admin
-
Content
-14 -
Joined
-
Last visited
-
Days Won
1 -
Feedback
0%
Everything posted by admin
-

-
-
-
-
-
-
-
-
-
-
-
-
-
-
-
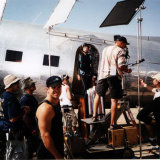
As reported earlier our former owners eliminated the parachute business from their holdings. The factory in Durban, South Africa, was sold to the Zodiac group together with the military product catalogue. Aerodyne is happy to announce that we have organized new owners for Aerodyne Research and the line of Aerodyne sports products. We are pleased to welcome Vidar Antonsen and Ole Petter Hjelle (Ole Petter is the team captain of the Norwegian national FS4 team Arcteryx) as members of the Aerodyne team. Both are from Norway and active skydivers themselves. Although, they will not be involved with the daily management, we view this as a positive development for the company to have their support and assist Aerodyne Research to become an even stronger player in the parachute industry. President Edward "Bushman" Anderson reports: "Right now we are setting up a new manufacturing facility in the Durban area, in South Africa. The facility will be located in a brand new air-conditioned building and we are installing state of the art machinery. We are also very fortunate to be able to retain many key staff members. Our current Technical Director Dominic Hayhurst will be the Managing Director of Aerodyne Research Manufacturing. At the same time we have teamed up with Aero Tech in Florida for the production of the Icon harness-container system. Aero Tech is a very professional operation headed by Terry Pike who has more than 30 years experience in the industry. Thiago Muradas, who is a co-designer of the Icon and has been involved with production and R&D; from the start, will supervise training and production." Aerodyne expects that the changes in production can be implemented smoothly and swiftly but has taken measures to ensure steady supply to its distribution partners. Arnold Collenteur, director of European sales, explains: ". In addition to main canopies and Smart reserves, we now stock Icon container systems. These Icons come with a harness finished to the custom measurements provided with the order. This way our distributors are able sell complete systems to our customers this summer, and deliver in a matter of weeks. Aerodyne is one of the few sport parachute manufacturers that can supply complete systems to our customer's specific needs."
-
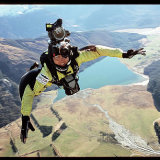
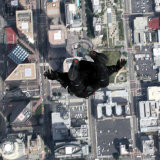
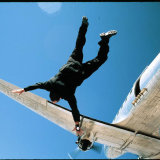
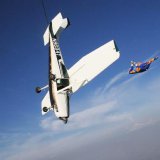
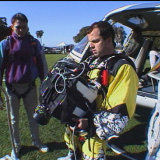
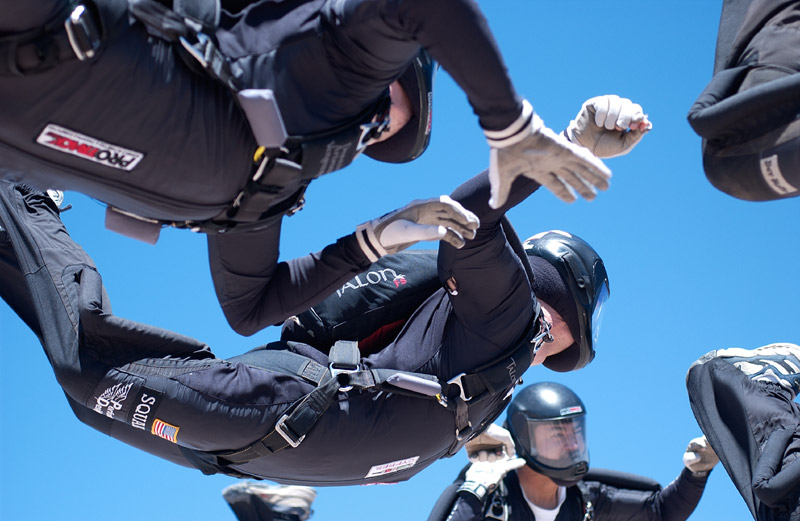
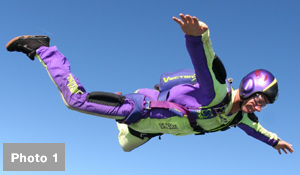 Many factors determine the way your canopy opens. The design of the canopy and the way it is packed are two important factors, but body position also plays a major role. We learn to deploy our canopies in a basic, stable position as students, and many of us don't give this skill much more thought after that. Unfortunately, we sometimes develop a few bad habits that have a negative effect on our openings. Even after making thousands of jumps, people have been surprised to find that a few small adjustments to their body position during deployment can significantly improve their openings. This article is about deploying a parachute, one of the most important things you do on every skydive. It might be a good idea to practice these techniques on the ground before trying them in the air. You might even want to make a solo jump and try some practice pulls using these techniques before it's actually time to deploy. If you are not a licensed skydiver yet, or have just recently earned your license, you should discuss this article with your instructor before trying anything you read here. He or she may want you to focus on more important skills, like altitude awareness and basic stability, rather than adding anything new to your pull sequence. No Need for SpeedThe speed at which you are falling when you deploy your canopy can have a large effect on the forces generated during the opening. As your airspeed increases, these forces also increase. Many of today's canopies are designed for relatively slow openings, and some will not be affected greatly by a little extra speed at deployment time. Some jumpers even find that their canopies open better when they are falling a bit faster. This is not something you should take for granted, though. Higher airspeeds might not cause a canopy to open hard as long as everything else is just right, but small variables tend to have greater effects at higher airspeeds. If you rush your pack job one time and let things get a little sloppy, or if your canopy is starting to go out of trim, extra airspeed could make the difference between an opening that is slightly abrupt and one that really hurts. Slowing down before you deploy can provide a greater "margin of error" and reduce the effects that other variables have on your openings. Slowing down can be especially helpful if your openings are frequently or even just occasionally faster than you like them to be. Vertical or "freefly" body positions like head-down or sit-flying allow you to reach much higher airspeeds than "flat" body positions. This extra speed makes flattening out and slowing down before you pull particularly important. Both beginners and experienced freeflyers should keep this in mind when planning their dives. Even if you don't freefly, simply tracking at the end of a belly-to-earth jump can significantly increase your airspeed, and you may still find it helpful to "flare out" of the track and slow down before you deploy. To flare out of a track, spread your arms and legs and de-arch slightly for a second as shown in. This will help bleed off any excess speed. Keep your arms and legs spread out and maintain a slight de-arch while you wave off, remembering to look around for other jumpers. As you finish your wave-off and start to pull, relax back into a normal arch. If done correctly this doesn't take a significant amount of time and becomes a natural part of your wave off. What Are You Looking At?Take a moment to notice where you are looking while you reach for your pilot chute. If you jump with a video camera, look at some of your openings on tape. What do you see in the video as you pull? Are you looking up at the horizon, or down at the ground below you? Do you look back toward your pilot chute handle as you reach for it? Do you look over your shoulder after you pull? Older skydiving rigs used spring-loaded main pilot chutes activated by a ripcord. Even in the late 1990's this type of system was still used on most student rigs. Those of us who were trained using this type of system were taught to look for the ripcord handle before grabbing it. We were also taught to look over one shoulder and "check" after pulling the ripcord. Looking over your shoulder changes the airflow over your back and helps clear pilot chute hesitations, which are common when using a spring-loaded main pilot chute. Most licensed jumpers use hand-deployed main pilot chutes, and these are becoming the standard for student training as well. Even if years have passed since they transitioned to a hand-deployed pilot chute, many experienced jumpers still have the habit of looking for their pilot chutes as they reach for them and checking over one shoulder after they throw them. Unfortunately, it's almost impossible to look over your shoulder and keep your shoulders level at the same time. Looking over your shoulder also tilts your container to one side. Although large, docile student canopies may not get offended if your shoulders and container are uneven, more responsive sport canopies will be much happier if you keep your shoulders level. Having your shoulders and container tilted as the canopy deploys can cause off-heading openings, line twists, and can even cause a hard opening. Most of us have our pilot chutes mounted on the bottom of the container, so trying to look for the handle is really useless. Even if you still use a legstrap-mounted pilot chute, you probably can't see the handle very easily in freefall. Since hand-deployed pilot chutes are thrown into the clean air next to your body, pilot chute hesitations rarely occur and checking over your shoulder every time isn't necessary. Some people have a habit of looking straight down as they deploy. This tends to put you in a slightly head-low attitude, which can increase your airspeed slightly. It can also amplify the opening force your body feels, since this force will mainly be transmitted to your shoulders when the canopy reaches the end of the lines. Also, your legs may swing through a wider arc as the canopy sits you up in the harness, making the opening feel more abrupt. Instead of looking for your handle or looking down at the ground, try lifting your head up and looking out at the horizon as you reach for your main deployment handle. This puts you in a more head-high attitude. The opening forces will be transmitted farther down through the harness instead of being concentrated at your shoulders.Looking at the horizon also helps keep your shoulders and container level as you pull. After throwing the pilot chute, bring your arms back into a neutral freefall position and think about keeping your shoulders level as the deployment bag lifts off of your back. You can also push your hips down slightly and bend your knees just a bit, as if you were in a very slow backslide. This keeps your head and upper body high. In the past, some jumpers have recommended "sitting up" during the deployment. This can actually work well as long as it is done correctly, but if you sit up too much or too soon there is a risk of increasing your airspeed or even becoming unstable. Simply lifting your chin, looking at the horizon, arching a bit more, and relaxing your legs slightly has a similar effect to consciously sitting up, and you're less likely to overdo it. Some people who jump with side-mounted cameras believe it's necessary to keep their heads down when they deploy, to prevent a riser from hitting the camera. This might be an issue if you have narrow shoulders or wear your chest strap very tight, leaving less room between your risers. It also might be a problem if your camera sticks out from the side of your helmet quite a bit. It's best to minimize this problem by keeping side-mounted cameras as small, streamlined, and snag-free as possible. If you're convinced it's necessary to keep your chin down, at least keep a good arch and relax your lower legs to keep your shoulders higher than your hips, and also focus on keeping your arms and shoulders level in the relative wind. Back in the Saddle As soon as the canopy sits you upright in the harness, try putting your feet and knees together for the rest of the opening . Putting your legs together helps keep your weight even in the harness and reduces the chances of an off-heading opening. This is especially effective if you are jumping an elliptical-type canopy. Just the weight of your legs swinging around or a small weight shift in the harness can cause some of these canopies to start turning. If you grab your risers as the canopy is opening it's best to hold the lower part of the risers, just above the 3-Ring system. If you grab the risers up near the toggles you might make the canopy turn by unintentionally pulling one riser or releasing one brake. If you hold on to the bottom of the risers, you can still slide your hands up quickly to steer with the risers or release the brakes if necessary. Some jumpers try to keep their openings on heading by actively steering with their rear risers while the slider is still up against the canopy. This works with some canopies, but other canopies don't like it at all. You may get better results if you just relax, sit still, focus on keeping your weight even, and wait until the slider starts to come down before making any corrections with the risers. Watch Where You're GoingIn a first jump course we are taught to check our canopies to make sure they open correctly. Although this is important, it can also create a very bad habit. Many jumpers look up at their canopies as soon as they start to open, and continue watching the canopy through the entire opening sequence. Some people continue looking up for several more seconds while they collapse their sliders and release their brakes. If another person opens close to you, you may only have a second or two to react in order to avoid a collision. Staring up at your canopy for five or ten seconds after you deploy is like driving down the highway while staring up at the roof of your car. Fortunately, a few techniques can help you avoid this problem. Many students are taught to count out loud while their canopy deploys, saying "arch, reach, pull, one thousand, two thousand, three thousand…" If you don't do this already it's a good habit to create, and can help you keep track of time during the deployment sequence. You will hear and feel different things during each stage of the deployment. A second or less after you throw your pilot chute, you should feel the snatch force pull you upright in the harness. This is the force of the canopy fabric hitting the relative wind as it comes out of the deployment bag. The canopy will then snivel. The snivel is the portion of the opening where the slider stays against the bottom of the canopy, reducing your airspeed before the canopy starts to inflate. There will still be a lot of wind noise during the snivel, and you will still have a sensation of falling. This may last for a second or two, or even for several seconds. The inflation occurs as the slider moves down the lines and the cells fill with air. Things become quieter once the canopy inflates. Even under a canopy that inflates very slowly and smoothly, you will still feel the transition from falling to gliding. You may also hear the slider flapping above your head once it comes down. Once you become more aware of these sensations you will find that your other senses can tell you as much about your opening, if not more, than your eyes do. Soon you will feel comfortable looking out in front of you during the entire opening, rather than watching the canopy itself. This allows you to watch for other jumpers, and many people find this reduces off-heading openings as well. "But," you may ask, "if I don't watch my canopy open, how will I know if I'm having a malfunction?" Take the advice of someone who has cut away a number of misbehaving canopies: you will probably know right away if you are having a malfunction. They tend to feel very different from a normal opening, and you will probably know something is wrong before you ever look up. If you start to count after throwing your pilot chute, and reach "two thousand" or "three thousand" without feeling the snatch force, there is obviously a problem. This would be an acceptable time to look back over your shoulder and check for a pilot chute hesitation or pilot chute in tow. Once you know how many seconds the snivel usually lasts on your canopy, you will also know if that part of the opening is taking longer than normal. You can usually feel line twists right away, and if you start spinning wildly you'll surely want to look up at your canopy and see what's bothering it. What if the opening feels perfectly normal? Unless you need to avoid another jumper right away, you should still look up and check your canopy right after it inflates. You might not notice a tear, broken line, or similar problem until you look up. Even in these situations, if the opening felt normal then the canopy is probably flying well enough to give you a low rate of descent. Assuming you deployed at a reasonable altitude, you should have enough time to do a control check and execute emergency procedures if necessary. If you've been watching your canopy open every time then you might not feel ready to stop doing this during your very next jump, but you should start developing better habits as soon as possible. Start counting when you throw your pilot chute, and notice how long each stage of the deployment sequence takes. Pay attention to what you are hearing and feeling during the opening. Soon you won't need to watch the whole deployment, and will be able to pay more attention to your body and your surroundings. Improving your body position and increasing your awareness when you deploy your canopy can produce great results. You might not remember everything in this article during your next jump, but at least think about trying these suggestions one at a time, at your own pace. You might be amazed by the difference a few small changes can make. About the author: Scott Miller runs the Freedom of Flight Canopy School at Skydive DeLand in Florida (www.freedomofflight.tv) and holds canopy skills camps at other DZ's throughout the year. He has worked at several drop zones as an AFF instructor, tandem instructor, and freefall photographer, and also worked as a test jumper for Performance Designs. This article first appeared in Skydiving Magazine, Volume 25, Number 7, Issue #295, February 2006. Printed here by permission of the author.
 -
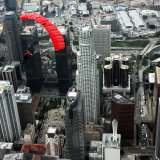
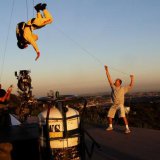
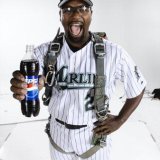
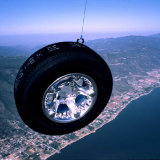
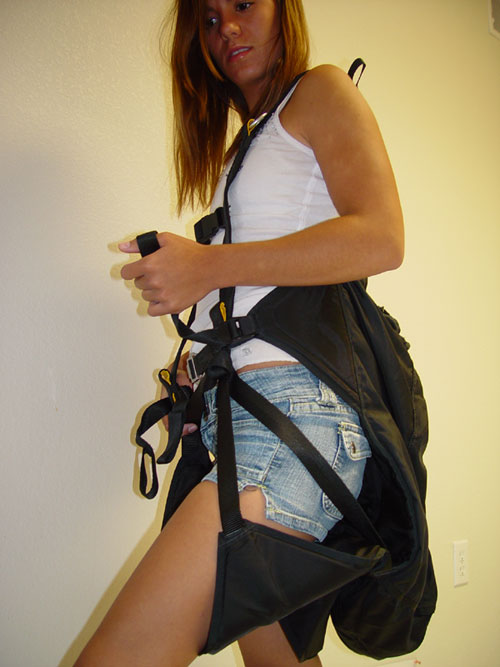 Ground Launching is the newest and fastest growing sport in the swooping community! Foot launching parachutes is relatively easy but having the proper equipment and training will save you alot of time. After years of research and development Jim Slaton started the Ground Launching Center (GLC) and teamed up with NZ Aerosports in New Zealand to develop parachutes specifically for ground launching called the Daedalus GLX and GLS. Now Jim has teamed up with Mirage Systems to develop the Mirage Ground Launch system. The Mirage GLX is the top of the line fully loaded ground launch harness that is lightweight and reversible. The GLX comes in blue & black mini diamond material, adjustable harness, risers, multiple riser attachment points, quick link hardware, backpack system, extra pockets on outside of harness, extra padding on shoulders and the harness inverts to become backpack. The harness forms a seat and the risers can be conneted to the GLX's lower or upper attachment points. This gives pilots the option between flying in the hanging position like a skydiving harness or the siting position like a paragliding harness. The Mirage ground launch harness comes in two styles for all your launching needs. These models are kept on the shelf and typically shipped the same day. The retail price of the new Mirage GLX is $695.00 and available in small, medium, large and extra large. For more information contact Jim Slaton at mirageGLX@canopypiloting.com or check out http://www.canopypiloting.com/mirageGLX.htm
 -
Pick up your Dropzone.com mail with your favorite mail reader! We think for skydivers a Dropzone.com email address is much cooler than Hotmail, MSN, Yahoo or any of the other free mail service providers. When you join Dropzone.com you automatically become the owner of the yourusername@dropzone.com email address. Standard users have access to their mail through our online mail interface (just like Hotmail and Yahoo). As a Premier Member you can now download your mail with your favorite mail reader! Whether you use Outlook, Outlook Express, Eudora, Pegasus Mail or any of the other mail clients out there, just set up your POP settings and start getting your Dropzone.com mail delivered straight to your desktop! Much more control... On Dropzone.com we scan all messages on our servers for viruses and you should never have to worry about possible infections. We also use SpamAssassin to minimize the amount of spam that comes to your Inbox. With all of this done, being able to download your mail to your desktop gives you even more control over your mail. You can run it though your own anti-spam and anti-virus software and archive it as you please. More space... Even if you choose not to download your mail via our POP server and just continue to use our online WebMail interface, we bump up your availible storage space from 3MB to a whopping 50MB! If you use our POP service then simply choose not to leave a copy of your mail on our server (it will be on your desktop anyway!) and with 50MB you should never run out of space! Back Continue your Tour
-
 In response to escalating costs in petroleum-based raw materials, as well as the impact of continual rising costs of other supplies and overhead expenses, Performance Designs, Inc. is implementing a price increase effective June 23, 2006. "We've experienced increases of more than 20% in some areas," said John LeBlanc, PD Vice President. "PD has absorbed these steadily rising costs for as long as possible, but it is time to make what has come to be an inevitable price increase on our products. Knowing that our dealers face many of the same cost pressures, we anticipate the same increases will be passed along to the skydivers." In a related move, PD is modifying its pricing policy to be wholesale-based rather than discount-based. "This means that while the suggested retail price will remain the same, wholesale prices will be increased on a canopy-by-canopy basis. We are pricing our canopies based on our costs - which our ERP software allows us to measure for each canopy - and using that to determine the wholesale price to our dealers," LeBlanc continued. "We expect PD dealers to begin quoting prices in fixed dollar amounts instead of a discount off of suggested retail, because that is how we are setting our prices to our dealers." Rob Wilson, PD Marketing Manager, added, "For a long time, skydivers have had to calculate the percentage discount, figure out what that means in terms of price, and then shop around for the 'best' price. We believe the market would benefit from a more straightforward approach to pricing - moving from bothersome calculations to simply: 'this is the price.'" "We understand the sensitivity to prices," he continued. "But there is another part of the purchase equation called value. We believe that skydivers know that canopies manufactured to international quality standards, that go through multiple levels of inspection throughout production, that are development-tested more than any other canopies in the world and that use the best materials money can buy results in a stronger, better performing and longer lasting canopy. "For skydivers seeking such quality, value far outweighs price considerations. That is what we will be focusing on in the coming months and years - quality has a price, and it is well worth it." "Part of our goal is to help the dealers take the focus off of price discounting and put it on helping the skydiver become a better skydiver. Making sure they are getting the right canopy for their skill level and their progression in the sport is a whole lot more important than shaving a few dollars off the price", said Wilson. "This simplified dollar-based approach to pricing is a step in the right direction." "The key thing is to call your PD dealer, use that conversation to make sure the canopy you want is right for you. And then get the purchase price", he said. Performance Designs, Inc. is the world's premier sport canopy manufacturer, setting the standard for innovative design, unmatched quality of materials and manufacturing excellence. PD's premise of "the dream of flight" is enjoyed by skydivers on 5 continents across all disciplines. PD products are preferred by skydiving professionals for their superior flight characteristics and performance capabilities. To learn more about PD products and services, or to find the PD dealer near you, visit PD's website at www.performancedesigns.com
 -
 You might as well be searching for The Holy Grail. How often have you heard of a team who's had a big argument and broken up before, during or immediately after Nationals, having already spent an exorbitant amount of money? Most of the time this could have been avoided by simple communication, honesty and a little bit of compromise from the outset. Instead, the 'volcano effect' takes hold, and petty grievances, built up over the course of the year, come to an ugly head, usually at an important and stressful event - like Nationals. Quite often the issue that causes the break-up seems pretty minor a couple of months down the line. But it's an all-too-common practice in skydiving, and one that detracts from teams and individuals being able to perform at their best. Most teams require two years minimum to even scratch the surface of their full potential. It takes time for teams to gel to the extent that they have true communication, anticipation and knowledge of working together. But this all-pervasive attitude, which makes it acceptable to break up a team over somewhat insignificant differences, prevents the sport and individual skydivers from growing and progressing. It's the syndrome of seeking the 'perfect' team, and it's become so commonplace in skydiving that we could almost be forgiven for thinking it's acceptable. What is 'the perfect team'Most competitive skydivers have an idea of what the 'perfect' team is. They look at teams like Airspeed, Deland fire and Sinapsi PD, see these teams communicating and performing well, and make the assumption that to some degree, team members are virtual clones of each other. They never see individuals disagreeing or arguing, and believe these must be 'perfect' teams comprised of 'perfect' skydiving individuals with 'perfect' personalities. They imagine how great it would be to be part of a team like this, and that their own problems stem from being unable to replicate this perceived 'perfection' in their own teams.Because of this unrealistic expectation, too many talented skydivers waste their time not training with a team at all. There's nothing worse than not training - in fact, some of my steepest learning curves have come from being part of what could be described as 'dysfunctional' teams. In a similar way, teams waste time by constantly replacing 'flawed' team members in search of the 'perfect' team dynamic; instead they should be working together, getting over personality differences to achieve a common goal, which is performing at the team best. It may come as a shock but - there is no perfect team! The truth is that on any team, individuals have their own ideas, flaws and times of stress - and often disagree with their teammates. Our unique qualities and imperfections make us part of this diverse human race, and differences are inevitable. I can't think of a more diverse group of people than Airspeed 8 - our disagreements ranged from how many jumps to do, to physical training and jumpsuit colours (you should see what we finally came up with in 1996)! Despite this, I often hear how up-and-coming jumpers idealise the top teams and think they always get along perfectly with each other. The result is that when a disagreement naturally occurs on their own team, they assume it's an inherent and insurmountable fault in the team - and subsequently break up or switch members. Differences like this are to be expected, and are part and parcel of team training, no matter what level you're at. A reply I often hear to this is, 'Yeah, but we're not Airspeed,' - implying it's easier to deal with team disagreements and personality conflicts when you're a professional team; if you have to put up with it for 'work', then somehow, you can. But when non-pro teams nowadays are spending between $5,000 and $25,000 per person per year on this sport - it seems like a few minor differences could be worth dealing with for longer than just one season! More to the point - there's really no alternative, if you want to perform, you have to deal! It's easy for teams to think their issues are unique, and that problems can't be resolved because of this; however, the case is most likely that the individuals are not willing to work out their 'unique' issues. Usually the problem is nothing more than the result of someone's need to express themselves, and this, in turn, being taken the wrong way. Problems like this could have been resolved months earlier with the input of a good coach, or by using truthful 'pass the rock' sessions where team members get the opportunity to vent and communicate openly. Teams need to realise that what they're going through is normal, and conflict is part of a natural evolution for every team. There is not a single team that does not go through conflicts. The difference between a successful team and a failing team is that the former works out their differences, whereas the failing team does not. It's not a matter of individuals being unable to resolve their conflicts - it's simply that they are unwilling to. Airspeed has gone through few big decisions without some pretty heated opinions being cast around the room. Because every team goes through the same cycles of development, it's worth outlining what those cycles are, so they know what to expect. One way of looking at how teams grow and mature is to use Bruce Tuckman's 'forming, storming, norming, performing' model. Forming - Stage 1 The 'honeymoon phase'When most teams join up, they all seem to get along - everyone is excited about the new team and keen to get started; this is also known as the 'honeymoon phase'. Most skydivers are jubilant that they actually have a team to skydive with, morale is high, and negative personality traits are kept in check. It's very important in the 'forming' stage to get an experienced coach for guidance and direction. Many teams also benefit from having a team leader, and this is the time to appoint them. You should also spend quite a bit of time discussing your goals and aspirations as honestly as possible, as this will avoid problems down the line. There could be nothing more frustrating than being in a team where people have completely different agendas - one wants to take the team to the World Meet and another just wants to get the swoop at the end of the dive! Levels of commitment in terms of number of jumps, tunnel, money and time should be discussed as a priority, and while not every member of the team will have exactly the same objectives here, as long as they are in the same ballpark the team can succeed. It's important to come to a workable compromise and move on - rejecting a team whose goals don't precisely match yours, and ending up not jumping, is much worse than doing only 200 team jumps that year instead of the 300 you wanted to do! Individual long-term goals can even be different - it's fine if one person eventually wants to become a World Champion, and another just wants to compete for a couple of years before moving on to other things - as long as the collective team goal is agreed upon and compatible for the duration of the agreed term of the team. I refer to this as 'buying into the contract'. The key agreements of this 'contract' are: Individuals agree to work together to achieve the common goal. Individuals agree to communicate honestly with each other, more commonly known as having regular 'pass the rocks'. Individuals value their differences, i.e. they recognise that every person has a different background and personality, and will therefore have different ways of relating and behaving. Individuals seek to gain insider learning about their impact on the team, i.e. thinking before speaking and recognising that what they say has the potential to impact the team in a negative (or positive) way. Individuals should be responsible and accountable for their actions and words. Storming - Stage 2 Guess what? The honeymoon is over!This is the frustrating stage of learning with the team; individual quirks start to come out and team members vie for position as they attempt to establish themselves. Cliques can also start to form within the team - questions and uncertainties come up and the 'contract' itself may be questioned. This is where most teams sow the seeds of inevitable self-destruction. Simply put, this is the stage where arguments might occur over block techniques, individual performance and styles of relating. Even table manners, personal hygiene and fashion sense can all come under attack! It's important to realise that this is natural human behaviour in a goal-orientated team environment. It's also important for individuals and the team to reiterate the goals they set and believe that the team outcome is more important than individual needs. At this stage, outside help in the form of a coach experienced in dealing with team dynamics is invaluable. I've heard more times than I'd like to recollect, 'I guess I'm just not a team-player'. I don't believe this to be true. That individual is just not willing to compromise, or never bought into the 'contract' in the first place. People who are described as 'team players' are just more willing than others to suppress their need to be heard all the time. I also believe there's no such thing as a natural team player. Anyone has the ability to become a team player as long as they are willing, at times, to put aside their own ego for the good of the team. Knowing that the 'storming' stage is normal and can be overcome by focusing and refocusing on the agreed team 'contract' is critical at this time. There's no knowing when the 'storming' will occur, or how long it will last. However the sooner a team recognises it and then accepts it as normal, the sooner the team will leave this phase behind. Norming - Stage 3Congratulations - you've got further than most teams and are on your way to performing your best! This is the phase where the team has recognised individuality as a strength, and has matured as a group. Commitment and unity is strong. It could feel similar to the 'honeymoon phase', but instead of being based on enthusiasm alone, it marks a time of personal growth and acceptance. Roles and responsibilities are clear and welcomed: the team's everyday interactions and dealings have become like clockwork, and the daily training routine, including team meetings and 'pass the rock' sessions, is more instinctive and needs no prompting. It's important to realise the individuals themselves have not fundamentally changed, and disagreements will still occur - however teammates have come to understand that having their personal needs met is secondary to team growth. The same disagreements teams had in the 'storming' stage suddenly seem less important and are dealt with more quickly and in a more mature manner. Performing - Stage 4 The fun part!In this stage the team has a high degree of autonomy and will be running like a well-oiled machine. The team is able to focus on performance; personal issues that would have held them back previously as a distraction have melted into the background and become irrelevant. This is also the phase where individual relationships and trust are consolidated within the group. On a personal level, team members trust that each one will always act for the good of the team - communication between piece-partners is open and honest. In the sky, teams feel that everything falls into an instinctual rhythm, more so than a forced or conscious act. Trust in individuals' ability runs high, allowing team members to be sure that others will also fly their slots with confidence. This in turn allows for faster keys, more confident moves, and ultimately, more points. Teams should expect that disagreements will still occur - even arguments - but now issues are resolved within the team positively. It's also important to recognise that just because a team has reached the 'performing' stage, they may not be the 'best of friends' - however teammates trust and respect each other, because of the understanding that they are all focused on the common goal, i.e. the 'contract'. This phase is more easily attainable than most people think, or believe. It's the most fun part of training, and the pay-offs are numerous. Individual growth, realisation of your potential, a load more points and the best skydiving you'll ever do are just some of them. And it's a choice that anyone can make. Gary Beyer was a member of multiple World and National Champion team, Arizona Airspeed, between 1995 and 2002. He has since retired from World level competition and dedicates his time to team and tunnel coaching. www.onthelineskydiving.com This article was first published in Skydive The Mag (UK) and is republished here on request and with permission from the author. Photos by Mike McGowan
 -
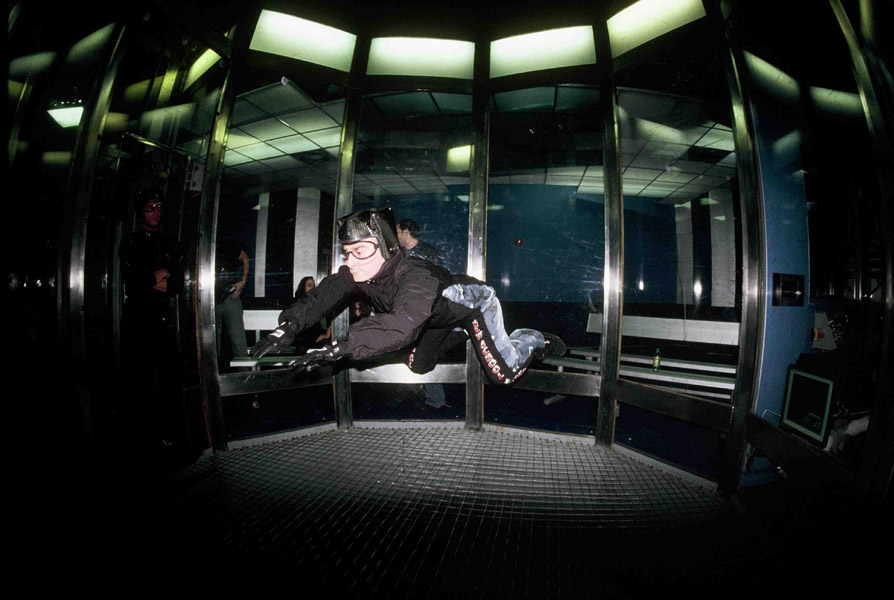 You just graduated AFF or you got your A license. You can execute all the skills required of you in the sky. Now it is time to take it to the next level. Tunnel flight can help you hone your skills that you have already, and most definitely help you learn some new skills. The wind tunnel can give you confidence, awareness and much needed experience at a time when it is hard to come by any of those things. The wind tunnel is perfect for anybody. Wind tunnel coaching through the whole AFF and A-license experience is standard issue for all Central Florida drop zones. Coordinating the circle of awareness, motion, fall rate, turns, docking and practice pulls are all possible in the wind tunnel. The first thing that you should learn is the relative work position. The position is the root for all movement. The reason is every time you want to move; you always start and stop in the learned belly position. Your chin should be up. Your eyes should be focused in front of you, not looking down. Your arms should be relaxed so they do not cup air or carry stiffness. You should have pressure on your shins so you do not back slide. You should be bent slightly at the knees so you do not constantly move forward. Your body should be symmetrical. Asymmetry causes turning. Your hip should be in its most arched position. Sometimes it takes a bit of moving down to actually get a good arch. After the neutral position is learned then the 6 points of motion are taught down, forward, backward, up, and sidle siding left and right. The first thing I teach after the standard position is to move down. The reason is the worst thing that can happen to a newbie in the wind tunnel is to catch air and ascend high up; so the instructor cannot reach you easily. Anything above 8ft high off the net makes it challenging for your instructor and dangerous for you at first. To move down, simply arch more. If that does not do the trick, take up less surface area by getting smaller. You should move right down to the net. Some times I keep first time students on the net for a rotation or two so they do not bounce around. In the lower wind speed it is easier to make mistakes and not fly up against the wall. Once general body awareness is attained, the controller can turn up the speed a little more. The first time student can fly off the net with a little more speed after they can go down. I also teach going down first, so if the student does get up a little higher than they like, they can easily come back down. The next thing to learn is motion forward and backward. Most people come into the wind tunnel with built in movement in their technique. In order to stay perfectly still you must learn to go forward and backward first. Forward motion is accomplished by putting both feet back at the same time and then relaxing back into the neutral position and coasting to a stop. Moving backwards is done by putting both arms forward in front of you while you relax your legs towards your butt and coast back in to a neutral position for a stop. I do not teach "braking" until the student can do the first 4 points of motion. The reason is for most students early on braking is too much to think about. Initiating subtle movements and coasting to a stop slowly is more effective in the beginning. Flying in the sky is like flying on a football field, plenty of room to roam. Flying in the wind tunnel is like flying in a bottle, close proximal flying. Small movements are a necessity. Deep diaphragmatic breathing will lessen the tension carried in the body and relax your mind. After a student can go down, forward and backward; I teach them how to go up. The two easiest ways to teach a student how to go up is by them taking up more surface area or de-arching with their hip. The easiest way to move up is to get longer with your arms and legs and flatten your torso. This cups air and pushes your body up like a board. The second way to move up is to de-arch at your hip. This will catch air in the pocket your hips and torso make and accelerate you upward. Each method for going up works in different scenarios. If a person you were jumping with slowed up very quickly de-arching at the hip would be a good way to slow down in the sky. Keep eye contact with the person! If that same jump partner ascended relative to you very slowly then getting longer and flatter would be optimal. Side sliding would be your next skill to learn. Side sliding is moving sideways while facing forward. It is very important to do this with a straight torso. Bending at the torso is inefficient and usually causes a turn. To keep your torso straight and move side ways, use your arm and leg at the same time to push you across the tunnel. The most popular rookie mistake is to push with just your hand. If you push with just your hand you will turn instead of side slide. You should push both your foot and your hand at the same time. Initiate the movement and then cost to a stop. This will create a seamless side slide. Make sure to arch when you side slide to keep on the same level or plane that you initiated the motion on. Once you can go back and forth seamlessly both ways with out changing levels at all; then learning more advance side slide techniques would be warranted. Turning is also a very important skill that can be learned in the wind tunnel. I start to teach turning usually right after the first 4 points of motion are learned. I progressively perfect my student's turn as side sliding is attained. The most important turning skill is to turn slowly in the wind tunnel. More often then not students like to "crank" turns out when they start. In the sky that might be all well and good, but most students are moving when they turn. If you turn with precision at first, then the progression will come easy. Keep your head up and maintain a huge arch when you turn. Most students look down and de-arch when they turn. The sheer act of spinning creates lift. Coupled with de-arching spinning can send you up to the huge fans that power the wind tunnel. It is important to arch even harder when you turn to maintain your levels throughout. Another popular mistake is to relax your legs on your butt when you turn. This makes for interesting times. Relaxing your legs will make you back slide while you are turning. Keep the shin pressure you have when you turn. Some students need to think of putting their feet out when they turn, just to keep the legs in the same place through out the completion of the turn. The Mantis position is popular in more advanced relative work. We will cover it in the scope of this article because the vast majority of new fliers want to learn it. My opinion is that it should be learned after 6 points of motion, 90 degree turns and 360 degree turns. Early on in the progression, I believe that most students are too stiff to learn the Mantis properly. Once a student can move their arms freely without causing instability or motion, then it is time to refine the basic relative work position into the Mantis. The student should try to bring their hands closer to their ears first to reduce drag on the arms. Remember the whole idea of the Mantis is to fly a more aero-dynamic position not to learn it because it looks cool. Most students press their elbows down at first. This usually causes tension. After a student can fly with hands closer to their ears instead of the basic relative work position, all the time, perfecting the Mantis position should be tackled. The hands should come closer together like you are hugging a small volley ball while laying your body on a flat surface. Dropping your elbows down into the standard Mantis position should be the last step to learning it. It is very important to fly in the wind tunnel. The wind tunnel is the most revolutionary tool to be introduced to the sport of skydiving since the three ring system and tandem jumping. Now that wind tunnels are popping up all over the world, they will subject more and more people to our sport. Our numbers will grow in a prolific fashion and we will finally get the market penetration that our sport has long yearned for. If you get frustrated in the tunnel keep trying. In all likelihood your frustration stems from only a few places. A bad instructor, people looking at you when you fly, the constant presence of glass or chicken wire and the inability to just go "buck wild" like you can in the air can lead to frustration. The wind tunnel is so much fun. With the right training regimen, repetition and a good instructor the sky is truly the limit to your skills. Steven Blincoe is the founder and head coach of the New School Flight University in Orlando, Florida. He has 4,000 skydives and 500 hours of wind tunnel time. He specializes in wind tunnel camps and will scower the globe in the next few years to spread the art of tunnel coaching. Please feel free to contact him at www.blincoe.org or 530-412-2078.
 -
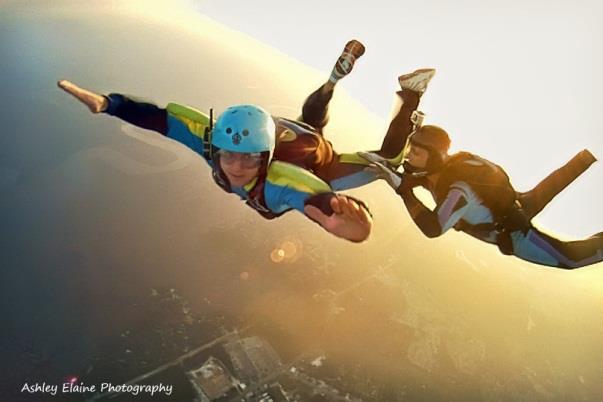 The Standard Suit is designed for relative work and made from your choice of the New Cotton-Poly or Supplex material this suit is made with the same construction techniques of the Tetris.
 -
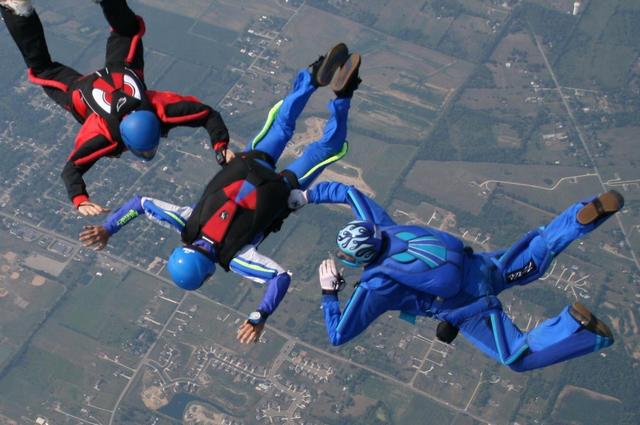 The Tetris is the next generation competition jumpsuit from Michigan Suits. The Tetris has been wind-tunnel tested for thousands of hours by the Golden Knights who put their suits through between 50 to 100 hours of wind tunnel time per training season. These are the kind of competitors that put their suit on in the morning and don't take it off 'til sunset. Making 10-15 jumps a day, 800-1000 jumps a season.
 -
 The Triax T-Stake is a revolutionary new packing multi-tool for both B.A.S.E. jumpers and skydivers. Designed by Triax Productions, the creators of the popular "Continuum" B.A.S.E. jumping DVD series, the Triax T-Stake is of use to anyone who packs their rig outdoors, and is trying to maximize the safety and heading performance of their canopy openings. A full explanation of the Triax T-Stake's features and a link to a short informational video clip can be found below in the article. The Triax T-Stake As the name implies, the "T-shaped" Triax T-Stake is a tool designed to make your B.A.S.E. and skydiving packing experience easier, faster, neater, and more organized by combining all of your tools into one. "We felt that this product could provide a 'missing link' in the jumping community," said Kenyon Salo, one of the B.A.S.E. jumpers that came up with the idea to design the tool earlier this year. "The Triax T-Stake was a lot of fun to design because we had full creative control from the bottom up, and being end users of the Triax T-Stake, we were able to base our design criteria on literally thousands of pack jobs worth of experience." Salo later added; "I really think that the world is a better place because of the Triax T-Stake. I know it's helped me become a better person!" Design Features: A specially designed "T-shaped" stake offering many different ways to secure your rig (or multiple rigs) while packing Light, durable and compact for easy use and mobility needs. Both 7mm (for most skydiving rigs) and 9mm (for most BASE jumping rigs) built-in wrench slots for your French (rapide) links for an easier time of changing slider configurations. A classic bottle opener for that cold beer (or soda?) after a long day of jumping. Bridge Day 2005 Triax Productions officially unveiled the Triax T-Stake in October at Bridge Day 2005 in Fayetteville, West Virginia, one of the few legal B.A.S.E. jumping events held in the United States each year. Overall, the Triax T-Stake was found to be a huge success at Bridge Day. Jumpers were seen using it all over the packing areas properly staking their leg straps, three rings or risers to securely anchor their rig for supreme line tension, at the same time providing adequate line separation while packing. During the event, the bottle opener function of the Triax T-Stake was put to the test with an estimated one thousand beers opened in a two-night period. Additionally, the crafty Bridge Day 2005 B.A.S.E. jumpers discovered yet another use for the Triax T-Stake-shot-gunning beers. Bridge Day Video FestThe pressure was on at this year's Bridge Day Video Fest for Triax Productions to defend their first place win in 2004. Although their entry did not win them a prize, as a way to introduce a little humor into a night of some serious B.A.S.E. movies, Triax Productions debuted their "T-Stake Infomercial," (directed and edited by Chris Pope). The entry went over as an audience favorite and has since become a cult hit. Popular demand has dictated that Triax Productions make their "T-Stake infomercial" available online, and it can now be viewed on the company's web page, http://www.triaxproductions.com/ [The infomercial is in Windows Media format and takes about a minute to download for an average broadband connection] Triax Productions would like to offer hearty congratulations for the winners at this year's Video Fest! The Triax T-Stake and Skydiving Although designed primarily for B.A.S.E., skydivers have also taken a liking to the Triax T-Stake. Not all skydivers have the luxury of being able to pack indoors all of the time, and for some, particularly on the boogie or swooping circuit, it's a rarity. The Triax T-Stake works equally well for skydiving rigs as it does for B.A.S.E. rigs, making the whole process of getting on with your pack job faster and cleaner, instead of scrounging around for a weight. Where to see the Triax T-Stake If you weren't lucky enough to be at Bridge Day this year, and want to get more information on purchasing a product, the Triax T-Stake, along with the company's DVD releases and apparel such as T-shirts, hoodies, and chick-tees have been made available for purchase at the Triax Productions web site. About Triax Productions Triax Productions was founded in 2002 and is made up of Colorado B.A.S.E. jumpers/skydivers Damian Doucette, Chris Pope, and Kenyon Salo. They offer stock footage and complete package action/adventure videography services on their website, counting aerial stunts and camera operation among their many talents. Triax Productions has also been producing some of the world's best B.A.S.E. jumping DVD/videos on the market, including their popular "Continuum" and "Continuum II: Tales From the Edge" DVDs, as well as the Bridge Day event videos for both 2004 and 2005. The Triax crew has just released the 2005 Bridge Day DVD and is currently in production of "Continuum III," tentatively slated for release in September/October of 2006. Plans for the Bridge Day 2006 event DVD are also in the works. FFI/contact: http://www.triaxproductions.com/