admin
-
Content
-14 -
Joined
-
Last visited
-
Days Won
1 -
Feedback
0%
Everything posted by admin
-
To activate your account we will send you a validation email to the email address you used to register. Click on the link in that email or copy and paste the entire URL to your browser and hit enter. This will activate your account. Why am I not receiving the validation e-mail?
-
The default anti-spam settings on some e-mail service providers sometimes catch the validation e-mail that we send you to activate your account. Hotmail for example is known to do this. Here are a few things you should do before you contact us: Check your "Junk" or "Spam" or "Bulk" folder to make sure our validation e-mail did not get routed to that. Add the dropzone.com domain your "white list", "friends" or whatever list your service-provider may be using or providing you with to manage incoming e-mail. This will ensure that all administrative e-mail from this site gets to you. Make sure you have access to the e-mail address you used to register your account.
-
When you loose or forget your password you can request that a temporary password be sent to you through the Password Retrieval process. Things to remember about a temporary password: It is valid for a SINGLE login only - so change your password immediately once you log in. Your temporary password "becomes" your original password once it has been issued. So, when you go to update your password as in 1) above, fill your temporary password in where it asks for your original password.
-
So you want to make a night jump and don't know what to expect? Here is an example of how many dropzones run their night jump procedures and what you need to know before you participate in night jumps.Before you even sign up for night jumps at a DZ you need to do a few jumps at the location during the day. Open somewhat high on at least one of the jumps looking and examining the potential hazards and outs if you end up in any direction from the DZ at night. Also before the end of the day arrives you need to have at least 1 glow stick and 1 strobe light that can be easily turned on under canopy. Typically most dropzones will hold a briefing before dark to go over the procedures for the specific location or situation. You will most likely then be asked to sit in a dark room with no lights for a period of time to allow your eyes to adjust to the darkness Typical things that are covered during night jump briefings include: Prep work In plane procedures Exiting Opening separation Under canopy behavior LandingBefore you can even prepare your eyes for the night skydives you need to prepare your equipment. First take the time to actually do a proper pack job on your main. Last thing you want to add to an already complex skydive is a reserve ride. You need to securely attach a glow stick to your altimeter or use a clearly lighted altimeter. If you are going to use a glow stick it is best to activate it before you start preparing your eyes then cover it with duct tape that is pulled off right before you jump. This insures that your glow stick is not a dud and it also keeps the light from shining on people's eyes. You also need to securely fasten your strobe light to you or to your rig. Attaching it to the rear of your leg, rear of your helmet or back is preferred since as the strobe fires your body will be blocking the light from getting in your eyes, but it is still very visible to everyone else. Some DZ's also require you to attach glow sticks to an arm so you need to listen during the briefing for individual DZ procedures. The most important thing in the preparation of the equipment is for the strobe and light sticks to be securely attached. One of the most important things you can do to maintain your night vision is to avoid looking at any lights during your climb to altitude. Make sure your jump plane does not have any interior lights on, that no one is using flashlights, or anything else to light up the plane. The only color light that should be used inside the plane is a red light since that does not affect night vision. If there are any other light sources or colors (from jump lights) cover as much of them as possible to maintain your vision and still maintain their functionality. According to the USPA SIM first time night jumpers are required to do a solo before they do any group night skydives. It is a really good idea to spend your first time in freefall at night looking around to make sure you find the landing area and pulling at your correct altitude. Typically groups are sorted by both group size and wing loading of the people in the skydive. Usually people with higher wing loadings are the first out on night jumps for reasons to be detailed shortly. After the groups and solos have been sorted most good night jump organizers will dictate exit order and pull altitudes. Usually with larger planes such as Caravans, Otters, Skyvans and Casa's two passes are made to allow for a greater horizontal separation then normally is allowed. Discuss with the pilot and S&TA; what the needed delay is for proper night jump separation. Exit on time, but as during the day do not rush the count. Just prior to exiting you need to activate the lights in the altimeter or uncover the glow sticks. DO NOT activate the strobes yet. In the last rewrite of FAR 105.19 the FAA changed the wording so the strobes no longer have to be active in freefall and since the lights of others in the group could affect your vision keep the strobes off. You do need a strobe that's visible under canopy still though. At most DZ's each night jump group is separated by a solo skydiver. The first group out the door is assigned the lowest pull altitude. 3000 feet is a standard first pull altitude for the first group to allow proper separation and more time to deal with the complexities of night canopy flight but this may change with the group experience and DZ procedures. Each solo or group exiting after the first group is assigned an altitude 500 feet higher then the previous group up to usually 4500 to 5000 feet. Pull at your correct altitude. Do not pull higher then your altitude since the combination of horizontal separation, vertical separation and wing loading separation make for the safest possible night jump environment for you. Once under a good canopy you need to do a few things differently than you normally would. The first is do not collapse your slider. The flapping noise that it makes can be heard by other canopies that might be getting close to you. You also need to turn on your strobe light. Do not do any spiraling or altitude loosing maneuvers since this will eliminate the vertical separation factor that the assigned pull altitudes established. Remember that. In a lot of cases of near misses on night jumps its usually discovered one jumper spiraled down to the other jumpers' level. Fly a very conservative pattern with no hook turns, S turns or other erratic flying. As you are flying constantly be scanning for the dropzone, outs, hazards and other canopies in the air. Hazards at night are different then hazards in the day since its easier to mistake a river for a road or not see power lines. If you are going to land off, try to avoid landing extremely close to roads since there are probably power lines above them you can not see. Always assume a PLF when landing off at night since you will not be able to clearly see the landing area. Typically most DZ's will light their landing areas by having the jumper's cars facing into the wind with the headlights on. Jumpers must plan and fly a flight pattern that has them passing over the cars high enough to miss them, but low enough that they do not out fly the lighted safe landing area. Overshooting the landing area is acceptable if the jumpers know the terrain and know of any potential obstacles they need to avoid. Notice the wind direction as you are boarding the plane, in some locations near large bodies of water the winds will change 180 degrees at night as the temperatures change. Take note of the lights and wind direction before you are set up to land. Also to safely land at night the jumpers are best advised to concentrate on the horizon more then looking down. Looking down will distort your vision and cause you to assume you are at the wrong height for flaring. If you learn nothing else about night jumping learn about the shadow effect. In a lot of situations where the moon is at your back as you are landing you will see a large black canopy rising up on a direct collision course with you. This is your shadow that you are flying into. Lots of jumpers have made avoidance turns only to pound themselves into the ground breaking bones or killing themselves only to find out it was their shadow they were avoiding. As soon as you land depending on the DZ procedures and where you landed, most DZ's either have you walk towards the cars or to the side of the lighted landing area. Others have you stay where you are until your entire pass has landed. Check in with either manifest or the organizer as soon as you land. Additional safety items to be taken into consideration are to carry a cell phone and the DZ phone number with you. Carry a DZ business card or pamphlet with you to make sure you have the correct local DZ phone number and not just a 1-800 number that redirects to them. This way if you land out you can call to let people know where you are or if you need help. Give your cell phone number out to manifest so that if you do not check in right away they can try to contact you. Leave the ringer set to high so if you are injured the rescue parties can locate you that way. Also a whistle around your neck can be used under canopy to scare away any canopy coming close to you or if you are coming close to them. The whistle is also a great way of assisting responders to find your location if you are hurt at night. As with all jump activity, the use of any alcohol or drugs is not only against the law, it is dangerous to others and STUPID. If you or others are unable to refrain from said activities do not get on an airplane to jump. Also some jumpers go the extra steps of attaching a glow stick to their main risers so in the case of a cutaway it is easier to track and then retrieve from the ground. Discuss the best method of doing this with your rigger or S&TA.; If a jumper lands off field do not rush into a truck to get them, slowly drive towards them with your head lights on high with someone walking in front of the truck to make sure you do not run over an injured jumper. This article was compiled by Eric Boerger D-26333 with assistance by Keith Laub, Michael Owens and Art Shaffer.
-
ISSUE DATE: 11 th MARCH 2005 STATUS: MANDATORY - To be actioned before next jump by a qualified Rigger. IDENTIFICATION: ALL ICON HARNESS / CONTAINERS PART NUMBERS: C125 BACKGROUND: Ground testing of a ICON Harness Container revealed a Hard Cutaway. The Hard Cutaway was attributed to Dirty Cutaway Housings and Dirty Cutaway Cables. The incident is localized to and individual Drop Zone. The individual Drop Zone is in an excessively sandy (fine beach sand) and windy environment. SERVICE BULLETIN: CLEANING THE CUTAWAY CABLE AND CUTAWAY CABLE HOUSING. Fit the Container as per normal and completely remove the Cutaway Cable checking for any abnormality. With the Cutaway Cable removed pass a thin line up thru each Cutaway Housing. Now once the piece of line has passed thru the Cutaway Housing attach a suitably size (± 1” x 7” / 25mm x 175mm), piece of clean cotton cloth soaked in paraffin to the end of the piece of string and pull thru the Cutaway Housing. Perform this to both the left and right hand side Cutaway Housings. Clean the Cutaway Cable (Yellow Cable) with Paraffin. Ensure that the Cutaway Cable is completely clean and all the dark marks on the Cutaway Cable are removed. Refit the cutaway cable. Fit the container as per normal and perform 3 Cutaways completely removing the Cutaway Cable each time. Clean the Cutaway Cable with Paraffin between each test. Ensure Cutaway Cable is routed and fitted correctly. If any queries or questions please contact manufacturer AUTHORITY: AERODYNE SYSTEMS AEROSPACE (Pty) Ltd 29 Duiker Road Canelands 4340 South Africa Tel +27 32 533 0333 Fax +27 32 533 0262 e-mail d.hayhurst@aerodyne-int.com web www.aerodyne-int.com Service Bulletin SB 110305 Download Service Bulletin SB 110305 (PDF)
-
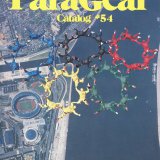
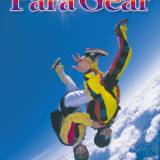
Para-Gear is interested in photographic submissions that you may have for the 2005 -2006 Para-Gear Catalog #70. We have taken the time to briefly describe the format and certain criteria that we look for, in order to help you to see if you have something worth submitting. We have included examples of previous catalog covers for your reference. Over the years Para-Gear has used photos from all of skydiving's disciplines. We do not have a preference as far as what type of skydiving photo it is, rather we look for something that either is eye-catching or pleasing to the eye. In light of the digital age, we are also able to use photos that in one way or another may be less than perfect and enhance them, removing blemishes, flipping images, altering colors, etc. The following are preferences. However what we prefer and what we get, or choose, are not always the same. If however we came down to a choice between two photos of equal quality, we would opt for the one that met more of our preferences. We typically prefer that the photo be brighter. In the past we have used sunset photos and even a night jump photo, although by and large most of the photos are daytime. We like the subject of the image to have contrast with the background. Subjects that are wearing brighter more colorful clothing usually stand out more. We prefer to have the people in the photo wearing equipment since that is what we sell. Headgear, goggles, jumpsuits, altimeters, audible altimeters, and gloves are all good. We also prefer to see skydivers wearing head and foot protection. We do not print any BASE jumping nor any Tandem photographs. No submissions of these will be accepted. Our basic criteria is as follows:Vertical Format. The front and back covers of the catalog are both in a vertical format. We can use a horizontal (landscape) shot, as opposed to a vertical (portrait), and then crop it as long as the image lies within a vertical cropping. Photo Quality. The front and back cover shots will be printed as 8 ½ x 11 in 300 dpi format. Any film that can hold its quality up to this size and print dpi is fine. Slide film is preferred. In the event of a final cover choice, we prefer to be sent the original slide for getting the best quality out of the image. Back Cover Photo. The back cover photo is no different from the front except in one respect. We need to have room on the left side of the image for the thumb index. In the past we have taken images and been able to horizontally flip them thereby creating this room. Originality. Anything that is original, eye-catching, or makes someone take more notice of the catalog covers is something we look for. It could be a photo from a unique camera position or angle, a scenic skydive, shots under canopy, landings, etc. We look for photos that have not been previously published and most likely would not accept them if they have, as we want a photo that no one else has seen yet. We also do not want any photos that are chosen as the front or back covers to be used for other non Para-Gear advertising for a period of one year. Para-Gear offers $250.00 each for both the front and back covers we choose. Our current deadline for catalog cover submissions is March 18th 2005 . Sending sample pictures by e-mail or mail are both fine. We will return any mailed in photos or slides after we are done with them. Please feel free to contact me directly with any questions. Para-Gear Equipment Co. Inc. 3839 West Oakton Street Skokie, Illinois 60076 USA Ph: 847-679-5905 Fax: 847-679-8644 E-mail: sales@para-gear.com Internet: http://www.para-gear.com When replying, please advise your full name, address, e-mail, phone/fax and copy our e-mail or refer to the subject so we can reply easily back to you. Thank you.
-

-
-
The next revolution in high performance technology: Z-Brace Performance Designs has been working on this concept for over two years and is proud to present the first Z-BRACE concept canopy. In 1990 Performance Designs launched Excalibur, the first cross-braced canopy. this technology was designed and patented by Performance Designs and is being used in canopies from around the world. The Velocity high performance wing from PD is the world's most winningest cross-braced canopy to date. Cross-braced technology:A cross-brace holds a non-load rib flat with a conventional rib, in effect creating three loaded cells between line groups. The Z-Brace concept:The Z-Brace goes a step beyond the cross-brace, by diagonally bracing two additional non-loded ribs, which results in five cells between line groups. The Z-Brace concept canopy displayed at PIA was a 35 cell canopy. The Z-Brace technology and canopy is not yet available on any released products. PIA Contest WinnerAt the recent PIA Symposium PD displayed the new Z-Brace concept canopy described above. At their booth they had a contest where jumpers completed a short survey and then were invited to guess how many parts make up the Z-Brace canopy. For coming up with the correct answer people could win a free PD canopy of their choice. One jumper came up with the correct answer – 400 parts ! “Chilly-Willy” Del Campo from Chile was the lucky winner – the only one guessing the exact number of parts. Enjoy the new canopy Willy!!
-
 We have been dreaming about this for a long time and now it is real. In air communication systems, allowing us to talk and communicate in freefall, in the wind tunnel and under canopy. An ideal tool for instruction, but not limited to only just that. Flight Club is now using the in air communication systems acquired from RareDynamic.com. The in flight systems arrived just in time, on the second to last day of a Freefly skills camp with the Golden Knights Tandem Team. The Golden Knights chose to receive coaching from Flight Club and improve their Freefly skills to become better all around skydivers. They were the perfect group to introduce this technology to. The results were incredible. Both Flight Club instructors and The Golden Knights witnessed and experienced a much faster learning curve. The Knights produced positive results including faster reaction time and better understanding of what the instructors wanted from them. Other students agreed with the Knights. Diane Oelschlager (1202 jumps) said: "Absolutely kick ass technology! Hearing your instructor's calm soothing voice, instantly relaxes you and lets perform at your best." Cheri Johnson (130 jumps) added: " Not only did I see my instructor but I actually got to hear him. Even on landing! When the winds seriously picked up to he point where my canopy was almost flying backwards, it was comforting to hear a voice confirming my actions and guiding me down safely." Instructors agreed that when the student hears the command, there is a faster reaction time compared to making the association and translation of hand signals. The instructor can also give more elaborate instructions. In comparison, hand signals, are somewhat limiting; one could command “legs out”, however, how do you give someone the sign for a more complex message? It is simple, now with the air-to-air communication system you can clearly communicate in detail.This helps to avoid miscommunication and decrease anxiety and apprehension with students by helping to manage arousal levels through for example breathing. Instructors can continue to use hand signals as a secondary form of communication. "This system is totally off the hook", says Benjamin Forde (520 jumps). "I could not believe how clear it was. Imagine having Omar chatting with you and pointing out the kinks, real time, crystal clear, no more guessing, no more trying to remember the 20 things that happened during the jump once on the ground. I get it! I will get the learning equivalent of 3-5 traditional coach jumps for every one I do with this system and these guys... and under canopy, its awesome, swoop training anyone? You are no longer alone—it's THE absolute revolution in coaching." Flight Club offers in flight communication to all students for all disciplines. Visit their web site for more information on their courses. Flight Club
 -
If you are sure that you have entered the correct username and password and for some reason is still denied access to some areas of Dropzone.com then here are some things you should try before you contact us. Please note: this does not apply if your login information is being denied of course! Sometimes, with firewalls and cookies and all the different browser and security settings possible it happens that the cookies that were set to track your login status on Dropzone.com gets corrupted. There's an easy way to clean this up and reset your cookies. This often resolves login problems. Follow these steps: Log out first - Go to your Account (link in the top right corner of every page) and if you are logged in, click on the Log Off Button Clear the cookies from your browser - do a quick Google search if you're not sure how to do this for your browser Close all browser windows Open up a new window Log in again - Do this either from the Home Page or go to your Account Check to see if your access to all areas have been restored. Remember, this only applies if you've logged in successfully but was denied access to parts of the site. If your Username and Password combination is declined then you may have forgotten your password. Click here to learn how to request a temporary password to log in and change your password.
-
If the location of your DZ wrong on a map then it is most likely because we don't have to correct location information or because the latitude and longitude data that we do have is not granular enough. We need at least the degrees, minutes and seconds for both the latitude and longitude to make the mapping reasonably accurate. Send any corrections to: support@dropzone.com
-
There are a few things that need to be aligned before your DZ will show up in the DZ Locator. They are: Your DZ needs to be in a country that is included Your DZ must be listed in the Dropzone Database We need to have good location information (latitude and longitude) for your DZAll three these requirements must be met before your DZ will show up on any of the searches. If your DZ is listed in the Dropzone Database and in a country we cover but does not have location information then please click here to learn how to modify your DZ info and add that information or send us an email at: support@dropzone.com If your DZ is in a country that we plan to add in the future, then the sooner you get your location information in the better. We will decide which countries to add next depending on the quality and amount of DZ locations we have.
-

Which countries are currently included in the locator search
admin posted an article in Dropzone Locator
The countries we can include is limited by the geocoding information that is available to use from our vendor. The following countries are included at this time: United Sates United Kingdom If your DZ is located in one of these countries but is not appearing on the locator search results, please read this FAQ. The following countries may be added in the future: Canada New Zealand Austria Belgium Denmark France Germany Italy Netherlands Norway Portugal Spain Sweden Switzerland We will continue to explore alternative and additional geomapping resources to add more countries. -
Why can't I access the Driving Directions to a Drop Zone
admin posted an article in Dropzone Locator
Dropzone.com Premier Members can get easy and quick driving directions from any address to location to any Drop Zone. To get access to this functionality, please upgrade to Premier Membership! Here's a full list of additional benefits. -
-
-
-
-
-
-
-
-
-