admin
-
Content
-14 -
Joined
-
Last visited
-
Days Won
1 -
Feedback
0%
Everything posted by admin
-
The Slimmer Freefly suit was created for a form fitting but comfortable fit in all the right places. The torso of the suit has spandex panels in the back and sides to give a body hugging fit but still allow for ease of movement (or allow you to breathe after you gain a few pounds). Then the lower legs and arms are double layered and have a straight cut to give a little extra fabric where you want it. The suit is mesh lined throughout and has available options such as magnetic neck closure and straight leg stirrup sport cuffs.
-
Do you fall fast? Tired of only being base on hybrid dives? Hugging the beach ball? A unique combination of features allows you to slow down and still realize the performance benefits of the “Loaded” RW suit. I think a big baggy suit sacrifices flyability. I designed a comfortable (not super loose) fit in the torso with no Spandex to avoid ‘flapping’ material yet still add drag. Double fabric sleeves, full size gripper set and full size booties add even more drag without sacrificing performance. It’s the best of both worlds.
-
This suit is for the skydiver who doesn’t want to deal with those pesky booties. This suit is built the same as the RW Suit without inside leg grippers (and who likes that swish-swish sound while walking). And did I mention no booties?
-
This suit was designed for performance, for any skydiver who wants the tools needed to skydive well including the serious competitor. The suit comes standard - loaded with full size booties, 2” diameter grippers, a full gripper set and cordura everywhere it’s needed for durability. It's perfect for the skydiver that lives in their suit all day at the tunnel and DZ. Just graduate from student status? Don’t be scared, this suit is perfect for you, too.
-
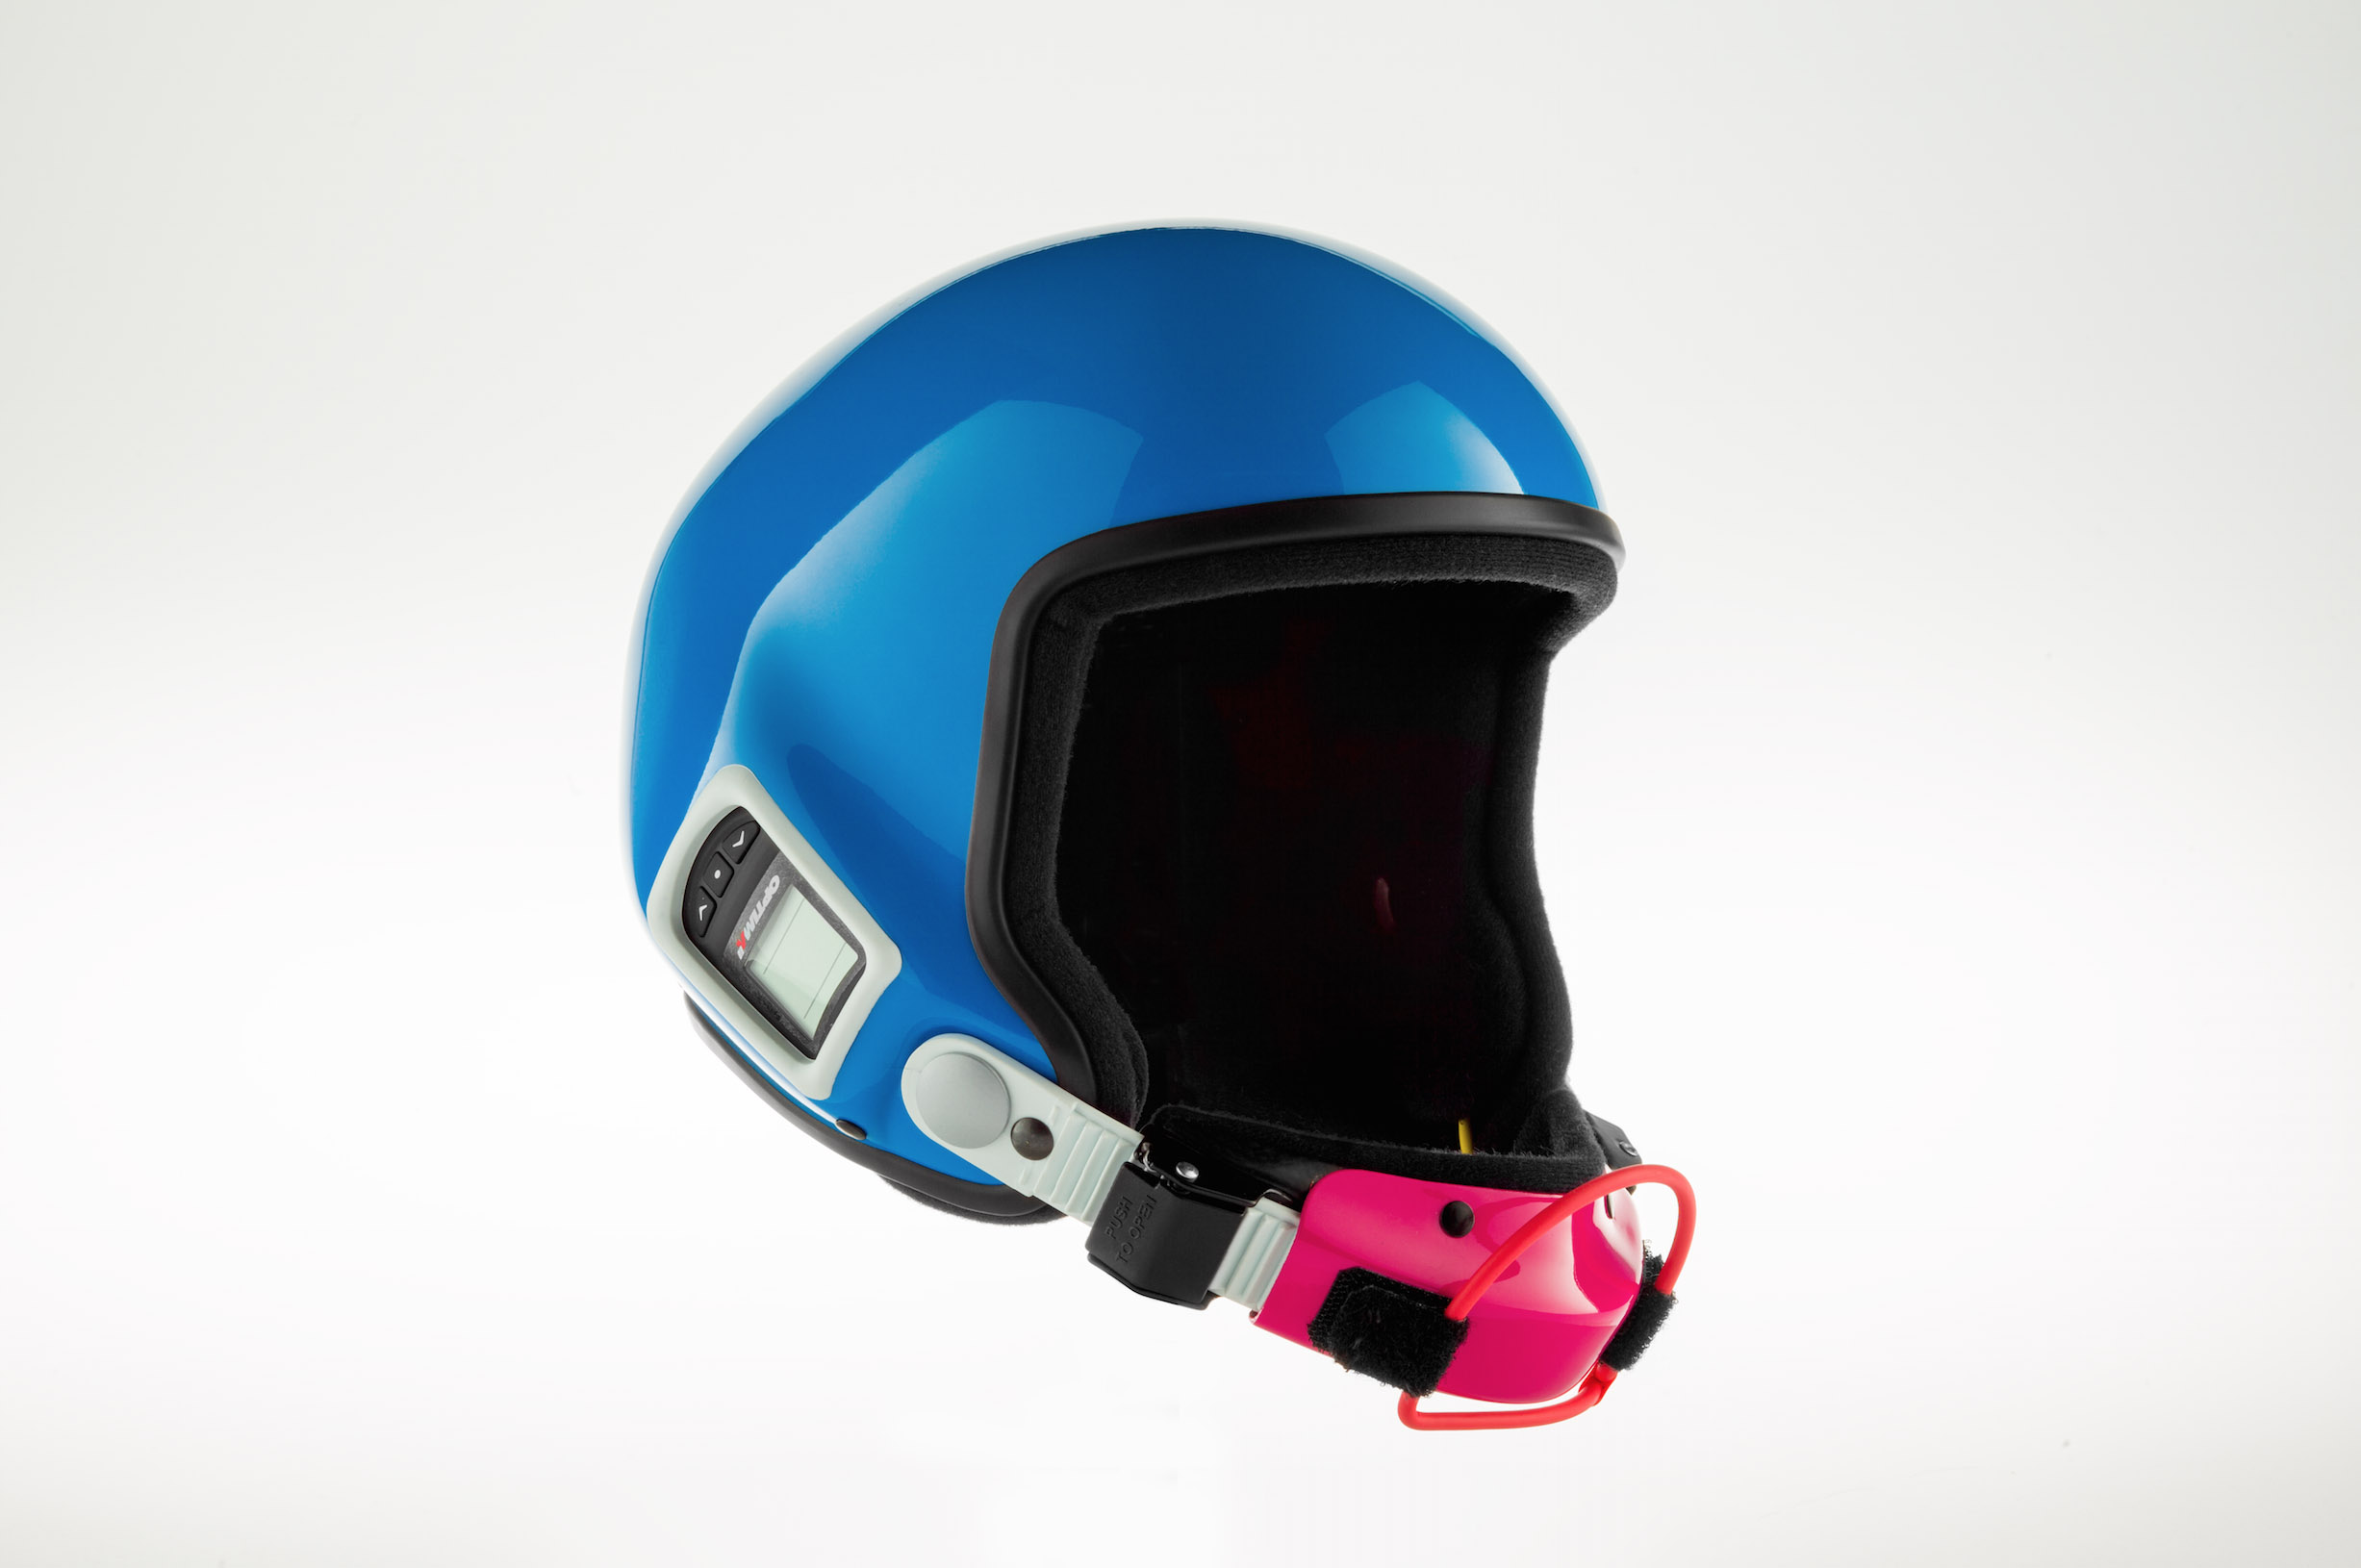
 The Phantom X full face helmet is the next generation skydiving helmet developed with the primary purpose of solving all of the problems inherent in the most popular full-face helmets currently on the market. A state-of-the-art design has resulted in a safer, more functional and more user-friendly skydiving helmet already favored by professional and recreational skydivers alike. The Phantom X features: 2MM Thick Polycarbonate Lens: Offers superior protection Opens and closes with ease Anti-fog coated Anti-scratch coated Easy to clean Easy Change Lens System: Change your lens in 30 seconds! No tools required No loose parts No need for super-human strength Intelligent Engineering: Widest field of vision Dual lens locks (1 on each side) Secure audible altimeter pocket Proven tightening system with adjustable snap
 -
According to Karel Goorts, Managing Director for Aviacom SA, production of the Argus automatic activation device (AAD) for the sport parachuting market has been discontinued. The current group of service centers will continue to provide service for units currently in use. A limited number of cutters and spare parts will be available. Many container manufacturers rescinded the approval of the Argus to be installed in their containers earlier this year, following questions about the effectiveness of the cutter. Argus owners should check with their container manufacturer to determine whether the Argus may be installed. Source: USPA Aviacom released the following press release on the situation: Dear Argus Customer, We thank you for the support and the confidence that you granted us over the years. The Argus has saved no less than 31 lives since 2006. The recent bans from major manufacturers forced us to discontinue further production for the sport market, due to the impossibility to use our AAD in most rigs. We have been lobbying in St.-Louis at the PIA meeting with all involved parties to get the Argus back in the air – to no avail. The manufacturers demand a brand new cutter design. This will take between 18-24 months and cost over 100,000.00 USD. We don’t get any guarantee that this solution will be accepted by those who issued the ban, so it is not a viable option. Our Service centers will be able to continue the 4 year check-ups and the remaining ‘old’ cutters still will be exchanged for free. A limited stock of spare parts will be available. The remaining stock of Argus SIS will be sold through our dealer network. We are sincerely sorry for this unfortunate situation. Kind regards, Karel Goorts Managing Director Aviacom SA P.S.: The Argus is allowed for use in the following rigs: Mirage, Wings, Dolphin, Racer, Infinity, Next and Basik. Source: Aviacom
-
 Imagine holding your arm out of a car window as you drive down the highway. The wind you feel is caused by your speed through the air rather than by weather. Skydivers call this apparent wind the relative wind, and it is the single most important element of the freefall environment. In fact, it is the only thing you have to work with in freefall, and from the moment of exit until your parachute opens you must think of yourself as a body pilot instead of a regular person, just as when you go swimming you have to leave your land habits behind. Your adventure in the relative wind begins at the moment of exit. There is nothing particularly complicated about exits and the techniques you use on your first freefall will be the same as those used by skydivers with thousands of jumps. Your exit makes or breaks the skydive, so we spend a lot of time practicing this part of the jump. A weak exit consumes valuable freefall time and puts you in a mental position of having to catch up, adding unwanted stress to your skydive. With a good exit you can get on with your learning and enjoyment at once, finishing the freefall tasks with plenty of time to spare. The two essentials of an exit are presentation and timing. Presentation refers to how you relate to the relative wind. Timing refers to your relationship with the other skydivers. Let's take a detailed look at these aspects of the exit. The body position we use to maintain a comfortable, neutral position on the wind (the equivalent of floating on water) is an arch. We'll learn more about body position soon, but for now you need to think simply about arching into the relative wind. This means that your hips are pushed forward into the wind, your arms and legs are spread out evenly and pulled back, and your chin is up, creating a smooth curve from head to toe. If you imagine lying face down in a shallow bowl with your arms and legs spread out evenly, you are thinking of an arch. In this position you will naturally face into the wind. To achieve a good exit, all you have to do is present your arch to the relative wind. Remember, we're on an airplane flying nearly one hundred miles per hour, so the relative wind is from the direction of flight. (When you see photos of skydivers they are usually presenting their arch towards the ground, but that's because they have fallen long enough to be going straight down so the relative wind comes straight up from the ground.) Once you are poised outside of the airplane, start your arch before you let go. Then it is a simple matter to open your hands, pivot into the wind, and you're flying! As you will soon learn, a relaxed arch is much more smooth, stable, and comfortable than a tense one so try not to think of yourself as falling off of an airplane. You're not; you're flying free. A mental image that might help would be learning to swim. You would be more relaxed and alert if you lowered yourself slowly down a ladder into warm water and let yourself float comfortably before letting go than if you jumped off a cliff into cold, dark surf. Think of the air as a friendly environment, slip into it smoothly as you climb out of the airplane, arch, take a deep breath, open your hands, and float off on the wind! You will note that I didn't say "push off." Until your parachute opens, your last contact with the world of solid objects is the airplane. If you push off, you will have some momentum that will tend to make you go over on your back, just as if you stood with your back to a pool and pushed off of something solid. Just arch and face the wind. As you leave the aircraft, the relative wind (arrow) is parallel to the ground. In a good arch with your head up, you should see only the airplane and sky rather than the ground during the first second or two of freefall. Losing forward speed and accelerating downward, the relative wind gradually shifts from parallel to the ground to perpendicular. This transition takes several seconds. You will not be facing the ground until about eight seconds after the exit. At no time do you look directly down at the ground. Even after the transition is over and you are falling straight down, in a good arch your head is up and your eyes are on the horizon. The aircraft's speed is about 100 miles an hour. When you leave, you lose some of that horizontal speed and actually slow down for the first few seconds. Then gravity takes over and you gradually accelerate to 110 miles per hour. That's why there is no sensation of sudden acceleration - you only gain ten miles per hour in ten seconds! Relax, arch, and face the wind is all you really need to do to achieve a stable exit. But remember that you are jumping with other people. For everyone to have a good exit, you also need group timing. Just as a band starts playing to a count, we'll start skydiving to a count. That count, used all over the country, is "ready, set, go!" It should be done with a smooth, even cadence. Because it's noisy outside an airplane, the count should be loud. Finally (think of a conductor with his baton giving a visual count to the orchestra) you, the conductor, need to give the other jumpers a visible count. We have you bring up your left knee on "set" and turn into the wind on go. Combining these two elements of presentation and timing will almost always result in a smooth exit. Leave out either one, and the exit may funnel, the term skydivers use to describe an unstable formation. Leave both out and a funnel is almost a certainty. But if that happens, don't panic. An arch will fix the problem. Incidentally, it doesn't affect your stability to dive out of the airplane. As long as you are presenting an arch to the relative wind, you will be stable. Unfortunately it takes most people a while to get used to the idea that the relative wind starts right outside the door. If you walk through an airplane door like you would a house door, you'll present your side or back to the wind and lose stability. In the water, walking doesn't work; you have to swim. Air is the same way - you have to fly through the door, not walk through. Test Yourself1. Skydivers on the outside of an aircraft as they prepare to exit are called floaters. The ones inside the airplane who will dive through the door are called divers. Floaters are further divided into front, rear, and center, depending on their position in the door. On an ASP level one jump, the student is the center floater, the reserve side JM is front floater, and the main side JM is rear. Why is the front floater more likely to have a problem than the rear floater if he cannot hear or see the exit count given by the center floater? 2. Novices diving out of an airplane frequently do a half roll and then recover stability facing the aircraft. What could cause this common problem? Proceed to Chapter 3 (Flying Your Body)
 -
 Every skydive starts before you board the airplane. Before you get on the airplane, you should be totally prepared for the jump ahead. This means that you know exactly what you are going to do on the jump and have had your equipment inspected. Make sure you have your helmet and goggles, remove jewelry and take sharp objects out of your pockets, tie your shoes tightly, and so on. Each jumper is responsible for their gear, and you should always check to be sure you have everything necessary for the skydive. Another part of the ground preparation is being ready to board the aircraft on time. Jump planes are just like airliners: they can't hold up twenty people because one wasn't ready. At the start of your skydiving progression, your jumpmaster will usually take care of reserving your slot on an airplane after you are completely trained and outfitted with the necessary equipment. It is then your responsibility to stay in the area and gear up at the appropriate time with your jumpmasters. Before you Board:1) It's too late to ask questions once you are in the airplane, so before you board know exactly what you will do on the skydive and review your emergency procedures. On the ride to altitude you should review the dive mentally, imagining a perfect performance. Keep in mind, however, that you are not compelled to jump from the airplane just because you happen to be on it! If you realize on the aircraft that you are not ready to jump, you may ride down with the airplane. 2) Check your gear. Your jumpmasters will help you to be sure everything is correctly routed. Be sure your altimeter is set to zero, your goggles are clean, etc. If you will be boarding an airplane when its engines are running, keep a good grip on your goggles and gloves! 3) Stay close to your jumpmaster and away from the propellers, other aircraft, and any other hazardous objects. Remember that the pilot may not be able to see you when he is taxiing the airplane; he always has the right of way. Once you are in the airplane, sit where instructed. Be sure to wear your seat belt until you are high enough for an emergency exit. It is also a good idea to put your helmet on for the take off. Your two responsibilities in the airplane are to minimize movement and to protect your deployment handles. Avoid snagging not only your equipment but that of other jumpers. Until we are on jump run you should stay seated. Then, at the jumpmaster's command you can get to your feet and move carefully to the door. As you move about in the airplane, watch out for door handles, emergency exit releases, seat belt buckles, etc. While inside the airplane your job is to protect your parachute! Most of your jumps will be done from our larger, twin engine airplanes. Exactly which airplane depends on how many people are jumping and the aircraft maintenance schedule. You should have familiarized yourself with the aircraft door, handles, and steps before boarding. Most of the time the more experienced jumpers will exit first for a simple reason: students open their parachutes higher than experienced jumpers. To preclude the possibility of jumpers from different groups colliding, exits are staged several seconds apart and planned with the opening altitudes in mind. That way we get both horizontal and vertical separation between groups. If you are leaving first because of unusual circumstances, have your jumpmaster fill you in on what to expect. The jump run itself is flown into the direction of the wind. This gives the airplane the slowest possible ground speed . In other words, it is over the drop zone (DZ) longer than it would be if it was running down wind. The pilot uses GPS (Global Positioning System satellites) to tell him exactly where he is, and when he is over the spot , or correct exit point, he turns on a green light back by the door, telling the skydivers to exit. Should the exit sequence take so long that the last to leave might not make it back to the airport, the light will go off, indicating that the remaining jumpers should stay in the airplane for a second pass over the drop zone. Incidentally, since you will usually be getting out late in the line up, and since the jump run is into the wind, you have a way of knowing which way the wind is blowing as soon as your parachute opens. Imagine a line from the landing area to a point directly below you. That is the wind line - if the pilot was right about the spot. Test Yourself:1.Why do we take our seatbelts off once we are above 2,000 feet instead of wearing them all the way to altitude? Continue to Chapter 2 (Exits)
 -
 The principles of freefall flight are quite simple; after all, you are dealing with just two things: your airfoil (body) and the wind. In a perfect, relaxed arch, or box man, you will fall straight down at a constant rate. To an observer falling along side, you appear stationary. You only seem to be falling relative to someone not in freefall, such as an observer in the airplane or on the ground. The box man is the neutral freefall position from which all maneuvers are carried out. Relative to a stationary observer, by altering your body position you can turn in place, move up and down, backwards and forwards, or sideways. You can even turn upside down or fly standing up. In fact, no one really knows the limits of body flying yet! From the box position you can easily initiate turns, forward, backward, and sideways movement, and changes in fall rate. From the side, the body presents a continuous smooth curve to the wind. The head is up, the arms higher thanthe body, and the legs are bent at a 45-degree angle, leaving the lower leg slightly extended into the wind. From above, the elbows are straight out from the shoulders and the hands are at least as far out as the elbows. The knees are slightly spead so that the feet are as wide apart as the elbows. Seen from the front, there is a smooth curve from side to side with the hips at the lowest point. Note that head, shoulders, and knees are all held high relative to the hips and chest. The basic moves are well understood. The most commonly used maneuvers are turns, forward and backward movement, and faster or slower falling. All are accomplished by changing the flow of air around your body. If you think of your box man as being balanced on his center in a neutral position, all he has to do to turn left is deflect more air off his right arm than his left. This is done by simply banking like an airplane - left arm down slightly, right arm up in proportion. The turn will continue until he resumes the neutral position. Lowering one knee relative to the other accomplishes the same thing. That's why an unintentional turn can often be stopped by assuming a neutral position and then giving a little "legs out" to increase awareness and balance the legs. Turns are also based on deflection of air. In the neutral position, equal amounts of air spill off both sides of the body. To turn right, our box man banks his arms, just as an airplane does in a turn. More air flows off the left side, creating a right turn. Note that the position of the arms relative to each other does not change; both arms tilt as a unit. The rest of the body remains neutral. To stop the turn, simply return to neutral. Forward motion works on the same principle of deflection. To deflect more air to the rear, resulting in forward motion, bring your arms back a few inches and extend your legs. This tips your body slightly head down, air rushes back off your torso and legs, and you slide forward. The two elements combine to create forward movement. Naturally the opposite motion - arms out and legs in - will make you backslide. Now think about how to go up and down. Everyone knows that given the same power, a streamlined vehicle can go faster than one that isn't. It slips through the air easier, just as a canoe knifes through the water more easily than a barge. So to speed up, you simply arch more, letting air slip off easily. Flatten out, or lower your knees and elbows, and you will fall slower. Incidentally, the faster you fall the more stable you are because your center of gravity is further below your control surfaces (arms and legs.) Test yourself: 1. If you reverse your arch, what will happen? Is this position stable? 2. Think about forward and backward motion. What would you do to fly sideways? Proceed to Chapter 4 (The Skydiving Universe)
 -
 Welcome to skydiving, perhaps the most exciting and unusual sport in the world! You are at the beginning of a path thousands of people have safely followed for over thirty years. In that time, experience has shown that some approaches to skydiving work better than others. This handbook is designed to supplement the practical instruction you will be receiving from our instructors, all of whom are certified by the United States Parachute Association. During the course of your training we will cover the basic principles around which skydiving is built. While actual dive sequences and hands-on training will be given to you by our instructors, this handbook will explain the concepts behind the activities and allow you to study important principles at home. Skydiving terms are clickable the first time they appear, which takes you to the glossary. Be sure to have your jumpmasters explain any concepts that remain unclear. Although underlying principles will not change, they may be easier to understand through a different explanation, drawing, or analogy than the ones offered here. I encourage your questions; some of the principles covered are not immediately obvious. As the author, I also invite your comments and criticism - this first edition is sure to have many oversights and flaws. In the Aircraft Exits Flying Your Body The Skydiving Universe After the Freefall Canopy Performance Landings After the Landing Blue skies and safe skydiving; Bryan Burke
 -
 We've already discussed your body's relation to the relative wind. Now let's look at your relationship to space and time. When you leave an airplane at our customary exit altitude of 12,500 feet above the ground, your accelerate from zero miles per hour vertical speed to approximately one hundred and ten miles an hour in about ten seconds. It doesn't seem too dramatic because the aircraft speed was already about 100 miles an hour, so you reall only gain ten miles per hour. At that point you reach terminal velocity, the speed at which the air pressure against your body balances the pull of gravity. Ignoring minor changes in body position, you will stay at that speed until something stops you - hopefully the deployment of your parachute! At terminal velocity you pass through one thousand feet every six seconds. If your parachute opens at 4,500 feet, that gives you about 52 seconds of freefall. (Ten seconds for the first thousand, six for each of the next thousand.) If your parachute did not open, you would now have a life expectancy of 27 seconds. Opening altitudes are based on allowing skydivers time to be sure that they do land under an open parachute. More experienced jumpers commonly open at about 2,500 feet because of their greater familiarity with equipment and emergency procedures. This gives them about 65 seconds of freefall from a 12,500-foot exit. The main thing about altitude is that if you run out of it while in freefall, you die. However, since your fall rate is constant, your consumption of altitude is constant. This means that if you have plenty of altitude, relax, because only time can take it away from you. Time and altitude are directly related. Loss of altitude awareness is a major contributor to skydiving fatalities. Always bear in mind that no distraction is worth dying for. Until your body's freefall clock has been programmed so that you know how long you've been in freefall, your only reference is your altimeter. Every time you do anything - intentionally or not - check your altitude. That way, you won't lose altitude awareness if a distraction such as a difficult maneuver or loose goggles comes along. Keep in mind that since you are consuming altitude (time) at a constant rate, you can't stop what you are doing, think it over, go back, and try again. In freefall, there are no time outs! That's why we try to do all of our freefall tasks carefully and deliberately, getting them right the first time. If you rush, you will actually lose time because the extra mistakes that result will slow you down. And when you consider the cost of freefall time, you'll appreciate the value of thorough ground preparation! Besides our time reference (altitude), we also make use of space references. There are two types of space references, orientation to the ground and orientation to other skydivers. We'll call the ground reference heading. Heading is an imaginary line drawn from a point on the horizon directly in front of you through your center. You use this reference for tasks such as turns, backloops, or simply hovering in place. Eventually you will substitute the line of flight for a personal heading. The line of flight is the heading the aircraft was on when you left it. The advantage of using line of flight is that now all the skydivers on the airplane have the same heading reference, instead of each picking their own. This makes it much easier to coordinate group activities. Your reference to the other skydivers is called the center point. The center point is that spot closest to all of the skydivers. When you are alone, it is in the middle of your body. With others, imagine a ball falling straight down around which everyone flies. In other words, four skydivers holding hands in a circle would have the center point in the middle of the ring. If they all backed up ten feet, it would still be in the same place because thjey are all still equally close to that point. In many ways, the center point of a formation is like the center of your box man discussed in the previous section. If one corner of a formation is low relative to the center point, the formation will turn in that direction. If two corners are low, it will slide in the direction of the low side. By now you can see that while skydiving, you have to be aware of several different things: altitude, your own body position, your position relative to the ground, and your position relative to others. Initially this will seem like a lot to be aware of, so on your first few jumps you will concentrate almost entirely on altitude and your body position while your jumpmasters take care of the rest. When you are release to fly free, you will add your own heading, and eventually you will be able to monitor these, the formation center point, and the line of flight as easily as you monitor your speed, direction, location, and other traffic as you drive to the drop zone! Test yourself:1. "Temporal distortion" refers to the fact that in an emergency situation (losing control of your car, for example), the rush of chemicals to your brain can cause events to seemingly go into slow motion. Why would temporal distortion be extremely dangerous to a skydiver? 2. Why is ability to hold a heading considered essential to flying with other skydivers? Proceed to Chapter 5 (After the Freefall)
 -
 No matter how many skydives you make, you'll always feel a moment of great satisfaction as your parachute settles to the ground. But the skydive isn't over yet! You need to carefully gather up your gear and bring it safely back to the hangar. You should daisy chain the lines (ask!) and be sure not to snag anything. One easy way to keep track of your stuff is to put things like your goggles, gloves, and ripcord in your helmet and fasten that to your chest strap. Back in the packing area, set the rig down carefully and be sure not to drop or lose any of the paraphernalia such as the altimeter, radios, goggles, and ripcord. Keep in mind that all the equipment is very expensive and you are responsible for keeping it safe; a moment's carelessness with an altimeter, for example, could cost $150. Once all of your gear is safely off, there is one last thing to do. Review your dive thoroughly, noting areas where you would like to get suggestions and advice and thinking about which techniques worked well, and why. Freefall only lasts a minute, the canopy ride about three. That isn't a lot of time to learn, so to be a good skydiver you have to develop your ability to learn on the ground before and after a jump. A few minutes of careful review with your jumpmaster (or yourself, when you are doing solo jumps) will save you many expensive mistakes in the future. Finally, log all of your jumps. Any jumps you plan to use towards a license requirement must be logged and signed by another jumper. Around the Drop ZoneAlthough our sport has a two hundred year heritage of air show jumps and military parachuting, sport parachuting as we know it began in the late '50s when civilians began jumping strictly for fun and combined to form sport parachuting groups. Eventually skydivers began to design their own gear instead of modifying military surplus parachutes, and the combination of civilian organization and improvements in equipment has led to a steady growth that continues today. The national organization that has overseen skydiving in the Unites States is called the United States Parachute Association, or USPA. USPA is a non-profit membership organization in which each member may vote for the board of directors. We will ask you to join USPA by the time you make your Level 4 ASP jump; the first year's dues are $39.50 (more for overseas memberships.) Besides certifying instructors and administering the license system, USPA publishes a monthly magazine that is included with your membership. Membership also provides you with some liability insurance. But perhaps the most important reason for joining USPA is that the organization has been instrumental in keeping the government, at all levels, out of the sport. In fact, skydiving is one of the safest aviation sports and is also the least regulated. To keep it this way, it is important that we police ourselves. The USPA has established safety guidelines that all skydivers at this drop zone are expected to adhere to. The USPA's representative on the drop zone is the Safety and Training Advisor, or S&TA.; He or your instructor can answer questions about license requirements, skydiver ratings, and most other skydiving matters. The USPA categorizes skydivers into six experience levels: students - under direct supervision in a formal training program novices - graduated from a student program but not yet licensed A license - minimum of 20 freefalls B license - minimum of 50 freefalls C license - minimum of 100 freefalls D license - minimum of 200 freefallsIn addition to the freefall experience, each license level requires demonstration of skill appropriate to that level. A license is important to you as a proof of your ability level, especially if you intend to travel to other drop zones. Each level also has currency requirements. Staying current (jumping regularly) is one of the most important things you can do to enhance safety. For this reason if you are away from skydiving for several weeks you will have to do some reviewing and get back into the sport with a simple, safe, skydive. Until you are licensed, if more than 30 days passes without jumping you will be required to make a Level 4 ASP jump with one of the school's jumpmasters before jumping on your own again. USPA also issues instructional ratings to qualified applicants. A person holding a jumpmaster rating has attended a training program and demonstrated the necessary skill and experience to safely guide novices through a student program. Instructors have more experience and have also attended further training courses. Either one will be able to answer most of your questions. You will meet plenty of people willing to offer suggestions to you. Bear in mind that someone with one or two hundred jumps will seem very experienced to you but is actually a relative newcomer to the sport. Rely on rated instructors for guidance until you have your A license! Occasionally you may hear experienced jumpers discussing techniques or procedures that differ from what you have learned; be aware that some things which may be safe for experienced jumpers could be inappropriate for novices. If you have any questions be sure and get an opinion from one of your instructors. Skydive Arizona is a business incorporated for the purpose of providing skydiving facilities. While you are on student status, your jump price pays for all aircraft and site expenses as well as instruction and equipment. The operators of the drop zone, Larry and Liliane Hill, are proud that they have built the finest skydiving center in the world, operate the finest fleet of aircraft available, and have some of the best skydivers anywhere on their staff. To help keep this facility safe and pleasant and to control costs, customers are asked to avoid littering (smokers, please put your butts in the yellow or orange cans) and to be on time for their aircraft. Feel free to bring non-skydiving guests out to share the fun, but be sure that children are under constant supervision: drop zones abound with expensive and dangerous objects! Dogs are not permitted in the grassy central grounds or in the buildings. Drop zone etiquette is casual, but when you are in an area where people are packing, be sure to walk around the parachutes rather than step over them, and never smoke or leave drinks around parachutes. Do not borrow or examine other people's gear without permission. Drinking alcohol on the drop zone is forbidden until the last load of jumpers is up. This rule extends to non-skydiving guests for a simple reason: we try hard to maintain a good image, and an uninformed observer might not be able to distinguish between a skydiver and a non jumper. Where do you go from here?The ASP program has eight levels that cover all the skills discussed in this handbook. At each level you will receive detailed instructions from the school staff. After graduating from our student program you will make several more jumps to hone your basic flying skills. At the same time, you'll be trying more advanced things and looking at buying gear. For this stage of your progression we have written a second handbook, geared for jumpers off student status and working towards their A license. The Skydiver's Handbook will fit right in with this one, and goes into details on license requirements, relative work, the coach program, buying gear, and other neat stuff. Keep the two together for reference and rainy day study. You can also keep notes and sketches, packing manuals, license applications, etc. in this folder. All of these materials are designed to be flexible and are subject to continuous updates. Please let Bryan Burke, the Safety and Training Advisor, know if any of the information was unclear or if you felt more detail was needed. We very much appreciate your comments and suggestions, as well as your questions. Welcome to skydiving!
 -
 There are only two ways to end a freefall. One is to open your parachute, and the other is not to. No one wants it to end the second way. Statistics show that the overwhelming cause of skydiving fatalities are due to the jumper not using a perfectly functional parachute in time. Why does it happen? In order to open your parachute safely, you need to know two things: when and how. The when was discussed in the previous chapter. Altitude awareness is critical and the loss of it is a life threatening situation. The problem can be compounded if the skydiver, running out of altitude, is unfamiliar with his equipment and has trouble deploying his parachute. Add the possibility of a malfunction to low altitude and unfamiliar equipment and you have a perfect recipe for disaster. Therefor you must always watch your altitude and before you ever get on an airplane you should be totally familiar with your equipment. The sport parachute, called a rig in skydiving jargon, is a very simple machine. It must include two canopies, a main and a reserve. The components must be TSO'd, meaning they meet government technical standard orders that require high manufacturing and testing standards. All rigs are worn on the back and consist of similar components. A look at the diagram will show that a rig consists of the deployment system (pilot chute, bridle, and bag), canopy, suspension lines, steering lines, toggles, risers, and harness/container. Deployment is initiated when the container opens and the pilot chute enters the relative wind. The pilot chute may be packed inside the container (all reserves and student mains) or kept in a pouch outside of the container and pulled out by hand, which most experienced jumpers prefer. The pilot chute acts as an anchor in the air, while the jumper continues to fall. As the two separate, the bag in which the canopy is folded is pulled from the container. The parachute's suspension lines, carefully stowed on the outside of the bag, are drawn out until they are fully extended. The bag is then pulled open and the canopy comes out. It immediately begins to inflate as the cells fill with air. Inflation is slowed by the slider which prevents the canopy from expanding too fast. It usually takes three to five seconds from deployment of the pilot chute to full inflation of the canopy. Over the years, parachute design has been refined to a remarkable degree. In fact, square parachutes have no known inherent design malfunctions. Theoretically, given proper packing, a stable deployment, and barring material flaws, a square parachute will never malfunction. However, we don't live in a perfect world, and malfunctions are common enough that no sensible person would intentionally jump without a reserve. The malfunction rate for sport parachutes is about one in every thousand deployments. Nearly all are preventable. The catalogue of possible malfunctions is long, but all you really need to know is that any parachute must have two characteristics. It must be open, and it must be safe to land. Otherwise it is a malfunction. The first characteristic is determined at a glance. The second one, if there is any doubt, is determined by a control check. Should you have a malfunction, the response is simple - pull your reserve. On student parachutes pulling the reserve handle combines two functions. The main parachute is released from the harness, then the reserve container is opened, starting the reserve deployment sequence. For all practical purposes, main and reserve deployments are identical except that the canopies may be of different sizes. Most parachutes used by experienced jumpers have a separate handle for each function of the emergency procedures so you will need some special training when you progress to your own gear. Also, at Skydive Arizona we use only square reserves. If you travel to another drop zone be sure you receive training on their equipment, and find out if the reserve is round or square. Round reserves mean you will need special training. The first factor in preventing malfunctions is a simple one: don't leave the airplane with an existing malfunction. This means that you should always have your equipment checked by a knowledgeable second party to be sure nothing is misrouted or damaged. Prevention extends to packing. When you learn to pack you will learn to inspect the canopy. In the student phase, you have to trust your jumpmasters and packers to be responsible for the condition of your parachute, but you will eventually assume all responsibility. Because of the possibility of a jumper making a mistake, our reserves are inspected and packed by a specialist who holds a Rigger's Certificate issued by the U.S. government, thus ensuring that at least one parachute on every skydiver is technically sound. The second factor in malfunction prevention is one you control: body position. If you think back to the deployment sequence described earlier, the importance of a stable opening becomes apparent. Since the parachute is on your back, if you are facing the relative wind in a good arch it will deploy straight out behind you. If you are unstable, it must find its way past you - between your legs or around an arm, for example. In this situation, the pilot chute could entangle with you, stopping the deployment sequence. Another possibility during an unstable opening is that the lines will feed out unevenly, creating the potential for a line knot that could keep the slider from coming down or deform the canopy to the point that it cannot fly properly. Don't forget, however, that stability is not as important as opening in the first place. Pulling at the correct altitude always takes precedence over pulling stable. An unstable opening does not always result in a malfunction; parachutes are so reliable that the worst that usually happens is a few line twists. Not opening has far worse consequences. Test yourself:1. While you are a student, your decision altitude, sometimes called your hard deck, is 2,500 feet. If you initiate main deployment at 4,500 feet and nothing happens, how many seconds will pass before you reach the decision altitude? How many will you have used counting and checking before you realize you have a problem? 2. If you know you have a malfunction, why should you pull your reserve at once instead of waiting until the decision altitude is reached? 3. In the old days, skydivers wore their reserve mounted on the front of their harness. If you had a chest mounted reserve, what body position would you want to be in for reserve deployment? 4. How often should you practice your emergency procedures? Proceed to Chapter 6 (Canopy Performance)
 -
 There are two goals when landing your parachute: the first is to land safely and the second is to land where you want to. Clearly, the first goal is much more important than the second one, yet a surprising number of skydivers have had the opportunity to consider their values at leisure while recuperating from landing injuries. A parachute is only as safe as the person operating it. As soon as you have determined that your parachute is functioning properly, it is time to start thinking about the landing. Look for potential landing sites - any level area free of obstacles will do but we try to land at an established point, our student landing area, if we can. Usually you can get back over this landing area with at least a thousand feet of altitude left. If this is not the case check the area below you and between you and your target for possible hazards; if you are not positive you can make it safely to the planned landing area, you must select an alternate site. Do not go below the thousand foot mark without making a firm decision about where you will land! Assuming you have made it over the target above one thousand feet, you should turn into the wind and check your ground speed. This is especially important on windy days. Remember the higher the wind speed is, the less ground speed you have when holding, and while running with the wind your ground speed will be higher. Keep this in mind and avoid getting too far down wind of your target area. (Helpful hint: if you can find your canopy's shadow on the ground it will show you exactly how fast you are going!) As you hold into the wind you can make a rough guess as to how far you could fly in, say, 250 feet of vertical descent. Take that estimated distance and lay out an imaginary line of that length from the target to a point downwind. Now just work your way to that point and stay near it until you are about three hundred feet up. Turn towards the target. If your original guess was good, you would slightly overshoot the target. A small "S" turn - ninety degrees one way, then 180 back to the approach, and ninety degrees back into the wind - will line you up on a good final approach. As long as you start your final approach a little high, you can continue these "S" turns to adjust until you are on approach at the right altitude. Remember that your first priority is to land safely, not necessarily in the target. You may have to share the landing area with another canopy, in which case you need to avoid flying in front of or near them. For example, if you are on one side of the target and another student is near the other side, stick to your side rather than aiming at the middle. Be careful to always look before you make a turn and assume the other canopy pilots may not see you. Whoever is lowest has the right of way. Also look for dust devils. They can turn or even collapse your canopy and should be avoided. Most skydivers like to set up their final approach by using a pattern similar to the kind airplanes use approaching an airport. After your ground speed check at one thousand feet, work your way down wind until five hundred feet. Then turn cross wind (90 degrees to the wind direction) until you are over that imaginary point where your final approach begins. This type of pattern lets you observe wind indicators as you refine your estimate of where to turn onto final. Another useful tip: the more turns you do, the harder it is to tell where you are going, because your descent rate and forward speed change in a turn. A few smooth, slow turns will set you up better than lots of radical ones. At an altitude of about one hundred feet you are committed; just let the parachute fly straight ahead and limit any corrections to turns of ten degrees or less. The last part of the approach is the flare. This procedure is simple: pull down both toggles simultaneously to slow down your parachute to a comfortable landing speed. To get the most out of flaring, you must be flying full speed on your final approach, so keep your toggles all the way up until it is time to flare. (An exception is if you have poor depth perception, when the lighting is bad, or when the surface is uncertain such as water or corn. Then you may be better off approaching in partial brakes to slow your approach, giving you a little more time to assess the situation.) The flare should be done when your feet are about two to three body heights above the ground. A smooth flare over about three to four seconds will work better than a fast, hard flare, but the main thing is to have both hands all the way down when your feet are three or four feet off the ground. If you realize you started the flare low, speed up; if you started high, slow down. Do not, however, let your toggles back up once you have started to flare. This will cause your canopy to dive forward and result in a hard landing. The illustration showing a canopy's flight during a flare will show the consequences of a badly timed flare. Too low, and you have a lot of forward speed even though your descent is slow. Too high, and you will have a lot of downward speed even though your forward speed is low. That is why you should flare a little high and slow on a calm day, a little low and fast on a windy one. Let's quickly review the three most important points for a safe landing. First, always pick a safe place. Be sure of your landing site before you reach 1,000 feet! People who hit hazardous things such as cars, buildings, or power lines almost always do so because they did not choose a safe landing site high enough and were forced to land in a bad location when they realized, too late, that they could not make the target. Second, never land in a turn. We know that a parachute's descent rate increases dramatically in a turn, and that speed remains for a few seconds after the turn is stopped. Landing in turns is by far the biggest cause of skydiving injuries. These low turns are usually made by people who did not pick a safe area and turned at the last moment to avoid an obstacle, or by people who thought landing on the target was a higher priority than landing safely.No low turns! Third, land into the wind. This one is too obvious to need elaboration; the slower you are going, the softer you land. However, landing down wind or cross wind is less likely to cause injury than landing in a turn or on obstacles! On a breezy day, turn towards your parachute after you touch down and pull in one line to collapse the canopy. You may need to run around down wind of the canopy. Test yourself:1. The United States Parachute Association limits student and novice jumpers to wind conditions of fourteen miles per hour or less. Why are winds over fifteen miles per hour considered dangerous? 2.Turbulence that can make steering difficult or even collapse your canopy can be caused by three things. Hot, rising air such as dust devils is one and high winds passing over obstacles are another. What else could cause dangerous turbulence on landing? Where would you expect to find turbulence on a windy day? Proceed to Chapter 8 (After the Landing)
 -
 Your square parachute is the result of two decades of design refinement. Like a glider, it can fly straight and level or turn, slow down, spin, and even stall. As the pilot, where you land and how you land is totally up to you. Practice, combined with a clear understanding of how your parachute works, will allow you to land softly, exactly where you want to, every time. When your parachute is inflated, the pressurized air filling the tailored cells causes it to take on a wing shape. A parachute has a fixed angle of incidence, built into it by the length of the lines. The "A" lines in front are shorter than the "D" lines in back, causing the wing to point slightly down. It essentially flies forward and down on the slope of the angle built into it. This angle causes it to fly about three feet forward for every one foot down, giving it a 3 to 1 glide ratio. In other words, on a calm day a parachute opened at 4,000 feet could fly a straight line distance of 12,000 feet before landing! The speed at which it flies is about 20 miles per hour forward and 6 to 8 miles per hour down when the canopy is in full glide with the control handles, called steering toggles all the way up. The toggles are also referred to as brakes, since pulling both down slows you down. Pulling down on the right toggle pulls down the back right corner of the canopy, slowing it down and creating a turn to the right. At the same time, the slow side looses lift and the canopy points downward in the direction of the turn, increasing the vertical descent rate. One of the most important handling characteristics of parachutes is that their descent rate always increases in a turn! This phenomenon is by far the greatest cause of parachuting injuries. With this in mind, you must take care to always plan your landing so that you will not be forced to do any major turns below 100 feet. How slow or fast you turn is in direct proportion to how far you pull down the toggle, as is the change in your descent rate - fast in a sharp turn, slower in a mild turn. If you pull down on both toggles simultaneously, the canopy's forward speed decreases. The slowest you can go is about five miles per hour forward. Generally you should fly your canopy as fast as possible - toggles all the way up. This is because the more air the wing has passing over it, the better it flies. In fact, in sustained deep brakes so little air passes over the wing that the descent rate increases significantly. You can even cause the canopy to stall, which means it gives up flying altogether. Normally student canopies have the control lines calibrated to make a stall condition difficult or impossible to get into. Whenever you jump an unfamiliar canopy, you should always do a series of turns and practice flaring (pulling both toggles down simultaneously) above 1,500 feet in order to acquaint yourself with its handling characteristics. Why 1,500 feet? Your CYPRES automatic activation device that deploys your reserve in an emergency is calibrated to fire at about 1,000 feet. It may mistake radical maneuvers under a good canopy for a malfunction and could deploy your reserve if you are aggressively turning or stalling the canopy below 1,500 feet! This is not only dangerous, but expensive. Recharging the CYPRES and repacking the reserve costs $170. If the CYPRES fired because of your mistake, you are the one who pays! Besides the canopy's handling characteristics, the parachute pilot must consider the surrounding conditions. Two variables are present to some degree on every jump; the spot and the winds. Let's take a look at spotting and how it affects you. Imagine the simplest jump possible. Let's say you are going to exit the airplane at 3,000 feet and your parachute, instead of gliding, descends straight down. There is no wind. In such conditions if you opened directly over the target, you would land on it. If we add a ten mile per hour wind, the spotter would have to determine how far the unsteerable parachute would drift and plan for the jumper to open that much further up wind of the target. Now let's say he has three parachutists leaving at ten second intervals. He must plan the initial exit so that all three will land as close as possible to the target: the first would be short of the target, the second right on, and the third would be long. In our case, the spotter is looking down from 12,500 feet, has to guess about the wind, and has only a rough idea of how long each group will take to exit. Fortunately square parachutes are maneuverable enough to compensate for the variables. As a novice you will usually leave late in the exit order which means that for you the spot will usually be long. This can be useful, because it means all you have to do is locate the landing area and fly towards it. As you do you can think about the wind line (remember chapter one) and check for other wind indicators such as wind socks, the shadows of clouds moving over the ground, smoke or dust, and the direction other parachutes are landing. You need to do this, because the wind is the second variable you need to think about. On a calm day, your ground speed will be the same as your canopy's forward speed - about 20 miles per hour. But when there is any wind, it will affect your ground speed. If the wind is blowing five miles an hour, you are now in a river of moving air. You don't feel like your speed changes, because your air speed is the same. But your ground speed is not. Facing into the wind, or holding, your ground speed is reduced by five miles per hour. When you turn and fly with the wind, called running, you add the wind speed to your canopy speed, resulting in a ground speed of 25 miles per hour. Test yourself:1. When you are crabbing (flying at 90 degrees to the wind) in a 10 mile per hour wind, what will your path over the ground look like? 2. The slowest your parachute can go is about five miles per hour in full brakes. Flying into a ten mile per hour wind, what would your ground speed be? Proceed to Chapter 7 (Landings)
 -
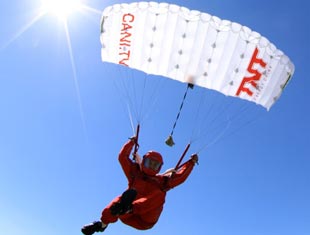 The JFX is a 21-cell Elliptical ZP Crossbraced canopy. Unlike the JVX, which has been shaped for wicked swooping power and CP competition, the JFX design is simply the highest end everyday canopy we could come up with. Although being fully Crossbraced with the powerful landings, long recovery arcs and efficient flight you'd expect, we've tamed the JFX for piss easy, everyday, low hassle jumping. Now you can have Crossbraced performance with almost Crossfire type ease. Whether you are hard-ass team training, work jumping, doing camera, wingsuit jumping... or just a Jump Hog wanting a bit more welly in your day... this is your sports car! It's not a canopy for light wing loadings, transitioning to a JVX, or to learn on. The JFX is for the already experienced small HP Elliptical 9-cell jumper who couldn't be bothered with a Crossbrace canopy before now. You'll want to load it up slightly compared to an elliptical 9-cell, and it will come alive with more zip. And that gorgeously efficient Crossbrace flare can become either a blazing swoop or use the power for the easiest, gentlest touchdown. Yup, it's more bulky and more expensive than a 9-cell, but it’s worth it! NOTE: Recommended wing loading 1.8 to 2.8 (Yes, you can load it up like a JVX too!)
 -
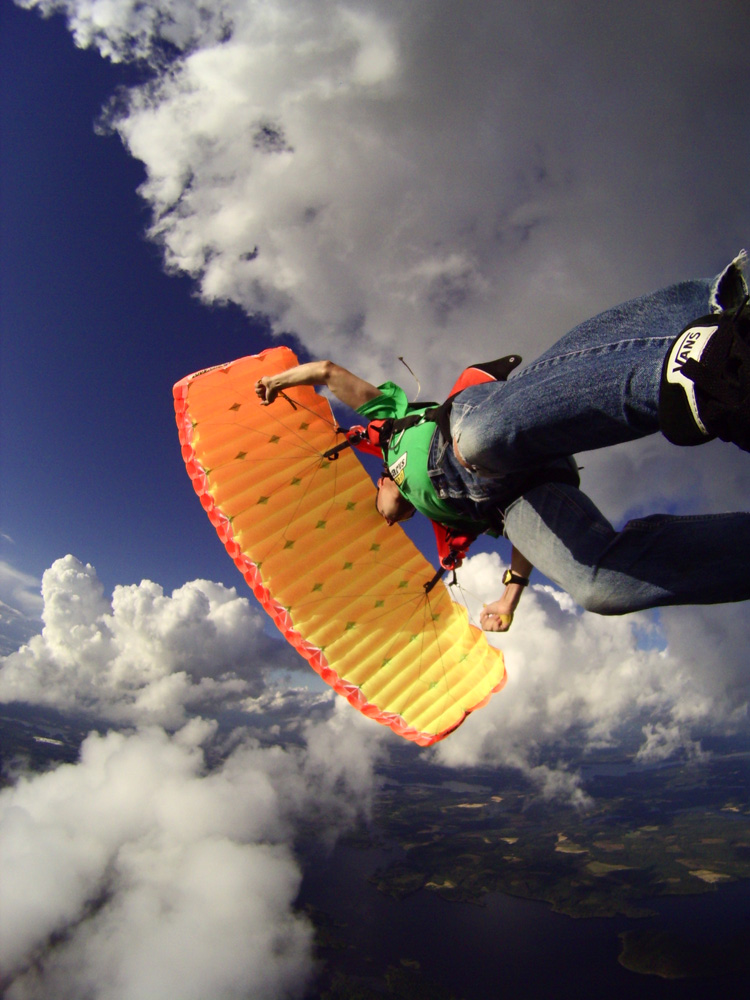 Nil wind days over the swoop pond are always memorable: they are either epic reminders of why you jump out of planes to go at mach 10 speed just above the ground, or they are painful lessons of why you need a competition wing like the JVX. The JVX is made to be flown by experienced pilots; she has better openings than other canopies in her class, and improved trim and longer lines keep her diving for longer. With no stabilizers and HMA lines the JVX just keeps on flying. This wing loves speed, but is built for power and excels at going the distance. Imagine yourself dragging water every day. The JVX isn’t just suitable for competition, but also as a high-end everyday canopy for experienced and current pilots. If you’re a competitive swooper or an experienced jumper wanting a rush, the JVX is a ridiculously epic ending to your skydive.
 -
Mike Marcon has written of a time in the 1960's when sport parachuting, or "skydiving," as it is called today, was just starting to come into its own as a sport. In the U.S., Europe and across the world, even in the Soviet Union, small groups of jumpers would gather at local airports and grass airstrips on the week-ends. The equipment they used was usually military surplus -- their aircraft, a mixed bag of smaller airplanes. Mike's early days as a jumper took place mainly in the south, starting first in Mississippi and later, in Louisiana. Mike revelled in the sport as a young guy with nothing on his mind but jumping, girls and partying. He was the master of practical jokes. The characters he recounts in "Red Beans & Ripcords" are varied and slightly off-balance. There was Major Goody who tried to kill a cat with home-made nitroglycerine, and Swartz who jumped with his dog. There were the first-jump students he trained and the jumpers who became his extended family. There were the ocelots kept as pets that terrorized the various visitors that visited his parachute center. There were outrageous drinking games and eating unbelievable amounts of a southern staple, red beans and rice. You'll roar with laughter at the story of "Eddy and the Body." And, through it all, there was Leon, the Cajun, his mentor and friend. You'll most likely hear the sound of Zydeco music in the pages of this book. Mike Marcon resides in Virginia with his wife, Marianne. He has written professionally since 1984. He has been published by Random House, Prentice-Hall, and Hilltop Publishers. He also writes for many regional magazines and newspapers. Today, he operates Marcon Publishing, helping new writers bring their words to readers worldwide. He is currently co-authoring another book to be debuted later this year. Marcon Publishing can be found on the internet here: www.mikemarcon.info
-
Among the discussions currently taking place in Washington, D.C., about reducing the deficit and finding new revenue streams is talk about imposing new user fees on general aviation. There has been similar talk in the past, but Congress squashed the idea. There’s not yet any formal proposal, but there are enough rumors from official sources that many of the general aviation associations representing pilots and businesses that operate aircraft have asked their members to contact their Senators and Member of Congress to oppose the idea. General aviation users already contribute to the aviation trust fund by paying a federal tax on every gallon of fuel purchased, and general aviation users want to stay with that method. The basic idea of a user fee is to charge aircraft operators a set fee per flight. The charge could be anywhere from $25 to $100, and it could be assessed per takeoff or per radio contact with air traffic control (ATC). Skydiving operators—with multiple takeoffs each day and a requirement to contact ATC on each flight—would pay more than most operators; the cost of jump tickets would go up. A new fee could be aimed at jets only, or it could be aimed at all turbine aircraft, or all aircraft in commercial operation, or simply all aircraft. Regardless, if enacted, it is a sure bet that the fee would eventually increase and also be expanded to other users in the future. Adding insult to injury is that the FAA would have to create a sub-agency to track billing and enforce payment. USPA joins our general aviation brethren in fighting the user fee concept. Please take action now to ensure that Congress rejects the user fee idea. On the Senate website, select your state from a dropdown menu in the upper right corner to be directed to your two Senators’ contact information. On the House of Representatives website, enter your zip code to be directed to your one Representative’s contact information. A phone call is best, followed by an email, and even a fax; mailed letters take too long to arrive. In your contact, identify yourself as an aviation user, and explain how increased costs would affect your participation in skydiving—an FAA aeronautical activity. Ask them to reject the idea of new user fees for general aviation and to continue the collection of federal taxes on aviation fuels. The above article was taken from a USPS news release: www.uspa.org
-
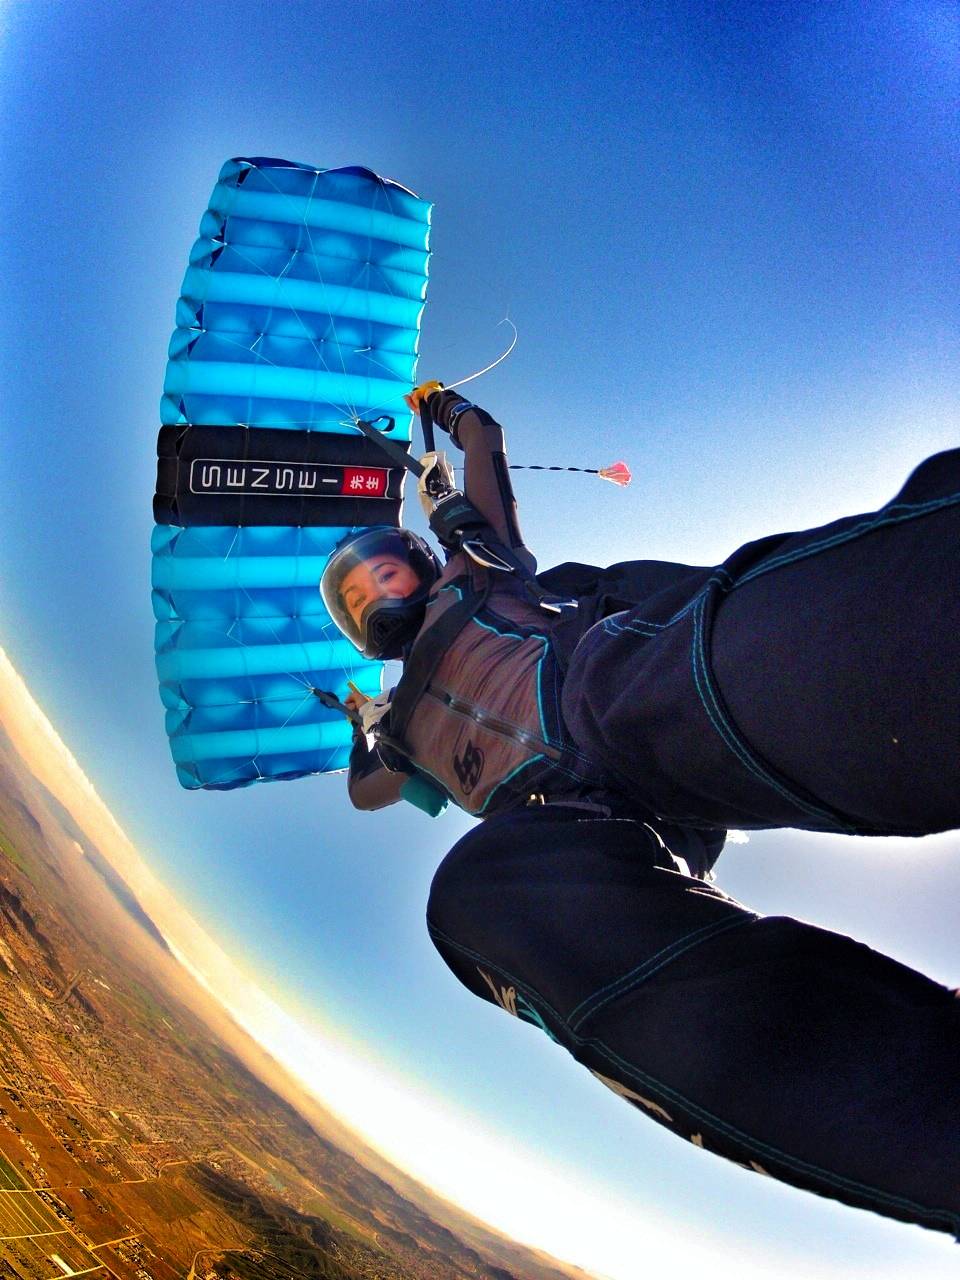 Nearly ten years in research and development make the Sensei Project the longest test-piloting program of any ram-air canopy in history. Now Aerodyne Research has teamed with master designer Brian Germain to bring this elegant canopy design to the marketplace. In order to shave some of the increased drag experienced at high speeds, the Sensei uses a 21-cell cross-braced infrastructure. This makes it a beautifully proportioned wing, configured into seven cells. Twenty eight tiny but incredibly strong suspension lines constructed of High Modulus Aramid fiber are coated for extra wear resistance. These low drag lines are essential for preservation of energy. We know you worked hard for your airspeed, and we want you to keep it all the way to the entry gate. The carefully sculpted airfoil is a novel "Fat-Tail" design, with a greater thickness at the trailing edge to create superior stability when maneuvering with rear risers, especially when pulling high Gs around the corner, down in the power band. The reduced span at the trailing edge makes the canopy more responsive to toggle input during ground effect and throughout the flare. The Sensei comes with your choice of 350 or 450 HMA lines.
 -
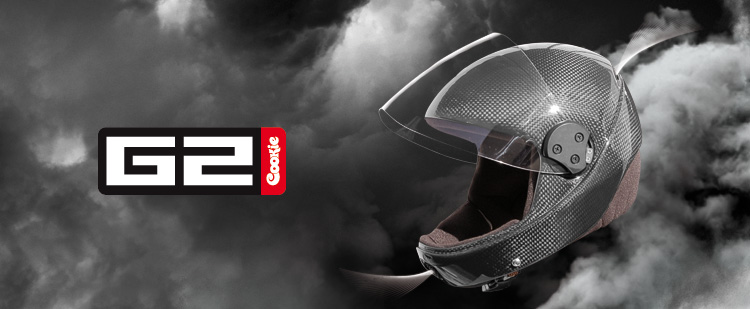 The Cookie G2 Helmet represents a new begining in the design of Full-Face Flip Up Visor helmets used for skydiving. In close consultation with world champion teams such as Arizona Airspeed and Arizona Arsenal we we able to design and test the G2 in environments encountered by professional skydiving teams. Key criteria for the G2 helmet were - A Thicker Visor for better protection - A Visor locking system that cannot fail and leave the wearer with an open face sheild in freefall - A Low jaw line, increasing peripheral vision and communication - Increased ventilation for the hour long wind tunnel sessions The New G2 Helmet Features - Carbon Fibre outer shell - 2mm Injection molded poly-carbonate Visor with antifog coating That meets opitical standard - Secure Visor Locking Mechanism - Increased Peripheral Vision - d3o Impact protection liner - Front and rear vents - Velcro-less liner synching system - The ability to wear certain glasses beneath the visor
 -
The SensationsSpeed skydiving in principle sounds like a high-octane, extreme discipline in skydiving. However, when you hear it’s a solo sport, you then think it “sounds boring”. But it is anything but boring and it’s for one simple reason; speed skydiving has a unique adrenaline-filled freefall sensation. It feels like those first few seconds of normal freefall where you accelerate rapidly, but throughout the entire speed skydive. Speed skydiving is measured as an average over the vertical kilometer (from 8,858 to 5,577ft). That means if you do it well, you can expect to reach your peak speed at the bottom end of the measuring gate. Some skydivers say it is hard to quantify what normal terminal velocity is, however in speed skydiving it’s definitely more tangible. The sensation is of freefalling seriously fast and that’s slightly scary whilst giving you a big adrenaline rush! Who Am I?I jump regularly at Skydive Hibaldstow primarily doing FS team camera work and wingsuiting. Although I have never been on the International Speed Skydiving circuit or a speed skydiving training camp, I always try to attend the UK Speed Skydiving Nationals and seminars. I’m not a freeflyer and I’m not even the best speed skydiver, but I have been enjoying it for 9 years. Doing It WellDoing it well is another matter of course. I have never done an average of over 270mph, whereas Mark Calland (UK jumper) has been over 300mph unbelievably. Speed skydiving requires you to strike a 3-way balance between feeling the airflow on your body, making fine corrections and relaxing. Putting too much input in or being too ridged and it’s all going to go pear-shaped. What to wear plays big part of getting a good average. Some speed skydivers like to wear bright red all-PVC spray on gimp-suits. Sorry but that is too kinky for me! If you can handle them, you can get some good speeds. Many more however prefer to wear a surfers rash vest and some jeans. The jeans help to smooth the airflow, provide some good stability and grip. A Typical Speed SkydiveSo let me describe a typical speed skydive. I get out of the aircraft between 12,000 to 13,000ft (the same altitude as the 8-way jumpers at nationals) and for the first 15 seconds, I slowly start to build up my speed by going into a progressively steeper and steeper track. After what feels like a long time, I begin to feel the air on the back of my calves. This is when I know I am now in the vertical airflow phase of the jump. Around this point, I feel a sudden acceleration and I know I am passing the 200mph mark. It’s almost like I’m passing through a pressure wave and this is common amongst other speed skydivers. For extra speed, I try to flatten my arms by my hips and bring my ankles together. Not long after, I pass through the opening gate of the measured kilometer. By then, I am already doing over 230mph. At this measuring phase of the jump, I’m concentrating on stability with every nerve cell in my body. Ideally, I’m trying not to make any inputs in at all. In fact, I’m trying to relax whilst balancing on what feels like a pinhead. Another sensation is like falling through an invisible narrow tube barely wide enough for my shoulders. I’m talking a lot about sensations in this article, but that is one of the big attractions to the discipline. Being symmetrical is also very important. A slight hip twist, one leg in front of the other and I can expect radical oscillations. Simply relaxing often cures the problem and I can continue to job of accelerating away. The final and most important part of the speed skydive is the deceleration to 120mph! I do this when I hear my two L&B; audibles beeping away inside my Oxygn fullface helmet. For those that don’t know, I’m completely deaf in one ear. So I pack them next to each other. You wouldn’t want to miss your beeps at those speeds. Pulling out of a 250mph swoop is not as gruesome as it sounds. You simply arch your body slightly and you begin to peel out into a swoop. As the speed decreases, you then bring your arms in front of you to a normal flat body position. All this takes less than 4 seconds and this makes you realise how fast you were actually going. MeasurementOnce you land, you unclip the two L&B; Pro-Tracks (not the ones from your helmet) from you harness lateral straps and plug them into the Jump Track software, which produces neat and tidy graphs showing your performance. In competition, each competitor does 6 rounds and the average of their best 3 go forwards. It’s exciting watching the scores come in and seeing your own progression. You would be surprised that being a fatty has little to do with going fast. I’m on the slim side and 2 out of the 5 worlds fastest recorded times have been by other slim built skydivers. SafetyHaving a premature opening of your parachute over 200mph is extremely dangerous. In preparation for a speed skydive, I take a fresh closing loop and shorten it to the point where I can only just get the closing pin in. In addition, I make sure I have two audibles in my helmet and I put gaffer tape on the edges of the visor of my full face. There should be no more than three speed skydivers on a load to prevent traffic problems. The first and last part of the jump involve tracking and it’s possible to cover large distances quickly. Being able to keep a heading is vital. The last thing is that your BOC spandex must be in good condition. SummaryThere are very few disciplines where you can feel how fast you are going and that makes it a real adrenaline buzz. Whilst it is a solo discipline, there is a lot of excited interaction and camaraderie between the jumpers at competitions as they evaluate each other’s jumps and acceleration graphs. You can take part without having to do lots of coached training camps. It’s definitely not boring! Doesn’t covering a vertical kilometer in less than 10 seconds sound like fun? More information: 1. Speed skydiving seminar at Hibaldstow 2. ISSA 3. Larsen & Brusgaard – Kind sponsors of the discipline
-
The intention of this document is to outline some of the primary guidelines that should be adhered to when writing or submitting content to dropzone.com. All articles must be directly related to skydiving. Article Type Minimum Words Image Recommendations Videos General Article 750 3-10 Images Optional Interview Article 500 1-10 Images Optional Reviews 500 1-10 Images Optional Event Reports 750 3-10 Images Recommended Photo Journalism 500 3-10 Images Recommended Press Release 500 1-10 Images Optional * There is no maximum limit of words for any article. Image Guidelines: Images must be a minimum resolution of 800x600 with a recommended resolution of 1440x900. In either jpeg, gif or png format. Should attribution be required on an image, please include the photographer's name in the image filename. eg: 4-way_by_brian_buckland.jpeg If you need the images posted in a specific area of the article, you can do so by including a tag for the image. eg: Getting Files To Us:You can transfer files to us via e-mail at support@dropzone.com. For files too large for e-mail attachments, you can contact us at the same address for our FTP details. Videos: We request that videos that are to be added into articles first be uploaded to either Youtube or Vimeo. You can then include the video into the article by simply pasting the video URL. Descriptions and Examples General Information Article General information articles cover just about every article that doesn't fit into the other categories. It can be thought of as the default category for articles. General articles would cover such topics as technical safety, buyers guides, advice and disciplines. Example: Clean Up Your Turns Interview Article Interview articles are articles that consist in their entirety of interviews with relevant persons. This can be professional skydivers, gear manufacturers etc. Interview articles should clearly display the information of which person is being quoted, example John: Who are your sponsors? Mark: Well I recently got sponsored by... Example: Troy's Senseless Acts and Others Review Article Review articles can be written for all directly skydiving related products, such things as gear, mounted cameras and skydiving mobile apps. Reviews must remain factual and free of bias. It will be expected that the reviewer will address and explain how he or she came to any conclusions when testing. Example: Replay XD: Is it the New Generation of Skydiving Camera Event Report Article Event report articles are articles that are written about an event such as a boogie that was attended. It is important to note that this category differs from photographic based articles below, in that they are still primarily textual. Articles about events that are yet to occur, should be submitted as press releases. Example: New German National Big Way Formation Record Set Photographic Based Article A photography based article differs from the other articles in that the focus is not so much on the text, but on the images provided. With that said, we still recommend providing at least 50 to 100 words about each image in the article. Images in this category should typically be of high quality. Press Release Article We allow the submission and publication of skydiving related press release articles. We typically seek to push out press releases as soon as we receive them, though may not be featured on the home page (depending on relevance and importance.) Example: Press Releases
-