admin
-
Content
-14 -
Joined
-
Last visited
-
Days Won
1 -
Feedback
0%
Everything posted by admin
-
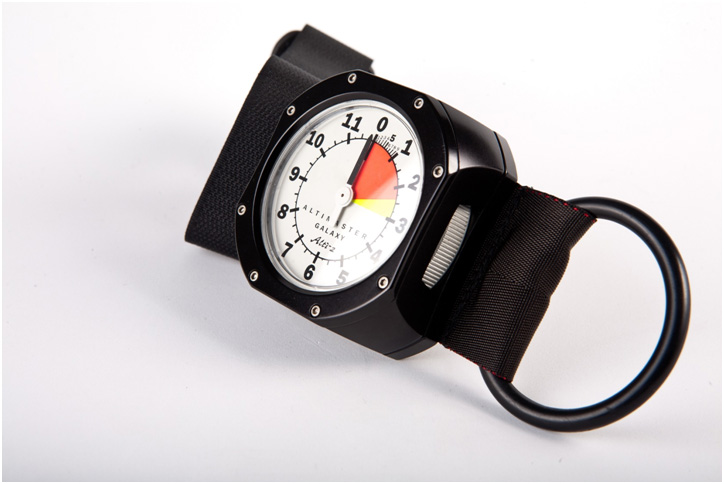 A waterproof version of Galaxy for pond swoopers who prefer an analog instrument over digital. Offered only in black; all Galaxy face plates are available. Due to waterproofing the lens is not user replaceable.
 -
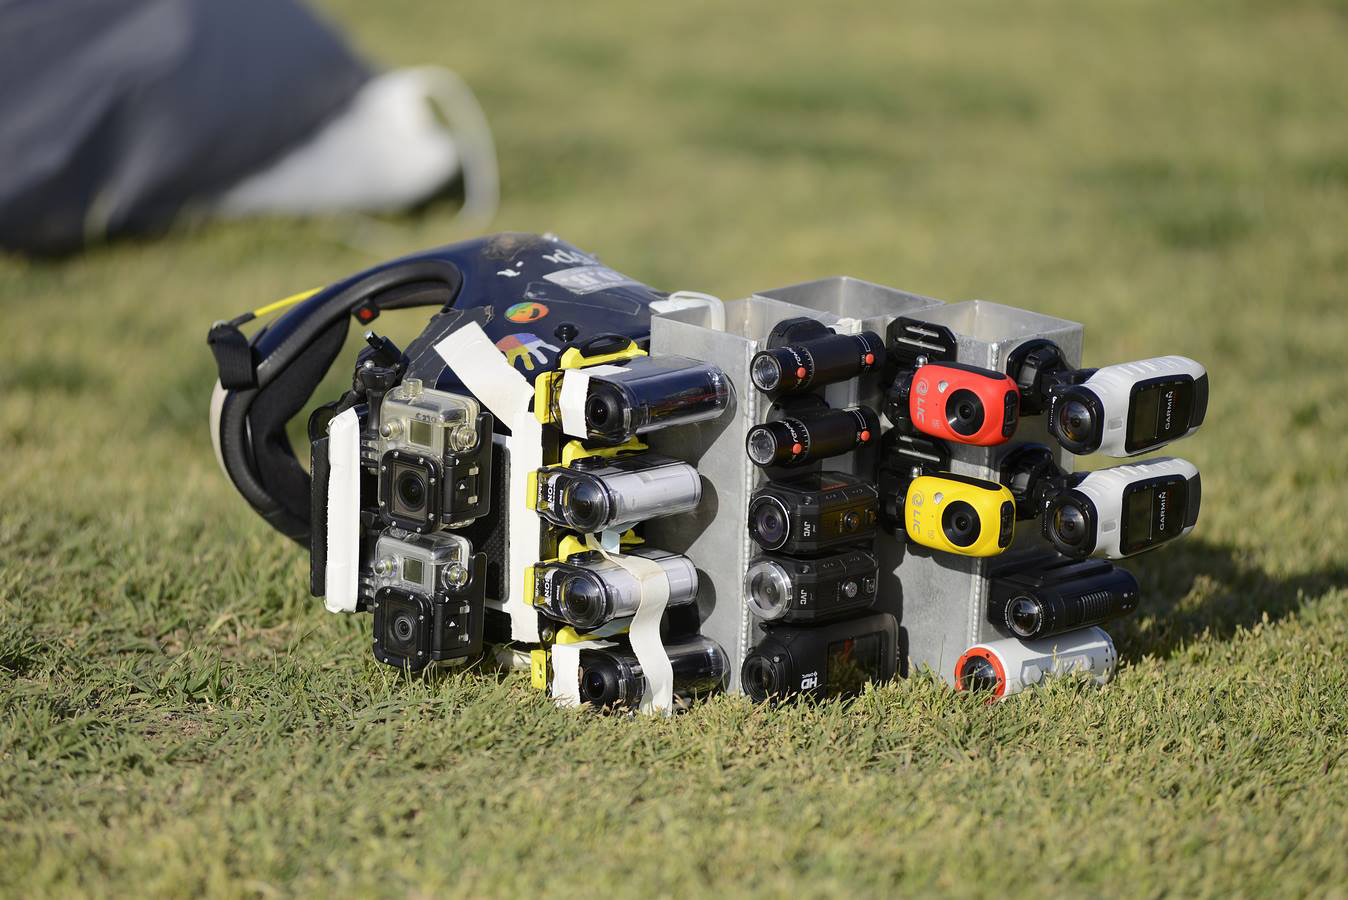 Action cameras aren’t merely changing the production world, they have become a staple of the production world. Getting the inside shot is simple with POV cameras and the number of choices in this niche world is broad and perhaps daunting. Action cameras are inexpensive and provide a simple means of additional camera angles to any production. In this review, I’m going to tackle all of the “name-brand” cameras available out there. This article will not provide the answer to “which camera should I buy?” The range of criteria is so broad that the question is beyond the scope of a single review. This review will provide information about which action-camera is best suited for specific criteria and provide information that may help you make informed purchasing decisions. I’ve gathered what I believe to be the most viable options for most “extreme” sport enthusiasts for shooting broadcast-quality video. During this review, each camera is set to 1920x1080, 30fps (except where otherwise noted). The criteria for inclusion: Price point (150.00-400.00 USD) Bit-rate (16Mbps or higher) Codec (must be non-proprietary) The selectees: GoPro 3+ ($399.00) GoPro 3 Black ($349.00) Sony AS100 ($299.00) Sony AS30 ($299.00) JVC Adixxion ($299.00) Midland XTC400 ($249.00) Polaroid XS100 ($169.00) ReplayXD Mini ($199.00) Liquid Ego ($179.00) Drift Ghost S ($399.00) Scoring Procedure With the criteria determined, particpants selected, I created a scoring sheet that could be used as a reference throughout the process. The goal is to be as objective as possible in a subjective conversation. A panel was selected, four people who would review images from the cameras and choose the best image when image quality was relevant. Other factors such as battery life, wireless functionality/reliability, audio features/quality are objective. Scores are based on how these functions are implemented and may be relied upon. For this shootout I mounted 17 action cameras on a single helmet, then took it skydiving, snorkeling, zip-lining, bob-sleighing and motorcycling to enable accurate side-by-side comparisons of each camera. For example in the battery life test, the Liquid Ego went for nearly 5 hours of record time, blowing through a few cards, while the Garmin VIRB and GoPro 3 Black barely reached 50 minutes of record time. The Liquid Ego nets a score of “5” while the Garmin VIRB and GoPro 3+Black earn a score of 2. The Sony AS series weighed in at just over 2.75 hours earning a score of “4”. Had it not been for the curve-altering record times of the Liquid Ego, the Midland and Polaroid cameras, Sony’s AS100 would have won this category. Regardless, with a linear scoring value of 0-5, the weighting may seem unbalanced from time to time. Please note that the score card contains two scores; one based exclusively on image quality, and the other score relevant to the overall product experience. Most of the cameras have tweaks and settings that allow them to be the best they can for specific situations. Rather than setting each camera to its best settings, all cameras were used exactly as they come out of the box. In other words, once the box was opened the battery was charged, a card inserted into the camera and formatted, it was put to the test. Sony, GoPro, and ReplayXD all have internal tweaks accessible via either proprietary software or .txt files. Each allow for an optimized image even though I’ve avoided using any of these optimizations. After all the results were in and the panel gave their feedback, here's what the final result looked like. I sorted the score sheet below by total score but you can click on any header to sort the table by that column and see how the different cameras compared in any specific test. I discuss each test area in detail below. Score Sheet Image Quality Winner in Image Quality - Sony AS100V The subject of image quality is subjective. The four panelists had to choose from a variety of videos (a few of which are linked in this article). Factors involved in the comparison are dynamic range (darkest to the brightest representation of image content), saturation, color accuracy, codec compression/banding/pixelation, motion management, and frame to frame blurring. Watch the Wingsuit Exit Video For example, in the image above, the center top allows for the lake in the background to be seen, while also allowing for the darker interior and tires of the aircraft to hold details. There are no blowouts of the highlights, and the reds, greys, whites, and orange colors are all accurate to original. Watch the YouTube-linked video at the 4K resolution on YouTube for the best experience and ability to determine which image you find best. Each camera is displayed at approximately 720p. You’ll likely want to turn off your audio as there is no usable audio content. Watch the Zipline Video Watch the Bobsled Video In the above test, one of the cameras failed due to (I believe) card error. The high motion, high contrast, light and dark areas for exposure testing provides for a terrific challenge. Even in the still framegrabs, the torture is evident in blur, color, and compression artifacting. Watch Wingsuit Overhead Video The complexity of the ground coupled with the high motion makes for a good test of contrasts and detail management in moving platforms. Note that the majority of the cameas are set to an FOV of 120 degrees, as that’s how they come out of the box. A couple cameras are 170 degrees. All panelists unanimously chose this action camera over all others in all resolutions and framerates. The GoPro 3+ came in second. The Sony AS30 takes third prize, and an honorable mention goes to the Drift Ghost S. In well-lit situations, the Midland and Garmin VIRB cameras really surprised me too, but at 35Mbps (this camera also does 50Mbps in XAVC-S mode, not used in this shootout), the Sony AS100 sweeps the image quality score. Battery Life Winner in Battery Life - Liquid Ego This was a stunner. I left all the cameras running/recording and went to dinner. Battery life would be lessened by movement, but the bigger point was how long the cameras could record. In most cases, the camera battery died prior to the card being filled (I used 16 GB cards for this test). The Liquid Ego kept running and running, filling a 16 and then 8 GB card before finally dying at just under 5 hours in 1080 mode. Wifi was disabled (all wifi was disabled for most tests). This is one of the least expensive cameras in the shootout; it has some shortcomings, yet one major bonus is that this camera, removed from its own mounting clip, can be fitted to GoPro mounting systems. Brilliant move on the part of Liquid! What I didn’t like about this camera are the number of button presses to record in 720-30p or 60p without wireless enabled. However, shooting in 1080 mode is as simple as turning it on and hitting record. When in the waterproof case, it’s impossible to see the LCD display. For budget users, this is an easy camera to like. Profile Winner of the Action Camera Profile Category - ReplayXD Mini 1080 At slightly larger diameter than a nickel this camera is rock-solid, doesn’t need stabilization, and blew my mind when I found I could drive a car over it. So small to present less of a snag hazard for skydivers, this tiny marvel is also perfect for UAV/Drones, hiding on cars (ReplayXD is the camera most used in professional auto-racing) and so small it can even be placed upright under a skateboard. It’s tiny and weighs virtually nothing. The camera also offers a threaded head so that lens adapters may be used for either lenses or filters for better image. This is tremendously valuable for outside photography, where an ND filter will immediately remove the heavy contrast and juddered playback, while reducing jello-cam (rolling shutter) issues. JVC, Polaroid, and Garmin all have the ability to come in fairly high in this conversation except their mounting systems are not only flimsy, they’re high profile and a snag hazard. Using these cameras without their manufacturer-issued mounts will provide a very low platform and a much more stable image. Testing Locations The waters of Ocho Rios Jamaica, Mystic Mountain for snorkeling, bobsled, and zipline testing Lake Elsinore California for skydive tests Virgin River Gorge for road/motorcycle testing Toronto, Ontario for slow motion and other comparisons Although durability wasn’t a measured factor in this shootout, ReplayXD would easily win the durability category (comparing cameras out of their waterproof box). There simply isn’t a tougher camera on the market. Other features I like; the camera offers up timecode for professionals, external audio inputs and user-controllable image quality (Saturation, Exposure, Audio Gain, Sharpness, etc). Wifi Winner of the Wifi Category - Sony AS100 and Liquid Ego This was a tougher call. Other than the Replay Mini, all of the POV cameras offer wifi control or connectivity to a mobile device. I tested the systems on a Samsung GalaxyIII cell and Samsung Galaxy Tab2 tablet. All devices connected successfully. All devices allow for some level of “streaming preview.” Some devices such as the JVC Adixxion allow for streaming directly to UStream if the user has an account and is fortunate enough to be very close to a WAP. Streaming for preview is a serious drain on battery life, rarely works in a moving environment, and is overall somewhat useless beyond setting up a camera angle or adjusting settings (in this writer’s view). Sony’s Play Memories application was difficult to use on their early AS15 models but on the AS100 they’ve gotten it right. It’s install and done. The same can be said for the Liquid Ego. JVC’s Adixxion was a bit of a struggle but it did work once all the paths were traveled properly. The same can be said for the Garmin VIRB, the Polaroid X, and the Midland XTC. GoPro was also reasonably easy to set up so saying that the Sony and Liquid win this category is essentially a small thing. In the end, these two were simply easier/faster to set up than the others by a small margin of time and/or frustration. It should be mentioned that the JVC Adixxion was the most difficult to set up. They use a broader-scope application called WiVideo, designed to work with a host of action cameras. Wet Use Winner of the Wet Use Category - Three Way Tie Between GoPro3+, Sony AS100 and Drift Ghost S What made the difference in this category is “how deep can they go and how easy are they to operate under water?” I did not take the action cameras to their rated depths and I am relying on the manufacturers for accurate information on how deep these POV cameras can go. With that said the Replay Mini, Garmin VIRB, Ghost S, Polaroid XS, do not require water housings. Watch Underwater Video After spending 3 hours in the water with the action cameras, water was no issue for any of the cameras. GoPro and Sony both include the waterproof housing in the purchase price. Garmin, Midland, Liquid, and even ReplayXD (for depths greater than 12’) all require the purchase of a waterproof housing for wet use. For underwater image quality, Sony AS100 and Drift Ghost S provide the most accurate image, yet the GoPro has a slightly smoother color saturation that is pleasing to the eye. For reasons I could not figure out, the Sony AS30 fogged in the lens. This didn’t happen with the AS100 and more curious, it didn’t happen with the hand-held AS15 I was using to document the event. The fogging didn’t affect the image much, but it was there. What I liked most about the AS100 is that the LCD panel is large and it was easy to see what was going on with the camera while under water. Audio Winner of the Audio Category - Sony AS100 With external microphone-in that requires no adapters, AGC, and high-end audio converters, this camera offers wonderful compressed audio, equal to the audio recording capability of significantly more expensive cameras. The Sony AS30 also offers external audio inputs, but is a bit less flexible, as the audio input is hidden under the connection cover. ReplayXD also offers external microphone input as does the GoPro 3+ but both require larger, more bulky adapters that cost more dollars. ReplayXD offers a user-controlled gain function which is a real benefit to professionals needing nat audio from locations and in loud environments (such as auto races or helicopter skins). However, the Sony AS100 offers not only the external microphone input on the bottom of the action camera (obviously cannot be used in the water housing), but a higher grade of DAC (Digital Audio Converter) than its categorical counterparts. Ease of Use Winner of the Ease of Use Category - No Clear Winner Most of the cameras offer a one-button on/record feature. Out of the box the Sony series, Polaroid, Midland, Garmin, and ReplayXD cameras offer a one-button record feature. GoPro offers one button record as a menu feature, and the Drift can be programmed to loop and record when turned on for ease of use. However, out of the box there are several that are easy to use as point and press action camcorders and so there is no clear winner. If menus are the measure then the Drift Ghost S, the Garmin VIRB, and the JVC Adixxion win for graphic interface. Sony AS series win for clear instruction and ease of navigation. The GoPro wins for sheer depth of options. I’m not a fan of some of the GoPro surface options that make the menus long and kludgy to navigate. Curiously enough, ReplayXD has no menu; all controls are done in a .txt file set on a phone, tablet, or computer. However, their menu options go deeper and are more relevant to picture quality than any other POV camera available. Mounts Winner of the Mounts Category - Replay XD Mini Although the (likely obvious) winner for mounts would be GoPro, it actually isn’t. On sheer numbers of achievable angles and mounting systems, REPLAYXD Mini takes the prize with GoPro following a close second. There is a reason there are so many mounting kit options for some of the cameras out there; their factory mounts are terrible. Many of the parts and pieces available for various POV cameras are designed to compensate for the initial weaknesses of the mounting system. Mounting systems matter far more than most users of action cams realize. If the mount is not 100% solid then the image will be unstable and aside from needing stabilization in post (which affects image quality), the image will likely incur ‘jello-cam’ also known as “rolling shutter,” which cannot be repaired. In this video, both are out-of-the-box mounting systems. Note the difference in stability. A rock solid mount needs no stabilization work in post. Choosing the right mount system is important. A weak mount will be buffeted by the wind, bounced around by roads, surf, or the turbulence that affects a UAV camera platform. Internal stabilization is a tremendous benefit if it is done well. The Sony AS100 has a tremendous stabilization system (Sony has long been famous for their BOSS camera stabilization) matched by no other low-cost camera whether a POV/Action camera or a larger palm-corder category camera. This stabilization system makes the AS100 superior for use on a UAV platform, as it is not susceptible to jello cam, is very light weight, and allows for long battery life. Matched with a two or three-point gimbal flawless smooth video is possible for very little cost on a drone system. JVC and Garmin VIRB ELITE offer stabilization, but at a tremendous cost of resolution and color saturation. Slow-Motion/Overcrank Winner of the Slow-Motion/Overcrank Category - Sony AS100 It’s no surprise that the newer Sony AS100 wins in this category. Only Sony and GoPro offer high framerates of 120 or 240 frames per second, so only the Sony AS100 and the GoPro 3+ were tested for these features. Most every action sport benefits from slow motion, so with the ability of the Sony AS100 to sync up to five cameras with one button push, it makes for a wonderful mix of slow motion and normal motion possibilities. GoPro 3+ shoots 240fps with a resolution of 720 x 480 pixels and Sony shoots at 800x480 pixels. The Sony has been cropped to match the GoPro3+. Both cameras would benefit in their “pro modes” where GoPro offers up to 35Mbps and Sony AS100 offers 50Mbps in the semi-professional XAVC-S mode. However, since these tests are entirely “out of the box,” it was not appropriate to compare the slow motion at anything but the stock settings. Low Light Winner of the Low Light Category - Tie Between Sony AS100V and GoPro3+ This is a challenging category for most of these cameras. All of them have very small imagers and lenses that shoot at a very high resolution. Packing so many pixels onto very small surfaces means very little light can get into the individual pixel sensors and therefore, noise is usually part and parcel of for each of these POV cameras. GoPro offers the smoother color representation with slightly more noise. Sony is brighter with less noise, but a blue cast is apparent in both Sony cameras. The additional information in the 50Mbps file allows for a cleaner color correction, yet the smoother color in the GoPro 3+ means less need for color correction. Pushing the color in the GoPro3+ at 35Mbps brings up the noise pretty quickly, so if matching cameras is part of the workflow, beware that matching higher grade formats might be difficult. It’s a choice between removing blueish casting or a fair amount of noise reduction processing in the professional environment. On a personal note, I’d prefer to remove/reduce the blue cast. Watch the Low Light The table cloth in this image is purple, not black. The GoPro3+ (lower right) is smoother in its dynamic range but less accurate than the Sony AS100V (upper left). The GoPro Black at 16Mbps is quite noisy, while the Sony AS30 is clean, but also displaying a blueish cast. Extra Features Winner of the Extra Featured Category - Garmin Virb This category is easily earned by the GARMIN VIRB. With a cyclometer, heart rate monitor, GPS, ANT+™ wireless control (a wide range of remote and input possibilities), accelerometer, barometer, and a “skiing” mode that is a huge benefit to action sports enthusiasts, this camera is packed with features. In Skiiing mode, the camera knows when you’re engaged in your activity or not. It will stop recording when you’ve landed, stopped moving, etc. Unfortunately for skydivers, the camera senses aircraft movement as “sporting movement so in this mode, it will record the climb to altitude. For mountain-cyclists, this is a great feature. However, it’s also a battery-eater. Sony AS100 and GoPro 3+ also offer a plethora of features that advanced users will appreciate, such as higher framerates, controllable scenes, FOV adjustments, 24p, and other video-related features. Both Sony AS100 and ReplayXD Mini offer Timecode for multiple camera sync, logging, or reference video. Professional Codecs/Bitrates Winner of the Professional Codecs/Bitrates Category - Sony AS100V Both Sony AS100V and the GoPro 3+(Black) offer users higher bitrates and professional codecs for critical functions that will benefit the editing process during post production. Only these two cameras offer these features and although the unique features go beyond the scope of this review, I feel it’s worth of demonstrating what the differences look like. Not all video editing systems can manage these codecs. Professional video software has the necessary decoders yet even casual users can find free decoders on the GoPro and Sony websites. Apple FinalCut has issues with both the XAVC and Cineform codecs without downloading the decoder but again, every pro-level application can decode/read files generated by these cameras. Why would one want a higher bitrate, more robust codec? If color correction or compositing are to be employed to process the footage captured by these action cameras, it’s a good idea to have as much information in the file as possible. A higher bitrate provides more “bits” that the NLE can push around, and still retain quality. Watch the Codec Test Video This image is raw, no processes added. Keep in mind that when shooting high bitrates the camera is shooting flat, no internal color processing. In the upper right is a GoPro Black shooting standard bitrate. In the lower left, I’ve set the Sony AS 30 to “Neutral” so that there is no color processing. Pay attention to detail rather than color range. This is an overcast day, so there is no blue in the sky. In the next image, I’ll oversaturate and over luminate the image to better demonstrate how far the footage can be processed without falling apart. Here, an HSL filter has been applied. Note that the Sony AS100V in the upper left, and the GoPro 3+ in the lower right, best hold together. As subjective as this conversation is, most would agree that the AS100V at 50Mbps holds together better than its counterparts, although the GoPro 3+ at 35Mbps is very impressive. This is a very important consideration for professional users. To access high bitrates with the Sony AS100V action camera, a 64GB SDXC card is required. Smaller cards use the FAT format while the larger 64GB card uses EXFAT. EXFAT is necessary to access the PRO mode in the AS100V. The manual does not clearly state this, so beware. It actually took two calls to Sony technical support to realize this. Their own technical support team didn’t know the answer, probably due to the newness of the camera model. See the 4K video for more content and comparison. In Summary All in all, each of the action camera/POV camera products tested in this shootout did very, very, well and far exceeded the quality of cameras only one generation past. This shootout truly came down to a select few cameras though, and any one of the top five are excellent choices depending on requirements for form factor, image quality, post-production requirements, and high framerates. Not unexpectedly, the scoring fell very close to the price points of the cameras. Only the ReplayXD Mini was the surprise. Ultimately, it came down to a few things, all of them feature-related as opposed to picture quality related. Truly, there are so many offerings overall, it’s impossible to suggest that any one camera is significantly better than the others for overall use. My personal preferences come down to the Sony AS100V, it’s been called the “GoPro-killer” by many reviewers, but there is a reason everyone compares themselves to GoPro cameras; GoPro is a damn fine product. I don’t care for the GoPro manufacturer mounts, and mount stability is a very large factor in action sports, motor sports, and high-impact situations. The Garmin VIRB took me by surprise; the camera is the heaviest of the lot and has a terrible mount. It would be a terrific camera for most users if the mount was as stable as the camera itself. It truly feels like manufacturers pay almost no attention to the stability of the mounting system, and it’s for this reason that I didn’t use most of the manufacturer mounts (I was doing them a favor while also watching out for my own safety). Mounts aside, battery life aside, the VIRB is an exciting newcomer to the mix of cameras. Midland’s new XTC 400 really threw me for a loop, as the camera feels/looks cheap. Again, they have a horrid mount that is even more flimsy than GoPro’s mount. Yet the picture quality, price point, and ease of use make the Midland a wonderful choice for the budget-conscious sport shooter. Finally, Liquid’s EGO really is a delight. Yeah, it’s a pain in the ass to use when in the water housing, and it has a mount identical to GoPro, but it looks like a Minion. How can one just simply not LOVE a Minion? The record time makes this an all-day camera and given that it shares mount points with GoPro, a whole world of mounts are available for this fun little camera at the lowest price point in the mix (it barely made the review criteria). Final Standings: Sony AS100 74 GoPro Hero 3+ 60 ReplayXD Mini 1080 58 Sony AS30 53 Garmin VIRB 52.5 GoPro 3 Black 51 Drift Ghost S 49 JVC Adixxion 45 Midland XTC400 41 Liquid Ego 34 Polaroid XS100 34 All The Test Videos: Motocycle / Road Motocycle / Road Underwater Snorkel Underwater Snorkel II Underwater Snorkel III Wingsuit Overhead Wingsuit Exit Zipline Zipline II Bobsled Slow Motion Codec Test Low Light This Week in Photo 1st Runner Up GoPro Hero 3+ $399.99 More Information Winner Sony AS100 $299.99 More Information 2nd Runner Up Replay XD Mini $199.99 More Information New Action Camera Releases - Sony HDR-AZ1VR (Release Date: October 2014) - GoPro Hero 4 (Release Date: October 2014) About The Author Douglas Spotted Eagle (D29060) is a videographer/producer living between the world of professional production and skydiving. With more than 5000 skydives and 300 film/television productions, he loves playing with cameras and things that go fast. He is the managing producer and instructional designer at VASST, who will be releasing “ActionCam ClipFix,” an NLE plugin product designed for POV camera shooters. Thanks to Max at Mystic Mountain, John/Karl/Steve/Kenn/Ziggy at Skydive Elsinore, Pepper at Jamaica Snorkel, the Arizona Highway Patrol, Dropzone.com, Adam, Roger, and Nashie who helped make this review happen as smoothly has herding lenses can be. No animals alive or simulated were harmed in the production of this shootout/review.
 -
 Image by Vincent ReederDo you remember what it was like to go on a first date? Imagine inviting someone out that you felt was completely out of your league...beautiful, intelligent, witty - the whole package. I feel nervous just thinking about it. Naturally you'd want to leave a great impression. You hope that at the end of the night your date would say that it was the best date she'd ever been on. To reach this outcome, attention to detail is necessary. I'd wash my car, research restaurants to ensure the atmosphere was romantic, the food outstanding and the service excellent. Now visualize picking your date up. Think about how you feel physically: sweaty, nervous and a marathon-pumping heart rate. After you've practiced saying "Hello, you look beautiful tonight," (several times) you get out of the car, walk confidently up the driveway without revealing your internal emotions. Once she greets you at the door, your awareness levels are in hyperdrive - you notice everything in milliseconds - the way she looks from head to toe, how she smells… your subconscious notices what's behind her as she stands in the doorway. Is her place messy or neat? You take everything in. The emotions felt on a first date are how our students feel when arriving at the drop zone for the first time - out of their comfort zones, excited and nervous. Our students notice EVERYTHING from the moment they drive in to the parking lot until they've landed from their jump. As drop zone operators, we must remember that we are hosting the ultimate date - the opportunity to give someone a lifetime memory. Every detail on our date should be carefully examined - each customer point of interaction be brought to a five star standard. Our goal is to have our guests say that their experience was one of the best days of their lives. Bob Marley once sang, "You can't please all the people all the time…" No matter how hard we strive to exceed customer expectations, we will never be perfect. Smartphones have empowered consumers to become critics that effect how other consumers decide where to spend their money - with your business or with your competitor. When negative comments are posted about your business, how you react (or not react) can greatly effect the outcome. In this week's newsletter, we examine tips for handling negative feedback. 6 Strategies For Handling Negative ReviewsTip 1: Don't Knee Jerk The natural response when reading criticism is to immediately become defensive and type out a quick response. DON'T DO THAT. Sit with the criticism for a while and let the initial shock that you've been publicly called out, settle. The walls aren't caving in and some of the criticism may have merit. Try to be objective and own your part in the criticism. The biggest mistake is not making necessary changes to ensure a similar review doesn't pop up in the future. Tip 2 - Join The Conversation After you've calmed down, it's better to join the conversation than ignore it. Negativity breeds negativity and joining the conversation is better than allowing one person's views to rumble into an avalanche of criticism that becomes unmanageable and viral. It's best to be non-confrontational, non-defensive and act as a caring human being. Be calm in your response and say sorry if you need to. Introducing yourself and showing that you're a real person puts a face to a business as opposed to a corporate entity with a PR spin. Pick and choose your battles as well. If someone is a tyrant and is abusive... the general audience will be able to discern that. Tip 3 - You Don't Have to be Right Realize that you don't have to be right. People who spend a lot of time online are used to companies trying to spin everything into a positive. If you're wrong, it's okay to say you're wrong. No one is perfect and it can be refreshing to see some honesty. Acknowledge and see if it's possible to find resolution by contacting the individual directly. If you can convert a critic into a fan of your business, the word of mouth spread is far greater. Criticism and how a customer's complaints are handled can be very valuable in spreading goodwill about your company. Tip 4 - Don't Get Caught Off Guard If you haven't done this yet, stop reading this newsletter and do it now. (I'll wait here while you get this done). Go to Google Alerts and plug in your company name. If anyone mentions your company online, you'll at least be in the know. It's never a good thing to have an online war raging about your company and have no awareness that it's even occurring. Tip 5 - Never Go Into A Diatribe (This is Queens English for "Don't show your ass.") Let's suppose the criticism you've received is misguided and wrong. The most common mistake is how people respond by: a). working themselves into a lather and taking a hard stance defending themselves and b). write a long-winded response that only fuels the comment thread (we see it on a daily basis within the forums of dropzone.com). When responding, keep calm and carry on (even if you want to rip someone's head off) and keep it relatively succinct. Rehashing each detail of the customer encounter WILL fuel more commentary from those watching the thread unfold. Keep in mind, you're not responding publicly to an audience of a few - it could be a few hundred. No matter how right you maybe, acting indignantly will only turn many people off. Tip 6 - Don't Hide- Be Transparent Many companies delete negative reviews - particularly off of social media feeds. Deleting people's posts can cause rancor for those watching things unfold and they WILL CALL YOU OUT on it. The best course of action is to respond. Of course, there are some people out there ('trolls') who are looking for trouble and are looking to pick a fight.. when things get abusive, it's time to pull them off. The Realities Anonymity empowers people to say things they normally wouldn't in the presence of others. Showing you're human, interested in helping to solve a problem and publicly apologizing will usually diffuse most situations.
 -
 At 66 years of age and with a one year old hip replacement, it decided that it was time to upsize my main canopy. I currently jump an Aerodyne Triathlon 210, so I purchased a Performance Designs Spectre 230. I had heard good things about the Spectre, although I had not yet jumped a demo Spectre. Of course, I did not need any advice on how to use this canopy. I have almost 2300 jumps, a USPA Pro Exhibition rating, and have owned dozens of canopies. I thought I could land anything, especially my nice new big 230 square foot canopy. Little did I know that a "slightly elliptical" canopy would be so drastically different when making turns and in recovery than the more traditional Triathlons I have always jumped. So, my first mistake was that I never read the flight characteristics information in the sales literature, in particular, about the dive characteristics of this canopy. Many of the reviews said that the Spectre is described as “ground hungry”, and needs a deeper and faster flare to land well. My jumps on my new canopy: Jump #1: I tested my turns and my old style two-stage flares. Oh well. Not much of a stall. Maybe I just have to "learn" this new canopy. I used a straight-in approach on grass, but hit rather hard in very fast, sliding landing. Good thing the grass was damp. Jump #2: I decided to land into the pea gravel pit. A 10 mph crosswind at 45 degrees caused me to make a small correction on landing, then the wind side started to dive, a I pushed my flare, nothing, I hit hard, drove my right shoulder into the pea gravel pit, plowed a deep furrow through it, and went into a belly slide as I exited the peas. But this still counts for accuracy, right? Jump #3: After breakoff from a 15-way formation, and after too long of a track, I opened, and saw that I was rather far from the landing area. I decided to land in a small green field. I fortunately noticed the chain-link fence on all four sides of the field. Now I needed to burn off some altitude to get into this spot. I used one carving S-turn at quarter brakes, and then a last second turn to come straight in. However my canopy started to dive into the ground so fast that I never had a chance to get the “fast deep flare” that this canopy requires. I hit so hard that I caused six breaks in my leg and a partial shoulder dislocation. Rotor cuff surgery is now in my future too. It seems that in an stressful situation, I reverted to my old landing and flaring habits from my other canopies. So here are my comments and recommendation when jumping a new canopy (even when upsizing.) If most of your experience is on some of the more docile rectangular canopies, be careful if you change to even a slightly elliptical canopy, even if it is bigger. It will surprise you how differently it responds in turns, dives, and recovery. Bigger is not always enough to be better. (Sorry guys.) Read all of the reviews written about the canopy, and all about the flight characteristics. Talk to others who have owned one. Ask your Safety and Training Advisor and Rigger about the canopy and how it fits your style and experience. Open high and test everything you can up high. Practice steep as well as shallow turns. Test your flare and note the toggle pressure and location needed to find your stall point and "sweet spot". (Your brake settings may be different than on other canopies you have jumped.) Observe the dive speed and recovery traits at all brake locations, plan a straight in landing until you get experience, and that means more than one jump. Even if you have 2300 jumps like I do, read all of the articles you can find on canopy skills. At the very least, you will wind up with a checklist of things to look for to prepare for your first landings. In summary: I was careless but lucky. I have gone through many "could have - should have" thoughts, and offer my personal experience and observations as food for thought, and hope it may help others when changing canopy style or size.
 -
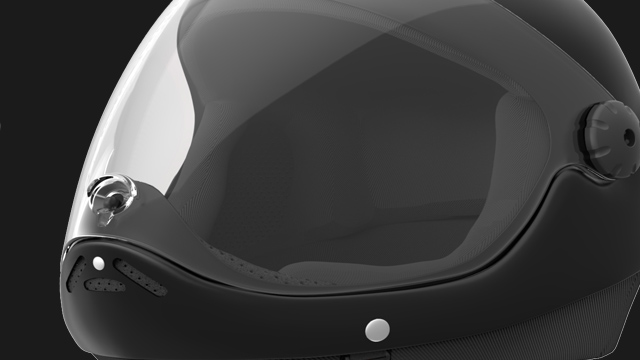 Parasport Italy recently released the latest addition to their gear products with the announcement of the Z1 SL-14 helmet. The Z1 SL-14 is the first of the company's products to use the much anticipated Skylight visor. One of the new features with the Skylight visor is the ability to rotate the flip-up visor to a point whereby it will go unseen, ensuring that it does not disturb your peripheral vision under canopy. The visor is made of injection molded polycarbonate and is both anti-scratch and anti-fog treated. Parasport Italy also put focus on the ease of use, and the Skylight visor has been made to operate easily with one hand, even while wearing gloves. The positive response to the previous Z1 helmet regarding the visor locking system has meant that while enhanced upon, the same concept is used for the Z1 SL-14. A wider face opening allows for enhanced peripheral vision, a clear field of view whereby the helmet does not distract, and makes for easier sight of the handles, as well as a better awareness of the environment. There have been numerous improvements made to the shell of the Z1, ensuring a stronger, more durable helmet, while at the same time focusing on comfort. The manufacturing process involved injection molding with high impact ABS, like that used in the building of motorcycle helmets. The method by which this injection molding takes place, ensures that the products are consistent and well built. The helmet also comes with an adjustable airtight collar which is made from soft anallergic polyester. A removable variable density liner ensures that the Z1 gives a comfortable fit, while also allowing one to easily set the size just by changing the liner. The collar system has been redesigned for a more comfortable fit than previous models, with more padding around the back of the neck. Similar enhancements have been made on the liner which has been redesigned to ensure even better comfort. There has also been an improvement with the airflow management, which the liner's new design helps aid in. A lot of focus was placed on consumer and industry feedback with the production of the Z1 SL-14. Such feedback is what brought the design of the Z1 away from the rear placed ratchet collar system that was found on the previous model. The new latching system makes it possible to close the collar around your neck and secure the helmet with the chinstrap buckle in a single movement. The chinstrap is adjustable to adapt the collar to the different shapes and sizes. Adjustment is needed just once (as shown on the drawing), after that securing the Z1 SL-14 is easy as pulling the chinstrap and closing the clip: no further adjustment needed. The helmet is designed to be light and aerodynamic, while still ensuring that it is of the highest quality and strength. Technical Specifications Integrated polycarbonate flip-up visor Unique practical and affordable visor mechanism Anti-fog, anti-scratch, sturdy replaceable visor Airtight collar, combined with safety chinstrap Interchangeable liner (can be washed in the washing machine!) Pouches on both ears to accommodate audibles Size is set by the liner. Available sizes are S, M, L, XL and XXL Available with IAS option to install the Skytronic GFX, the NeoXs or compatible audibles Available separately the beautiful protecting helmet bag
 -
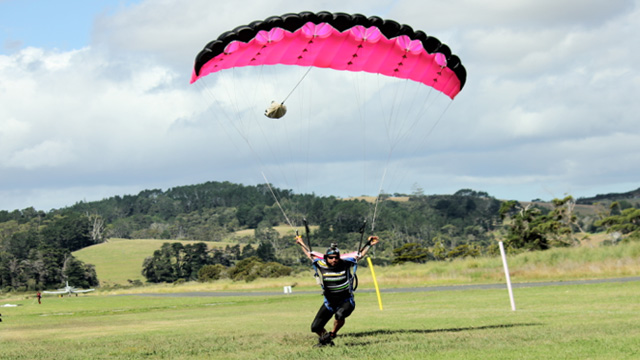 ConceptLeia is born from a simple idea: bringing the Petra technology to the open market! After bringing Petra to the CP competition scene three years ago, we have had many more orders than we could reasonably deal with. Everyone wanted one! But as I was going through the infamous ‘list’, I realized that about half were not the original target market of Petra. People were asking for bigger lines, insisted on a ZP version¹... They wanted the fun of it but were not planning to compete. It became quite obvious we would have to go back to the (computer aided) drawing board to infuse some of the Petra DNA into a more accessible canopy and create Petra’s little sister. She would have to fit in a small Freefly container and be jumpable every day and so we could see her first curves appearing: ZP No hassle Good openings She also needed to keep Petra’s epic flight characteristics such as a high roll rate, a very long dive, high harness sensitivity and the widest speed range ever covered by a parachute (Petra can fly with a tandem or a wingsuit without trims). The picture was getting clearer: High ellipticity Powerband² Steep trim Compact aspect ratio Development 1. BridgetWe first decided on a 7 cell format and we couldn’t wait to learn more so we cut two cells out of a big Petra. Bridget was born. This was a fun experiment but it wasn’t quite right. The aspect ratio was too small, the toggle range was weird and the flare wasn’t powerful enough. Why Bridget? In a nutshell, this prototype was a little frumpy looking, but still kinda hot! Her low aspect ratio gave her some luscious curves. And while we love curves, we reckon a sleeker wing might suit our purpose better for this project! 2. CandyWe gave it more thought (and more computer simulations) and used our secret recipe… a mix of science, beer, experience, overheating computers, head scratching, experiments, overheating sewing machines and beer. And finally went back to the dropzone with a much better design. We gave it a more reasonable aspect ratio and ditched the Mini Ribs³ that appeared useless on this type of design. She was awesome and the test jumpers were looking for excuses to keep jumping her. When they couldn’t find any more, they started fighting to get her in their personal rigs. And so she started to go around... a lot! We thought that was a good sign. She was truly flying like Petra so we thought about calling her Petra Lite but she deserved better than being her little sister forever. She needed a personality of her own to grow big in this world. We called her Candy, for her acid drop colors and sweeeeet openings. 3. LeiaWe knew we were onto something so we kept looking for things to improve. We changed the lineset, refined the panel designs, put more beers into it and made sure every detail was worth her surname... Here is Leia... We invited TJ Landgren, Katie Hansen and Nick Batsch to try it while they were visiting NZ this summer and they all loved it. Nick did an impressive 175m swoop on it on his first jump (nil wind and at sea level) confirming the awesome potential of the canopy! He didn’t say much straight away but his smile left us confident that she is better than any other ZP competition wing on the market. TargetWe said everyday, not everyone... Leia is a very high-end design targeted to the most experienced jumpers out there. The way we see it, Leia will NOT be the best choice for: First Crossbraced canopy Distance world record WingsuitingBut will be an awesome wing for: Awesome swoopers who want to fun jump, work and play with their canopy, and swoop the shit out of it too – competitively or not! Zone accuracy (currently tested by some of the very best pilots) Everyday canopy that flies similar to Petra to stay current while working Competition wing Mountain flying XRW Something you guys will come up with. Specs Cells: 7 Chambers: 21 Structure: Crossbraced Tip chord to Center chord ratio: 0.4 (!) Aspect ratio: 2.65 Wing loading: 2.2 to ? Features: No stabilizers, Integrated slider stops, Powerband², No Mini-Ribs³ Deployment system: Normal slider, RDS available on demand Materials: ZP (maybe a hybrid version later on) Lines: Black HMA 400 (maybe HMA 600 later on) Sizes: Any Price: The price hasn’t been decided yet but it will be around 3100USD. Availability: Leia is our current project and we are proud to share it with you but this is not an available product at the moment. We hope it will become available sometime in 2014 or 2015. 1. Petra is only made out of Sail fabric. This is a generic and misleading name for a range of Polyurethane coated nylons developed for paragliders. It gives more rigidity and a better controlled shape to the competition canopies thanks to its low stretch characteristics. Unfortunately, it also packs bigger and doesn’t last as long as our good old ZP (Silicone coated nylon) so it needs to be treated with much more precaution. To learn more about how to increase its life span, contact Julien@nzaerosports.com. 2. We call the Powerband the black part on the top leading edge. It is visible on Petra and makes it easily recognizable. It helps defining and controlling the shape better in this critical area where lift is created making a real difference in performance. 3. The Mini-Ribs are partial ribs covering about 20% of the chord starting from the tail. They allow better shape control on the tail and a sharper trailing edge decreasing the wake turbulence and form drag. This is a design feature commonly found on paragliders and on some wingsuits but Petra is the first parachute using it. Keep checking this space or our Facebook page to check the new stuff we are working on!
 -
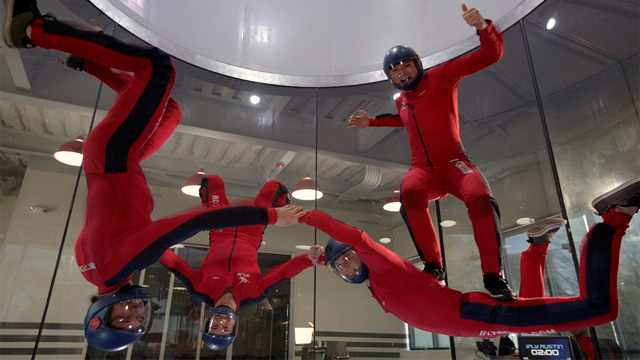 Image by iFly AustinWe would like to introduce the latest addition to Dropzone.com, our wind tunnel listings! We’ve been working hard at gathering information on all the active indoor skydiving venues from around the world, resulting in a list of 26 wind tunnels, spanning 12 countries, making it the most comprehensive and up to date list of vertical wind tunnels online.We have modelled the indoor skydiving section on that of our dropzone database, allowing you to review your experience, in turn helping others in choosing the best places to indoor skydive, and focusing on allowing you to quickly and easily find venues using GPS plotting. Users will be able to find detailed information about each dropzone in the listing, including time block pricing, training pricing, technical information and contact details. Indoor skydiving has become an essential part of competitive freefly training and continues to provide a platform for the evolution of body flight. With the continued growth of the sport, and the establishment of new tunnels, the future of indoor flying is looking extremely bright. We welcome and encourage users who have flown at any of the wind tunnels to submit a review of their experience. Should you know of a wind tunnel that is not listed in the database, you are able to submit a listing yourself, or contact us via e-mail and we will add the listing for you. Our database will continue to be built on and maintained by both dropzone.com and the respective owners and staff of the tunnels. If you are a staff member of one of the tunnels listed in our database, you can claim the listing. View Wind Tunnel Listings
 -
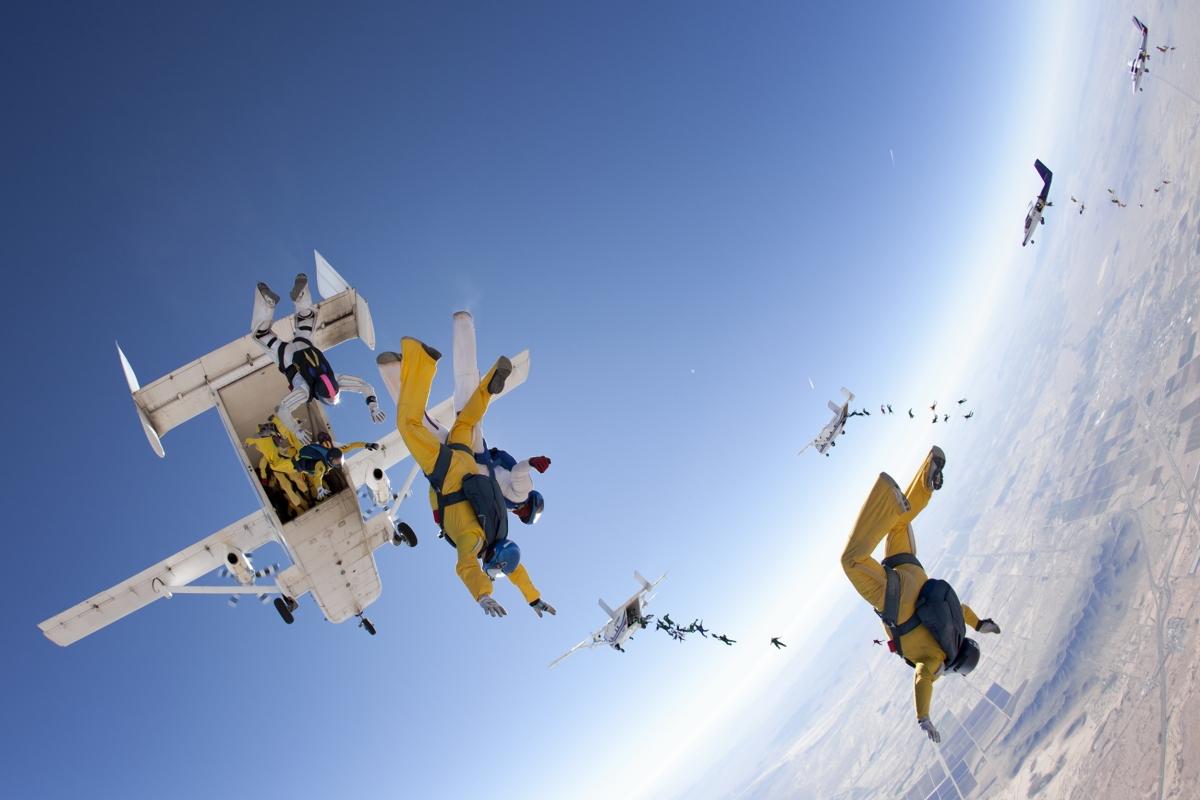 Photograph by Andrey Veselov/APAttempts are currently under way in Eloy, AZ to break the two point big way world record. The World Team has 222 skydivers from 28 countries are working hard at carving their names into the record books. The goal is an ambitious one with the previous world record standing at only 110 jumpers, so should the World Team successfully accomplish their goal, they will have more than doubled the number of jumpers on the record that currently stands. The event is being held as the 20th anniversary event for the World Team. Training jumps began already on Friday, March 28 when warm weather and a light breeze offered the jumpers near perfect conditions for the first day of training. The first training jumps consisted of 4 groups of jumpers, a base group of 42, along with three other groups of 66. Initial jumps were quite successful with the base group managing to complete four successful jumps, while the groups of 66 managed to perform three jumps with two complete sectors on each jump. The record attempt schedule set three days aside for practice, with record attempts beginning on March 31st. On the second day of training the bar was raised with only two groups being created, as opposed to the four groups that jumped on the first day. The formation practice was now done via the formation of a 90-way and a 132-way. Each group managed to make four jumps on the day and again progress was clearly evident, as the jumpers gave it their all. Safety is always of the highest standard during big way events, and despite the extremely skilled nature of the team, the demands that a large scale record attempt puts on the competitors make it easy for concentration to lapse. The practice days of the event seek to slowly build up the quality of the jumps and move the team closer and closer towards the final goal. The final day of dedicated training began with some reshuffling of the formation sectors. The 132-way group which was operating on a full base got some practice in on the mini base by downsizing to a 90-way group, while the 90-way group from the day before would spend some time getting practice on the full base as a 132-way group. Practice on this day was cut short by 30-knot winds at 1600'. Time that was lost in the sky was spent by the team practising their jump with some dirt dives on the grass. Earlier in the day the 90-way team was able to make a first point completion, but the 132-way team was still struggling due to difficulties with the base. Record Attempts BeginThe World Team began early on Monday, with a forecast for some less than ideal wind conditions later in the day. The plan was for a couple of final practice jumps in the morning before the record attempts would start, at around noon. The base managed to make two practice jumps, with only the Alpha team docking as one sector. The second jump provided a well established base and it was then decided for the record attempts to begin. The first jump would not seek for completion but rather aim to establish the build in stages. The base would complete and then allow the jumpers from the sectors to get into their quadrants and feel become comfortable with their position in the formation, there was no pressure for them to dock during this exercise. Unfortunately, as predicted, the wind did come up in the afternoon and cut the attempts short. The down time once again being used for dirt diving practice. Photograph by Gustavo Cabana/APImprovements were made on Tuesday, 1st April when the team began practising achieving the full 222-way formation. The first jump of the day saw the teams beginning some of the docking on the base, while the second jump saw a further improvements in the attempt. The third and final jump of the day was the most successful with the formation then nearing completion. The team would look to then, on Wednesday further the progress and attempt to make their first point. Once the first point is made, the sights could focus on completing the two point formation. It was an early start on Wednesday when the team began through first dirt dives just after 06:30 in the morning, but before being able to get into the air at the scheduled time of 07:00, low cloud came in and caused a delay to the progression of the record attempt. The teams decided that they would spend the morning period while unable to get in the sky, to practice with smaller groups, which would then take to the sky once the clouds had passed. There were some changes to the base in order to give the group confidence that they would have a solid base to build on. The first jump after the weather cleared would consist of the 42-way base which would be docked on by a further 66-way group. This jump was extremely successful with the base building quickly and the remaining 66 jumpers slotting into position with good form; a 108-way formation was done to perfection and eyes then turned to the ultimate goal of completing the 222-way. Photograph by Andrey Veselov/APThe second jump of the day saw all 222 jumpers and come very close to completion. One of the sectors were complete while another fell just short. Overall things were very close, and hopes turned to being able to complete the formation and break the record later that day. Unfortunately however, the weather once again hampered proceedings and high winds meant that it would be the last jump for the day and attempts would resume on Thursday. Tragedy StrikesOn Thursday, 3 April 2014 the atmosphere in the camp changed dramatically. Early in the morning one of the Diana Paris of Berlin, who was participating in the event suffered a malfunction. Paris, aged 46 was declared dead on the scene after her parachute was released too low, and unable to open fully prior to impact. Diana Paris was an experienced skydiver with over 1500 jumps. The team honored Paris later in the day by performing a "man missing" formation. The team have also decided that out of respect, they will not be replacing Paris for the record attempt, and instead will be aiming for a 221-way record instead of a 222-way. Despite suffering the loss of Paris, the team are still motivated to accomplish their record on Friday, the final day of the attempts. The Final DayThe World Team returned to the record attempts on Friday morning, but were unfortunatly unable to complete the FAI sanctioned world record. Things were looking solid at the end and the team came extremely close, falling only two skydivers short of the record, with them being unable to link. As such an unofficial record of a 2-way 219-way skydive was achieved. Information sourced from The World Team Blog
 -
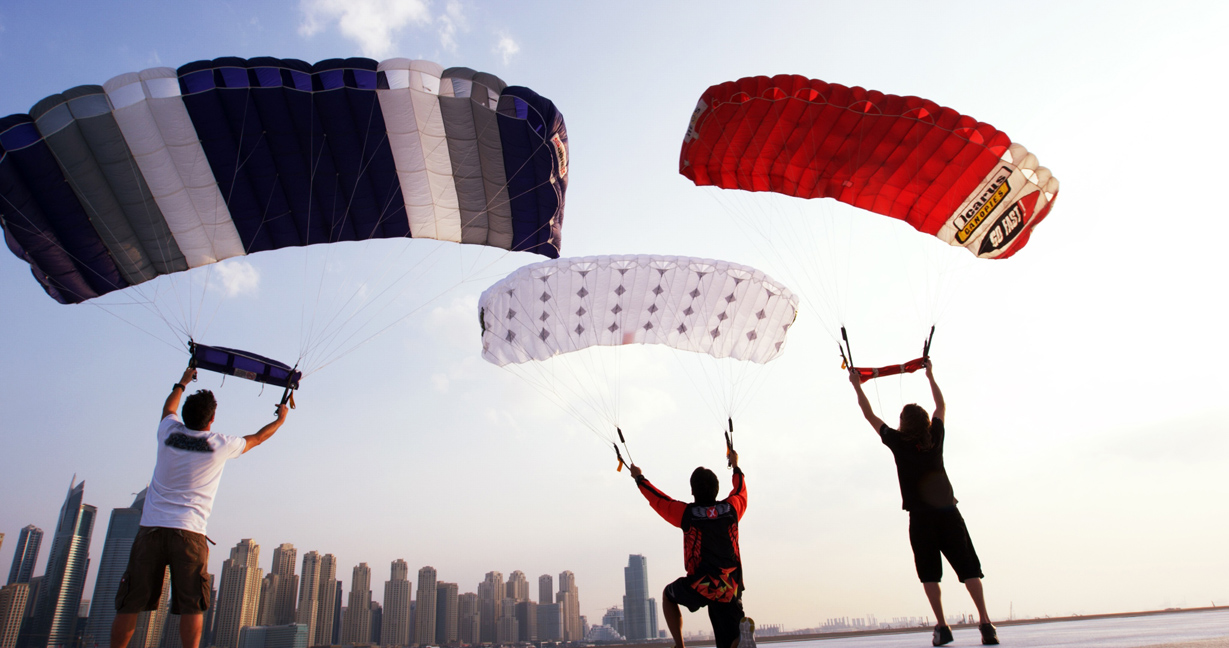 Dubai, UAE, 2nd April 2014 – Extreme Canopy Flight (XCF) is Skydive Dubai’s vision of making skydiving history by setting new limits for human flight by breaking the Guinness World Record for the smallest parachute jump. With the support of Emirates Aero Sports Federation and Skydive Dubai, Project XCF’s training and record attempts are going to take place at Skydive Dubai the Palm Dropzone in Dubai on Saturday 5th April from 3 – 7pm. The record breaking attempt is going to be performed by extreme athlete Ernesto Gainza, a test pilot for NZ Aerosports and Icarus canopies and professional stunt man with more than seven thousand skydives. The project will be documented from inception to successful completion. XCF jumps are all performed under highly experimental conditions and using specially designed prototype equipment. Currently expert skydivers use parachutes that range in size from 80-200 square feet and over the last decade the development of high-performance canopy sizes have averaged between 70-90 square feet. Ernesto aims to land a parachute of 35 square feet, less than half the size of the smallest parachutes currently being jumped. With the significant reduction in size the opening, flight and landing characteristics change dramatically resulting in a spinning malfunction which could cause an almost instantaneous loss of consciousness, as such Ernesto needs to have the right mental and physical preparation to be able to react decisively to any situation. Across the global skydiving community, a very small percentage of competitive canopy pilots have the skill to fly these canopies successfully. Ernesto Gainza stated, “Project XCF is the product of a man’s dream to fly and land the world’s smallest parachute. Regardless of the size of the challenge, a dream will always be a dream if there is no determination to make it reality.” The current unofficial record for the smallest parachute landed is held by Luigi Cani who jumped a 37 square foot canopy on January 1st 2008. Luigi was the inspiration for this project. Skydive Dubai provides a platform to fulfill dreams. In addition to granting Ernesto’s dream of breaking the world record of XCF jumps, Skydive Dubai will also be granting the wishes of three kids with incurable diseases through their collaboration with The Make-A-Wish Foundation® United Arab Emirates, an international non-profit organization with 38 active offices dedicated to fulfilling the wishes of children with life-threatening medical conditions. The event on Saturday 5th April is open to all who wish to come and see history being made. The day will be filled with a lot of entertainments for all ages. About Skydive Dubai SKYDIVE DUBAI, the world’s premier skydiving location, is located in the heart of Dubai city. It is operating in two locations The Palm Drop Zone, which has as area size of 260,000 and runway size of 60m x 700m, and Desert Campus Drop Zone. Skydive Dubai offers tandem jumps, training for athletes and courses for beginners and experienced skydivers. Both drop zones observe the highest standards in safety under the regulations of The International Air Sport Federation (FAI). All skydivers are fully accredited by the United States Parachuting Association (USPA) and The Emirates Aviation Association (EAA).
 -
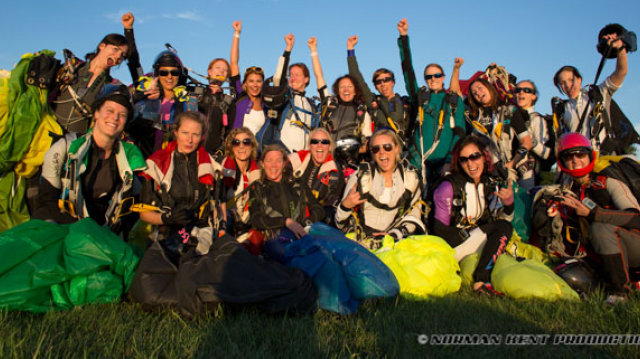 In celebration of women’s history month we decided to take a look at the role of women in the history of skydiving. Although only about 20 percent of all skydivers are female, women have been there right from the start, conquering the skies alongside their male counterparts. As soon as man figured out how to fly, he also had to find a way to save himself if something goes wrong with his flying device; which is why the first parachute jumps were all done from balloons. Some women made a living from parachuting in the early days, doing it not only for the thrill, but also to entertain the crowds. First Female Parachutists Jeanne-Genevieve Garnerin, wife of Andre Garnarin, inventor of the frameless parachute and avid balloonist, was the first woman to descend under a parachute. She did this on 12 October 1799, from a 900 meter altitude. Jeanne continued to tour with her husband in France and all over Europe, completing many balloon ascents and parachute descents. The bug also bit her niece, Elisa Garnerin, who started flying balloons at only 15 years of age and completed 39 professional parachute descents between 1815 and 1836. Kathe Paulus was another woman who had a great impact on skydiving as we know it today. In collaboration with her husband, Lattermann, she developed a parachute prototype to make their balloon flights safer. This was one of the first inventions of a collapsible parachute – the parachute was folded and packed into a bag. Unfortunately Latterman died trying out their invention when his parachute failed after jumping from a balloon, but Paulus made it to the ground safely. She improved the invention and made good money from sales during WW1, although she lost her fortune later because of inflation. By August 1914, Kathe Paulus had made about 70 exhibition descents in her safety device. Kathe Paulus on a balloon flight Jumping from a Plane Georgina Ann Thompson, known as Tiny Thompson, became the first woman to parachute from a plane on 21 June, 1913 over Los Angeles. Georgina was destined for a life of poverty, working 14 hour days in a cotton mill before skydiving changed everything for her. She got married at age 12, became a mother at 13 and lost her husband soon thereafter. Georgina was 15 when she first saw Charles Broadwick’s famous parachute show and felt so inspired she insisted on joining his troupe. She soon earned the nickname “Tiny Broadwick” or “Doll Girl” because of her small size and was a great hit at the carnivals. Dressing up in ruffled bloomers, pink bows and ribbons in her hair, Tiny drew large crowds everywhere she went with her daredevil manoeuvres. She was soon approached by famed pilot, Glen Martin, who wanted her for his airplane shows. Charles Broadwick developed a silk parachute for Tiny, which was packed into a knapsack attached to a jacket using harness straps. A string was woven through the canvas covering of the parachute and attached to the plane’s fuselage. As soon as she jumped, the cover would tear away and the parachute would fill with air. For her first airplane jump, Tiny sat on a trap seat, outside the cockpit and behind the wing. The parachute was on a shelf above her. Glen Martin ascended to an altitude of 2000 feet, where Tiny pulled a lever, allowing the seat to drop out from underneath her. The parachute opened up and she floated down gently, landing in Griffith Park. Tiny later also became the first female parachutist to land in water. In 1914, during a demonstration jump from a military plane that went horribly wrong, Tiny became the first person to do a planned free-fall. During this jump, the line of her parachute became tangled in the plane’s tail assembly. The wind was whipping her around and it was impossible to get back into the plane. Tiny however kept her cool and decided to cut all, but a short piece of the line and plummet toward the earth. Pulling this line by hand, she freed the parachute to open up, demonstrating the principle of the rip cord. By surviving this accident, Tiny showed that it wasn’t necessary for a parachute to be attached to a plane in order to open it. It was possible for a pilot to safely jump from a damaged plane. Georgia Thompson (Tiny Broadwick) Through WW1, Tiny worked as an advisor for the U.S. Army Air Corps. During her life, she made over a 1000 jumps from planes and survived several mishaps. She once ended up on top of a train; got tangled up in a windmill as well as high-tension wires. Despite suffering numerous injuries during her career, she lived a long and full life, dying at age 85. Women in Skydiving Today 63-Way Head Down Women's World Record Ever since the first female pioneers made their first jumps, women have been setting new records in skydiving. We decided to compile a list of some of the most impressive female skydiving achievements to date: A new world record for the largest female head-down freefly formation was set in 2013 in Arizona, where 63 women linked arms for a minute and a half to hold the formation. The women ranged in age between 20 and 52 years old and reached speeds of over 165 mph as they were falling upside down, head first toward the Arizona desert. Participants came from the U.S., Canada, Mexico, England, France and Russia. The world record for the largest all-female skydiving formation is held by 181 women from 31 countries and was set in Perris, California. With this feat, the women managed to raise over $900,000 for the fight against breast cancer. This record will be challenged in October 2014 when an attempt is made to exceed 200 jumpers. U.S. skydiver, Cheryl Stearns, holds the record for the most parachute descents by a woman, with a total of 15,560 in August 2003. To date, her total amount of skydives has exceeded 18,000. She is also the Guinness World Record holder for the most jumps in 24 hours by a female skydiver, with 352 jumps in 1995. The oldest person to have done a skydive jump is Hildegarde Ferrea, who was 99 years old when she did a tandem jump in 1996, at Dillingham Field in Oahu, Hawaii. 181-Way Women's World Record Conclusion Skydiving is a sport where female skydivers may be in the minority, but looking back in history we see that women have played a very important role through the years, directly and indirectly to help develop the sport to what it is today. We expect that this is also how it will be in the future and look forward to seeing more achievements and inventions from the fairer sex.
 -
 The Genting Wind Tunnel blows at 193 KPH (just barely 120 MPH). As most Skydivers know this isn’t really practical for some serious advanced flying. To be totally honest the Skyventure Genting Wind Tunnel is not the strongest. The Perris Valley Wind Tunnel is definitely stronger. For Skydivers out there who want to use it as a serious training device, don’t. While it is possible to do some Free Flying such as Sit Flying and Head Down this can be done but the Skydiver must be very experienced, very light and have a very baggy jumpsuit. The bigger and heavier folks are better off just belly flying and improving whatever they feel fit and needs working on. You will get more value and bang for your buck focusing on Belly Flying rather than struggling to get your Sit Fly airborne.
 -

-
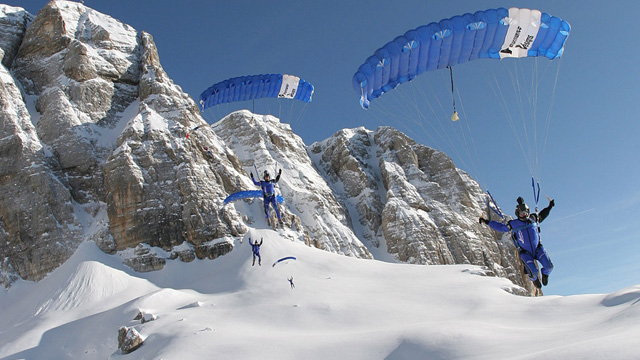 Flight-1 is the world leader in canopy education and progression. From novice pilot through the upper echelons of competitive canopy piloting, Flight-1 has a course that fits every skydiver’s skill set and learning objectives. Flight-1’s courses are set apart from many other canopy courses by the fact that they have been developed by members of the PD Factory Team, which has some of the world’s best canopy pilots and the most experienced canopy coaches involved. If you have any doubts about the skills possessed by the PD Factory Team, taking a look at the video of the “Threading the Needle” stunt they performed last October will show that you’re in the best hands. For years Flight-1 has offered a curriculum for group coaching in canopy handling skills. Their curriculum provides a clear progression for skydivers of all experience levels to continually learn and improve from basic to expert canopy handling skills. Flight-1 courses have been extremely popular over the years and shown great success. Flight-1 have just added 5 new course modules (103 / 201A / 202A / 301 / 302) Airmanship (103): This course follows on from their course 101 “Flying The Modern Wing and course 102 “The Canopy Performance Range”. In “Airmanship” Flight-1 will focus on bringing the skills skydivers have developed into what would be considered a general skydiving environment. The course will revolve around the fundamentals of the skydiving environment, managing the variety of skydivers on a jump to understanding the dropzone environment. It also includes discussions on canopy choice, equipment malfunctions, and avoiding and successfully dealing with canopy collisions. Modules 201A and 202A, “Flying Relative” and “Team Flying” respectively; are designed for individuals that are looking to hone their canopy skills and further develop comfort in flying around other parachutes. Flying Relative (201A): This is the first step in the Flight-1 Air to Air Program. After a safety briefing, the student is introduced to flying relative to another canopy piloted by the coach. Here the pilot learns the true reference of how canopy controls affect the system relative to each other in a one on one environment with an experienced coach guiding them through the jumps. Team Flying (202A): This course leads the student into dynamic team flying and landings. It builds on relative flying, teaching the student advanced dynamic formation flying, turns and landings. The "ultimate wind tunnel" for canopies. The final two courses currently being offered are Precision Performance (301) and Competition Canopy Piloting (302). Precision Performance (301): This course is targeted towards experienced pilots who want to develop their turns and high performance landings. It introduces a logical progression toward increasing power, bringing accuracy into the landing, and preparing to navigate courses and gates. Competition Canopy Piloting (302): This, the course covers the fundamentals of competing that all skydivers need when new to the competition environment. It helps the pilot focus on what is important and how to manage personal skills and tactics to ensure best performance. Flight-1 courses will now be open to more skydivers, as they have decided that while still firmly believing that the best approach is to go through the curriculum in order, the real importance is ensuring that education opportunities be maximized. So long as a skydiver has met the requirements listed below, they will be able to attend the course. Flight-101: Cleared to self-supervise Flight-102: Attended 101 Flight-103: Requirement - B license Recommendation - Attended & completed Flight-1 101 & 102 Flight-201: Requirement - Min of 200 jumps Recommendation - Attended & completed Flight-1 101 & 102 Flight-202: Requirement - Min of 500 jumps Recommendation - Attended & completed Flight-1 201 Flight-201A: Requirement - Attended & completed Flight-1 101 & 102 Flight-202A: Requirement - Attended & completed 201A Flight- 301: Requirement - Min of 500 jumps OR CP Competitor in the last year Recommendation - Attended & completed Flight-1 201 & 202 Flight-302: Requirement - Min of 500 jumps OR CP Competitor in the last year Recommendation - Attended & completed Flight-1 201 & 202
 -
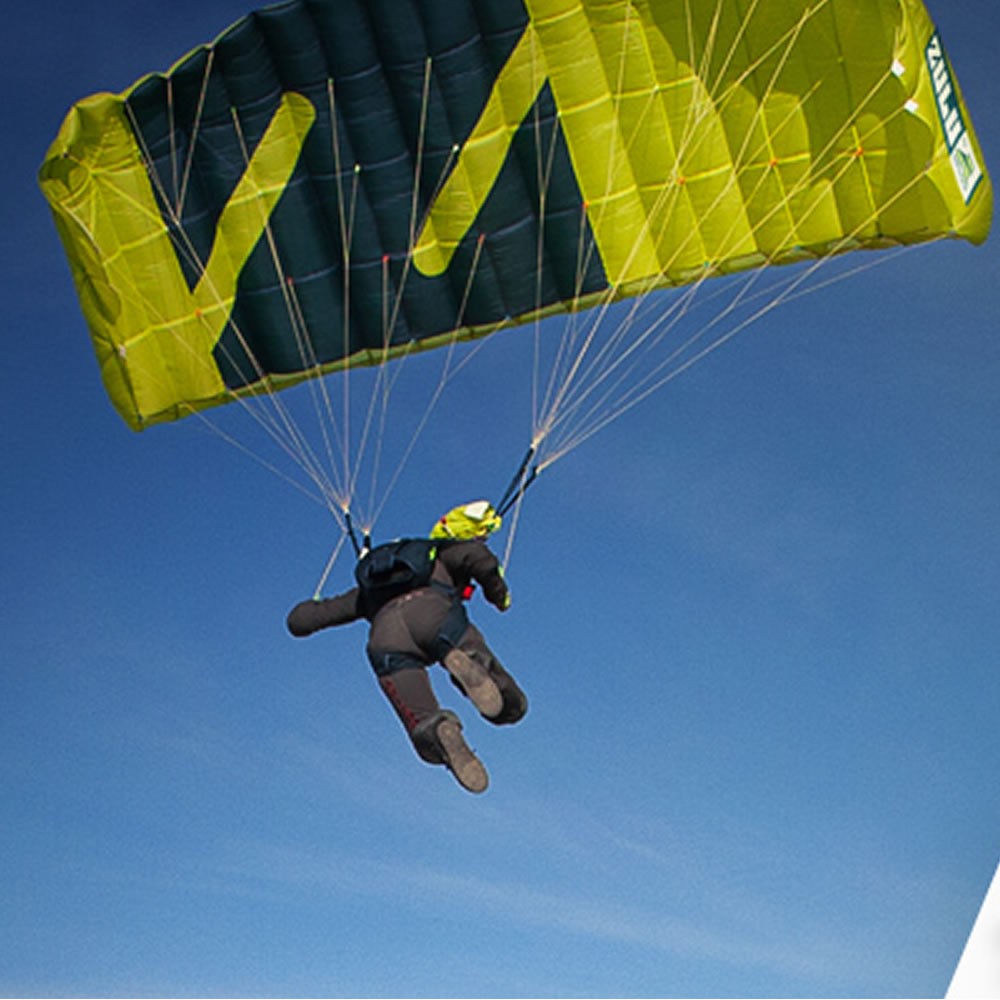 The Zulu is a fully elliptical, non cross-braced canopy. Quite a bit faster and more aggressive than our Pilot, but very well mannered.. Great openings, very fast turns, powerful bottom end flare..
 -
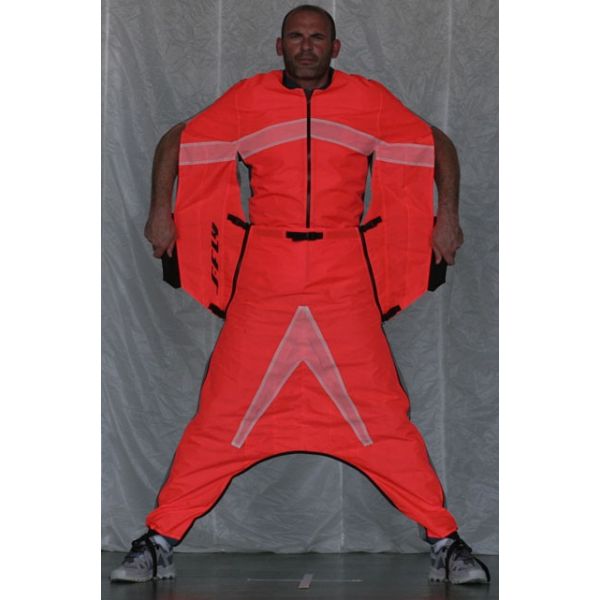 S-FLY ACCESS is a 2 parts wingsuit : a Jacket and a Pant. Only few minutes are necessary to gear - up before to jump! The arm wings inflate and create a "leading edge" from the shoulder to the elbow. Arms are free from the elbows to the hands. No booties : it brings a total ease. Movements inside the aircraft and during landing are easy. You can come back to a classic free-fall position when you want! S-FLY ACCESS is a perfect choice for people who want to start to fly a wingsuit or are looking to explore different way to fly it (back fly, loops, figures) while having a very high effectiveness in term of glide ratio. For Base-Jumpers, it leaves your arms free permanently so you can reach your toogles and risers and decide to use or not the wing… Invaluable solution !
 -
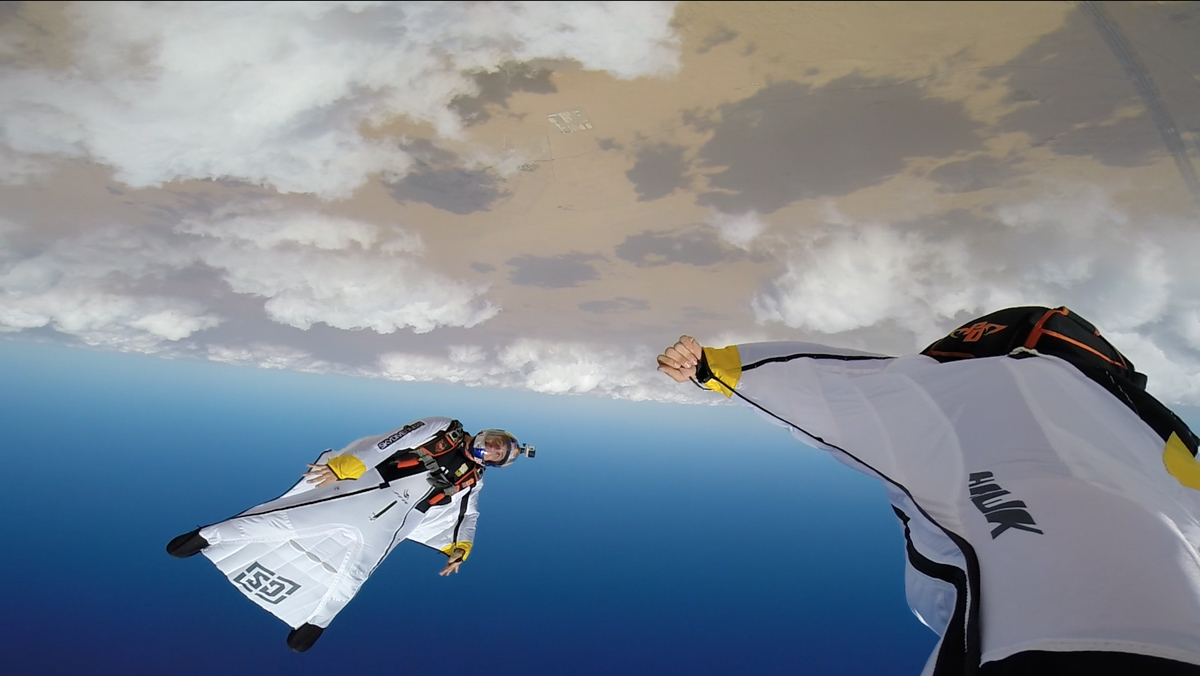 With the Hawk, the S-Fly team were looking to design a suit that maximizes manoeuvrability and agility in the skydiving and BASE environments. By maximising the pilot’s abilities to perform rolls, flips and precision carving from both back and belly with smooth transitions, the Hawk allows the pilot to creatively express their flying style. While extremely maneuverable, the Hawk still provides the lift and power while flying on your back or belly, to allow dynamic acrobatics without dropping out or sacrificing excess altitude. The result is a really fun, very fast and powerful freestyle acrobatic wingsuit designed for intermediate to expert level pilots. The DesignThe high performance and maneuverability of the Hawk was achieved by building upon the already successful Verso platform. S-Fly increased the surface area of the arms, extended the leg wing, adjusted the profile and sweep of the arm wing to maximise speed. Additionally, in classic S-Fly style, there are no grippers allowing free wrist and hand movement. The inflation and pressurization of the Hawk is where the guys at S-Fly feel the suit really stands apart in the modern wingsuit market. The suit remains inflated while transitioning through all maneuvers and positions, but with a smooth unhindered feel. This smooth and consistent inflation of the Hawk is powered by the specific design and placement of the inlets and the four independently fed elements of the wing. The AirfoilThe Hawk’s arm and leg wings are fully pressurized in flight. The two arm wings are fed by wide mesh valves located along its leading edge. The leg wing is fed by three pronounced and reinforced inlets located on the front and three on the back. This system ensures optimum distribution and pressurization while minimizing drag in all positions. The “body” is comprised of a single cell that runs from the chest, down the circumference of the legs and to the ankles. The “body" is an evolution of the original mono-wing design from S-Fly. Through the extensive testing phase, it was found that this design allows unique and total freedom to move the pelvis, giving the pilot unencumbered and precise lateral movement without compromising performance. Through the mesh valves located on the arms, and two inlets placed high on the back, the “body” is effectively inflated while flying on the back and belly. The Hawk is constructed with Parapack light which is much lighter, has the same aerodynamic properties and is equally durable to normal parapack. The suit is surprisingly light and strong the fabric feels and how much faster it feels in comparison to other fabrics used during the prototype phase. Options *Quick Zip Cut arm wing release system Textured BASE soles Chest zipper port for camera access Fast leg zipper opening strap
 -
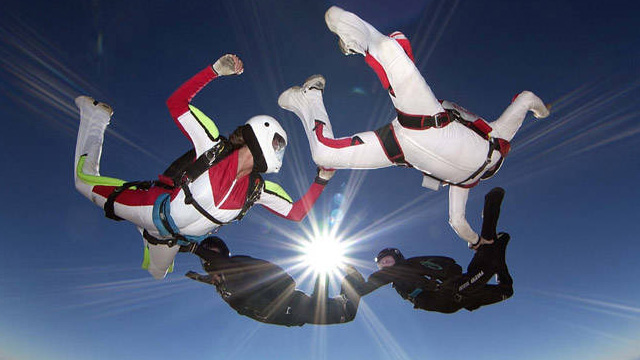 Image by Mike McGowanIn skydiving, knowledge is not only power but can also be the difference between life and death. Being educated on how to handle each situation you may find yourself in is of vital importance and you should never stop learning. No matter how sure you are of your abilities and your safety procedures, there's always room to improve. We encourage everyone to attend safety and training courses that will allow them to further develop your skills, while at the same time improving your safety. Fortunately for those looking to learn, we have a network of extremely skilled and trusted skydivers, who over the years have provided us with some truly excellent articles on matters of safety. With it being Safety Month, we thought that we'd compile a list of 10 of the best safety related articles we've published on Dropzone.com over the past 12 years. Read and share! Flying and Landing High Performance Parachutes - by John LeBlanc Downsizing Checklist - by Bill von Novak Cleaning Up Your Turns - by Brian Germain Another Look At No Wind Landings - by Scott Miller The Horizontal Flight Problem - by Bryan Burke Collapses and Turbulence - by Brian Germain Line of Flight Explained - by Melissa Lowe Exit Separation - by JC Fallo Ten Things That May Keep You Alive - by Bill von Novak Do Skydivers Care About Safety? - by Bill Booth
 -
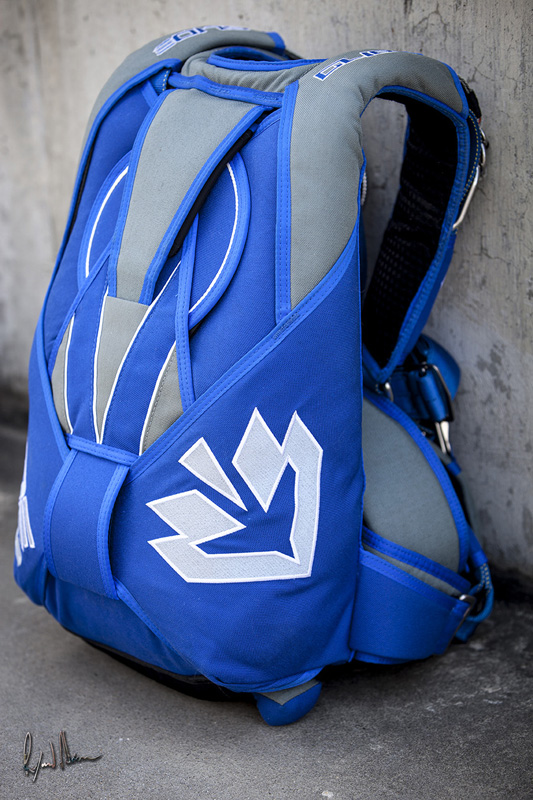 This harness/container system has everything. Reliable function, saftey, comfort and style. Our new reserve container design has excellent coverage/containment as well as outstanding emergency deployment characteristics. Our new “wrap around-style” design provides for perfect staging of reserve deployment while having significantly reduced container restriction forces in the event of a total malfunction. ‘Up tuck’ style secure main pin protection with modern main bridle routing, virtually eliminates main bridle piercing and provides for superior main pin protection in all genres of flying. All new custom design capabilities with our optional 3 or 5 stripe mid flap designs. Custom color embroidery is available Standard Features: Type 8 or type 17 main risers with NV toggles Reserve static line (RSL) Fit Right Soft Cutaway and Reserve Handles Custom Handle Pockets Reserve Pilotchute Freebag and Bridle BOC hand deploy pc kill-line with NUB freefly handle or hacky Main Deployment Bag Stainless Steel Hardware Fully Articulated, 4 Ring Harness (hip and chest rings) Kush or Spacer foam backpad/leg pads Pinstripes 3 or 5 Stripe Midflap Design Option Magnetic Riser Covers (tuck tabs still available) Ballistic Main Container Corners Options: ACE RSL (MARD) STEALTH Package (All black SS hardware, black housings, black pilot chute mesh, black reinforcement tape) BLAZE Bag (Semi-stowless main deployment bag) Specialty Kryptek Fabrics (Typhon, Raid, Mandrake, Highlander) Specialty Multicam Fabrics (Multicam, Multicam Black) Custom Embroidery Contrast Stitching Split Rig Design Wingsuit Option (Unboxed main container tray, extended bridle length, open mesh pilot chute with carbon fiber handle) Comp Swoop Risers (low drag risers, comfy dive loops, custom length) Custom Quilted Backpad/Leg Pads
 -
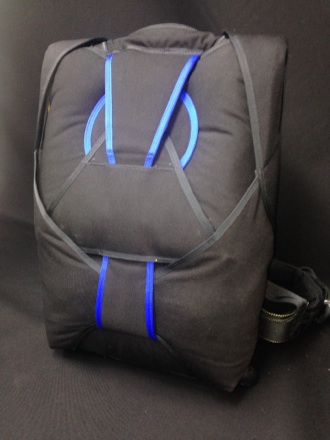 Standard features: Type 8 main risers with toggles (velcro or velcroless) Reserve static line (rsl) Aad ready Reserve ripcord (d handle) Reserve pilot-chute Free-bag and bridle Boc hand deploy pc with pvc handle Main deployment bag Safety stow Cadmium hardware Standard mlw (no articulation) Reserve toggles Packing data card Main closing loop Reserve closing loop Logo Options: Kill line main pc with hackey Type 17 main risers Kill line main pc Hackey pc handle Adjustable main lift web Custom logo Custom color panels Only available in 4 locations (see order form) Average delivery time: 3-4 weeks The most cost effective harness container system on the market. We have made some significant upgrades to our products and we are launching the triton harness container as our modern replacement to the dolphin. This is our most cost effective sport system utilizing modern materials, construction and features. Its been updated and upgraded making it a “no brainer” for those that need excellent quality, an affordable price and speedy delivery. The Triton harness/container system is only available in black 1000d cordura, with color options in 4 locations. Custom color embroidery is available Delivery times are about 3-4 weeks
 -
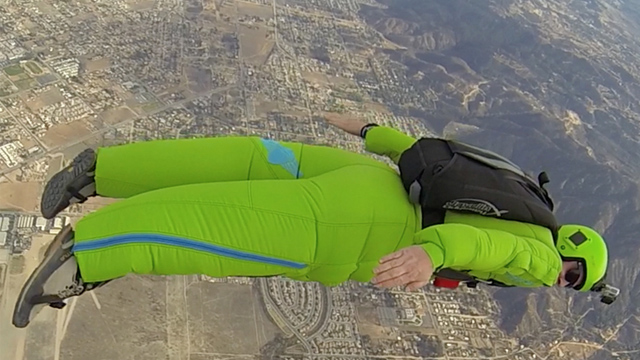 Squirrel Wingsuits have just released the latest addition to their inventory. The SUMO is a tracking suit, the first to be manufactured by the company. The suit is aimed towards both BASE jumpers and skydivers, and catered towards all levels of experience, from beginners through to advanced trackers. It was the decision of Squirrel to opt for a 2-piece tracking suit system as opposed to a single piece suit, aiming to bring the comfort and ease of use found in 2-piece systems while providing the performance of a 1-piece suit. The driving concept behind the SUMO was for a tracking suit that balances both volume and stability, while making internal pressure and quick inflation vital points in its design. The SUMO has an included “No-Wobble System” which secures the pants to the knee area. This feature, which can be toggled to be active or inactive, helps prevent movement while tracking, giving you better performance and is recommended for proximity BASE jumps, multiways and flights that demand only the best performance. It is attached to the area using Velcro, which can then be easily left unfastened, should one not wish to fly with the No-Wobble system. The suit is tapered slightly from waist to ankle, to increase the ease of handling. It is also quick to inflate after exit and is said to provide excellent forward speed with simple and intuitive control. Squirrel have built the SUMO tracking suit with the same high standards that have made their wingsuits such a success. It is highly advised that BASE jumpers first practice jumping with the SUMO from by skydiving it until they have become comfortable with the way it flies. SUMO Tracking Suit Features Force FeedThe majority of power in a tracking suit comes from the pants, and the SUMO benefits from an array of mylar-fed inlets which rapidly inflate and maintain pressure inside the suit. Quick StartsThe SUMO's oversized arm inlets provide immediate control after exit. Upper arm inlets allow early inflow after exit, and the shoulder inlets maintain pressure in flight, through all angles of attack. No-WobbleInside the pants at the knee, Squirrel have added a Velcro enclosure which anchors the pants to your leg, reducing pant-leg wobble and increasing control and performance. This is one of the most crucial features of the SUMO, giving the pants a more precise and solid feel when maneuvering in high speed tracks. Air-TightA high collar, cinched wrist, and extra-long torso help in reducing leakage and maintaining jacket pressure. Plenty-PocketsThere are four zipped chest pockets which provide plenty of space for phones / emergency electronics / gear storage, and the jacket is lined with airmesh and lycra/fleece for comfort and structure. ReinforcedThe knees of the SUMO are heavily reinforced with Cordura, with 5mm of closed cell foam padding for protection and structure. Toe-TensionThere are three toe-tension settings available , which use a lightweight and simple buckle/strap adjustment to maximize fit performance. ZipsHighly durable and custom colored 10C YKK zips run up both legs.
 -
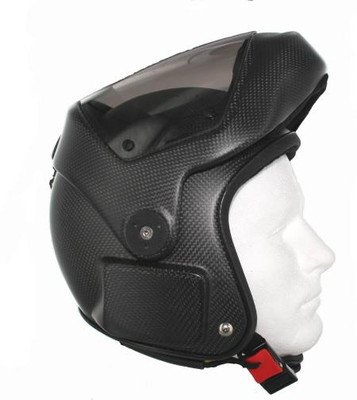 Introducing the second generation of The REvolve! After great success with the REvolve full face helmet released in 2010, we are thrilled with the completely redesiged of the Rev2. Starting with a high-end vacuum molded carbon fiber composite shell, the Rev2 has eveloeved with features that include a 2mm molded lens (avilable in tinted grey), GoPro mounting options, side mounting options, a two point cutaway system that comes standard, dual audible ports with an audible window and an improved field of vision. The Rev2 offers the same great features that made the REvolve so popular including the unique flip-up feature that allows the entire face to flip open leaving you with high peripheral vision when the helmet is both open and closed and the superb locking mechanism enables the face shield to easily rotate over the top of the helmet with the push of a button, making this helmet the perfect option for freeflying, RW, the wind tunnel - however you choose to fly! The Rev2 allows you to have an open face and full face helmet in one while giving you the comfort of knowing that you're safe having cameras on your head that you can get rid of in an emergency. In addition, we designed this helmet to accommodate glasses, large heads and odd shaped noggins! Sizes: Extra Small - Up to 21.75" Small - Up to 22.25" Medium - Up to 22.50" Large - Up to 23.00" Extra Large - Up to 23.50" Extra Extra Large - Up to 24.00"
 -
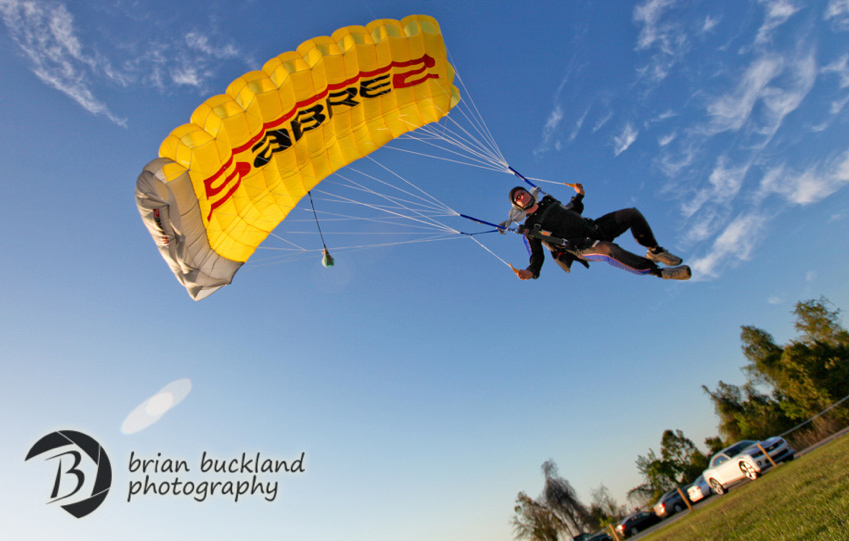 At the end of the day, skydiving is a dangerous sport. I’ve lost many friends and even family members– under properly functioning parachutes. We can’t regulate stupid behavior, but we can at least spread good information so more people can make wise decision. So why would someone consider upsizing? 10. Cannot land consistently standing up. If you’re having troubles standing up consistently or even in the same area in all weather conditions, then you need to upsize and take a canopy course to understand the concepts basic flight characteristics. 9. Not current. You can be uncurrent after a winter vacation without skydiving, coming off an injury or just life getting in the way. According to USPA, you are uncurrent if: A-license holders who have not jumped within 60 days B-license holders who have not made a freefall skydive within the preceding 90 days C- and D-license holders who have not made a freefall skydive within the preceding six months DZ policy: Every DZ has their own policy for uncurrent skydivers. Be sure to check in with them before coming out to the DZ to see what you may have to do. Also check the USPA Skydiver’s Information Manual for more info. 8. Jumping at a Higher Elevation. At higher elevations the canopy is going to perform faster and act more responsive because of the air being less dense. So landings will feel faster and turns will feel more aggressive. If you’re traveling to places like Colorado or Utah, you may want to pack a larger canopy. 7. Gained Weight/Wearing Weight. Well, what can I say? Sometimes during the winter, it’s easy to pack on some pounds and that invariably negotiates your wingloading. Also, if you haven’t jumped all winter and you’ve accumulated a new wingloading, you may want to consider getting current on a bigger canopy. Next, if you’re a small girl, or decide to get on a 4-way team, you may be wearing weights. This added weight will definitely make your canopy fly differently than expected. So before making a decision on what canopy to buy or whether or not to downsize, consider the use of weights to make the best wingloading decision for your experience. 6. Reserve Size. Generally, your main and reserve should be about the same size. If you were quick to downsize or couldn’t find the right sized container, but have a larger reserve, with little experience under a bigger canopy, may be a good reason to upsize your main. (Having the same sized canopies also reduces other problems should 2 canopies out occur.) 5. Types of Jumps. Doing big ways? Wingsuiting? Demos? Some jumps may warrant a bigger parachute. When I do world record jumps, I usually opt for my bigger canopy so I’m not fighting my way through traffic and have a larger range of floating. Wingsuiting can cause line twists or other malfunctions and jumping a more docile canopy can help you negotiate them better. On demos, having a lower wingloading will give you more range to negotiate smaller landing areas or areas surrounded by obstacles – as long as you understand the flight dyamics of your wing. 4. Age/Health/Agility. Take an inventory of your overall health. How are your knees? Wrists? Ankles? Eyesight? Depth perception? Reaction Time? These may be considerations to upsize. 3. Attitude/Experience. Someone’s overall experience and attitude about the safety of themselves and others is a vital component in skydiving safety. Disregard for your own experience and/or safety is an obvious sign to upsize. 2. Because You Downsized and You Shouldn’t Have. Having inconsistent landings? Not standing up your landings? Stabbing out your flare? Landing by touching down on your knees first then popping up to your feet thinking it was an awesome swoop? Spiraling in traffic cause it’s freakin’ fun on a small canopy when not necessary? Scared of line twists? Having a hard time kicking out of line twists? Not paying attention to others in the sky? Land downwind for fun? Don’t follow a landing pattern? What the hell is a landing pattern? Don’t understand the flight characteristics of your wing? Pretty much don’t follow the rules? 1. Finally, if you cannot answer yes to all of these questions, you need to upsize: Can you land your main crosswind? Are you comfortable landing crosswind? Can you land your main downwind? Are you comfortable landing downwind? If you had to land out and the only option was a tight area surrounded by obstacles, do you know you could land your canopy accurately? Do you feel that you completely understand the flight characteristics of your wing? Do you understand what happens to the flare, landing pattern, stall characteristics and overall flight characteristics when you downsize? Have you used your rear risers & do you know why and when you’d need to use them? Have you used your front risers & do you know why and when you’d need to use them? Have you performed braked turns? Braked turns for landing? Can you land within 10 meters of a target center at least 5 times in a row? Did you take a canopy course beyond the B-license requirements? When I first started skydiving, I was young and pretty much invincible. I was on the fast track to get on a small canopy and go fast! And it’s all fun, until you get hurt or you watch someone die. I’d seen a lot of crazy things (especially people “getting away” with bad decisions) in my 20-year career, but in 2003, I witnessed my father’s fatal canopy collision. Then without your permission, things change. It’s amazing how death will completely transform your perspective on safety, especially when the sport is your livelihood. We spend more time under canopy than we do in freefall, so this is a moment to check in and evaluate how much canopy education have you gotten? My dad used to tell me, “take stock into your destiny.” So, take that Flight 1 course you’ve always wanted to, finish your B-license canopy training, ask questions, and just know, there ain’t no shame to upsize that thang! How at risk are you? Below is a canopy risk calculator that was created by the USPA, which can give you an idea of just how big of a safety risk you're at with your current canopy and experience level Calculate My Canopy Risk Useful Resources Barry Williams on Canopy Safety (Skydive Elsinore 2013 Safety Day) [Video] Barry Williams on Canopy & DZ Safety (Skydive Elsinore 2012 Safety Day) [Video] Performance Design's "Survival Skills for Canopy Control" Contributors: Melissa Lowe, Barry Williams and Jason Moledzki
 -
 Name: Anthony Landgren Age: 35 First Jump: 1997 Skydives: 20,000 Home Dropzone: Skydance Skydiving, Davis CA Tunnel Hours: 1000+- Sponsors: Liquid Sky Suits, Velocity Sports, Cookie composites & Icarus Nz Cut Aways: 12 Container: Velocity Sports Infinity Canopy: Perta 67, JVX 88 Reserve: Icarus 119,Icarus 1092 AAD: None Wingsuit: Havok,Tony suits Apachi Rebal Helmet: Cookie G3 and Cookie Fuel DZ: You started skydiving quite young, when you were just 16. When you did your first jump, did you ever foresee that your life would end up revolving around skydiving, to a large degree? TJ: I did my first jump at Parachute center in Lodi,Ca. After that first jump I knew that I wanted to skydive for a living. I figured with skydiving there would always be cool new disciplines starting and always be interesting. DZ: Many of the top flyers talk about how they initially struggled in their AFF training and that their skills had to be developed through constant persistence and that it was never something they felt came to them naturally. What was your AFF training experience like? Did you feel as though things came natural to you in the air? TJ: Aff was a little rough for me, I failed level two twice and for a second I thought this was harder then I initially assumed. I took a couple days to rethink what I was doing and whether skydiving was really going to be for me. My Aff jump master Yoni Bango said "Just arch and smile, and don’t forget to pull. YOU GOT THIS" The rest is history. Some things in skydiving came natural and other things took a little more time. I had to keep telling myself to just keep trying you’ll get it! DZ: You're considered an expert in both freeflying and in canopy piloting, which discipline do you find yourself having more fun in and do you see yourself leaning more towards any one discipline in particular? TJ: I love freeflying and canopy piloting a lot! I find myself learning more in freeflying, with all these new tunnels popping up witch makes it easier to fly 7 days a week. I spend most of my time at Ifly SF Bay. On the canopy side I haven't been able to really push my canopy in a long time. The DZ I was jumping at would not allow big turns. I left that DZ about a year ago and started jumping at Skydance in Davis CA. I didn’t realize how much I missed it. Now that I get to swoop all the time I would say I’m having so much fun on my canopy. With all these new canopies coming out from Icarus makes it a really good time to fly fast canopies. DZ: Which competitive teams are you currently a part of? TJ: NorCal Alliance DZ: In your opinion, what makes Norcal Alliance such a strong team, besides having skilled flyers? TJ: What makes us a strong team is the comunication with each other and the pure love for what we are doing. DZ: Outside of skydiving, what other sports are you most interested in and which do you partake in? TJ: Outside of skydiving I like to snowboard, wake board and speed flying. I would say out of those 3 I speed fly the most. DZ: You've got quite a number of achievements under your belt. Which of them stands out as your proudest and why? TJ: The freely world records! It’s awesome to see all your friend from all over the world on one big jump and also all the people I have coached over the years ripping on the big ways. Truly rewording. DZ: Your schedule is usually pretty busy, with something exciting almost always on the calendar. What events are you most looking forward to at the moment? TJ: Extreme Week in Norway! It’s an awesome country, people are friendly and the event is amazing. Seeing all the extreme sports in one place is epic! DZ: Outside of your home dropzone, what is your favourite dropzone to jump at and why? TJ: Wow, that's a hard question to answer. Do you base it on scenery,lots of jumps in a day or if they have a tunnel close by. I love Skydive Arizona for always having a plane flying and a tunnel running. For scenery, Torquay in Australia - the view is amazing and the ocean is so beautiful. First time I saw a kangaroo was there. DZ: In your opinion, which aspect of skydiving safety doesn't receive enough attention? TJ: Canopy piloting, I feel a lot of DZ are stepping away from this. I remember when DZs where building swoop ponds not filling them in. DZ: I believe you have a keen interest in Canopy Wingsuit Flying / XRW, this is a discipline that not many people may be aware of. What does XRW entail and what makes it so interesting to you? TJ: Xrw is when wing suit flying relative to a open canopy. It is so amazing watching a person in free fall while you are under a open canopy and talking to them like your on the ground. Nothing gets me more pumped up then XRW. When you are doing Xrw you normally want to load a canopy at 3.0 or higher. The canopy pilot exits first with the wing suits and 10-20 seconds after the canopy pilot will be about 90 off of jump run by this time. When the wing suit gets close he should be aproching on the canopy pilots head level after the wing suit pilot figure out the speed we can then try to dock. The wing suit pilot flies in and the canopy pilot tack the dock. You fly around for about 2 min break off is at 5,000 ft. DZ: You do canopy testing with companies who are working on new products. Are there any new products in the works that you've seen that you're excited for? TJ: Yes! I love testing new canopies. Icarus is playing with so many new ideas. I can’t wait for there new line of canopies coming out. DZ: Which disciplines do you see dominating the future? Do you think we'll see more cross disciplines where jumpers are merging various existing ones in unique ways? TJ: I believe dynamic flying is going to dominate the future. Its got all the cool things in freefly that keep us pushing the edge, sit flying, head down, carveing and a hole bunch of eagles. DZ: What are you hoping to achieve in the next 5 years of skydiving? Are there any specific accomplishments you're hoping to achieve? TJ: I would love to do another canopy world meet and win and do 2 way VFS, Oh and win a Dynamic comp but will see. DZ: Thanks so much for taking the time to talk to us TJ, and all the best with your flying! Keep killing it!
 -
 In an industry where everything costs a lot of money, creating opportunities to maximize on customer expenditure is essential. Many of the DZ's I visit focus solely on tandem and video sales and are merely satisfied with any other purchases made in the gear store. Let's be more strategic by increasing peripheral sales to help boost your bottom line. The margins on tee shirts are too substantial to ignore. Also, guests who purchase a second tandem become part of your marketing team by recruiting others to join them on their skydiving adventure. Are you doing everything you can to boost these sales? Understanding What We HaveThe skydiving industry has something that retail companies, salespeople, and corporations crave….no, WISH they had with their customers. That word is connection. Ever been to the Gap during its heyday in the 90s or even the Apple Store of today? Millions of dollars have been spent by these companies to mix the right elements to make the retail environment inviting enough to make a connection. Selling has been turned into a science focused on stimulating the consumers senses. Walk in to an Apple Store and pay attention to what you're seeing. Visually, the store is appealing with clean lines, lighting that isn't harsh but illuminates and is soft. The colors in the store window are vibrant. Audibly, the music is up with an energy-induced, toe-tapping beat. The music isn't an ipod on shuffle but is part of a science known as multi-sensory branding. Everything is by design to connect with customers and create an environment that is inviting, warm and allows no obstacle for consumers to react on an impulsive purchase. The energy felt within the Apple Store is palpable as the throng of people within the store creates a vibe that makes the price of the products not seem so incredibly expensive. Touch - having all the products out and available to touch and play with is part of the Apple Store's brilliance and pushes the connection between user and product. Playing with an ipod is much more powerful than simply looking at one. Smell - Think there isn't a smell at the Apple Store? You won't notice what you're smelling, but instead notice what you're not smelling. There is no musty smell from hundreds of people crammed into its tight quarters, but rather a smell of newness that matches the vivid environment. Undoubtedly, the store is cleaned very well at the end of each day. Everything involving the senses is calculated and by design. Whether you're an Apple lover or hater, Apple has created a retail model that spares no expense to create a connection with the consumer. When a connection is made, sales are made. The skydiving industry has conquered the hardest part of selling: we have the connection. Now, let's make some sales! Closing the SaleThe moment a tandem student lands from their skydive is SALES GOLD. The reserved person who arrived at the DZ who hemmed and hawed about upgrading from video to video and stills is now primed to spend a little more money…at least $18 for a tee shirt. The connection the student has with the tandem instructor and the organization is now sealed as serotonin surges through the veins of an individual who has just completed "The best experience of their lives." The consumer WANTS to share their experience showing off a tee shirt or product that says, "yeah, I jumped out of an airplane and loved it." Be sure we're creating the right environment to make the sale. NOTE: You don't need to have an amazing facility or retail space to accomplish this.The minimum requirement is that your sales area is clean and feels organized. 6 Power Tips To Boost The Bottom LineThe Closing 1. The Tandem Instructor The tandem instructor is the gateway to an easy sale. The student has entrusted his / her life to the instructor while facing their biggest challenge and they lived! Big time connection here. If your DZ is meeting instructors in the landing area with a rig, then you're negatively affecting your sales. Great that you're busy, but if there is not enough time to complete the experience, then you're clearly understaffed. A great book has a strong beginning, middle and end. Too often, we end the tandem experience improperly without an instructor: a). debriefing the tandem student with encouragement about how well they did during the jump b). the presentation of a certificate of achievement signed by the instructor with a shake of the hand or hug and the signing of log books (instructors and student's) c). presentation of sales opportunities that the customer has become eligible for having completed their first jump as well as the next steps to becoming a solo skydiver. A Word on Instructors: Passionate instructors will buy-in to this. A DZ's success is everyone's success and job security for all! 2. Placement Where the closing takes place is key to driving sales. Ideally, have the presentation of the certificate of achievement take place in the store. Once the instructor shakes hands and departs, the student is left with feelings of exhilaration and happiness in the retail space. 3. The Store The gear store, regardless of size should feel clean and organized. If the store is poorly lit, has worn out carpeting, and is bulging at the seams with product then make the correct changes. Offer less product if needed to make the sales environment more friendly. All products should be neatly hung or folded. 4. Displays Be sure your customers can touch tee shirts. If tee shirt designs are simply on display behind the counter with sizing in drawers, then you are not maximizing sales. As with all retail stores in the mall, people want to see how tee shirts will look on them. The interaction of touching the product is very important. 5. Offer a Deal Even if it's perceived. There is a euphoria in shopping when people feel like they've received a deal. Observe the madness of Black Friday in the US as shoppers quite literally feel a 'high' when getting amazing deals even at the cost of getting out of bed at 4:00am, fighting traffic and huge crowds for the opportunity to spend money in a crazy environment! When presenting the certificate of achievement, offer an exclusive discount in the form of a coupon (preferably on card stock, so it feels substantial) for those that have completed their jumps to receive a discount on purchasing their next tandem, a discount for beginning AFF and a discount on a tee shirt). Even a $2 discount off of a US$20 shirt feels good to a shopper. You don't have to give the house away to see a jump in sales. 6. Create an Urgency Don't give customers options to get a deal after they leave the DZ. There is no better sales environment than the moment after a jump. During my time at Skydive Carolina, I offered my guests who had paid full retail the opportunity to purchase a gift certificate for a tandem at half the price. The discount would be valid for that day only, pushing the student to make an on-the-spot decision. (The strategy is not to force the student to jump the same day, but to leave with the discount in hand in order to recruit others). Once the customer leaves the DZ with an option to buy later, the percentage of sales decreases dramatically. If someone called within a few days begging to cash in the offer…I would always honor it. The psyche of most people doing a tandem skydive is to share in the experience with others. My basis for good marketing is to convert happy customers into 'talkers' for your DZ. Anyone leaving with a half off tandem promotion becomes a marketing mouthpiece. They will try to recruit others to join them for their next tandem experience and of course you will capture them at full retail. Some people return alone, but that is the minority. This is part of equipping your guests to become the marketing machine for your DZ and the best part is they're paying you to do it. Owning and running a DZ is harder than most people can imagine. The lists of to-dos and responsibilities are endless and being ahead on anything is typically short-lived. My thoughts are geared towards working smarter, not harder and to convert your happy customers into marketers.
 -
 The Plexus Tandem System was designed to be a fresh approach to tandem parachuting operations and incorporate the best of existing tandem technology and remains dedicated to addressing those needs and desires in the skydiving community. Each system is built under TSO C-23d and is available in a combination of sizes, options, and several standard features, the Plexus Dual Harness/Container System includes: Main Pin Cover- Having an upward facing pin cover creates the ultimate in pin protection from unintended knocks or bumps causing premature container openings MAIN ASSISTED RESERVE DEPLOYMENT (M.A.R.D.) “Reserve Boost “ included Approved AAD installations for appropriate CYPRES and Vigil automatic activation devices. Adjustable Harness- The Plexus Dual Harness /Container System main container lift webbing and laterals are available with adjusting hardware. Cut in laterals for added fit and comfort. Type 13 Reserve Risers for added safety. Comfortable Yoke and field replaceable Leg padding for long wear and heavy workloads. Dual Loop Main Toggle for Assisted Canopy Flight Training. Left and Right Hacky style Drogue Release Handles for better grip and familiarity. Right Drogue Handle is retractable and at the Hip Junction for Student Training purposes. Center Point Drogue Attachment Point for Controlled Drogue Freefall. Field Replaceable Drogue Kill Line, 1000# Spectra Micro Line. Field Replaceable Type 8 Drogue Riser w/ Mini Ring System. 11 Ft Free Fall Drogue Bridle.