
Hooknswoop
-
Content
6,738 -
Joined
-
Last visited
-
Feedback
0%
Everything posted by Hooknswoop
-
Not rigid at all. There are too many variables for this rule to be anything more than a recommendation. You can still suffer from the bends even after waiting 24 hours to fly after diving. I was a safety diver at the NBL for a year. I dove 533 hours in less than a year of diving. We dove 46% NITROX, for 2 hours in, 2 hour surface interval, then another 2 hour dive, max depth 40 feet. I would either jump the next morning or sometimes even that day after diving and never suffered any symptoms. I'm sure the NITROX made a big difference. Exercising after diving cleans the compressed nitrogen out of your system faster. The best information I could find for flying after diving was high altitude diving charts. Diving at altitude is the same as flying after diving (well almost exactly, close enough). You won't find a doctor willing to say that after diving for x minutes at x feet, you can safely go to xxxx feet in altitude. You can do the same dive then fly routine 100 times without getting bent, then get bent on the 101st time. It is an in-exact science. Play it conservatively and leave plenty of time after diving before flying. The first signs of the bends or decompression sickness is itchy skin and pain in the joints. Derek
-
They need one more picture so that it makes sense. The entire running end goes through both lines of the fingertrap to lock it in place. Derek
-
No-Sew Fingertrap from Jump Shack. Kudos to Jump Shack. Very cool idea AND they put it on their web site for anyone to use. I tried the technique with 500 Vectran and it was easy, no sewing, and reportedly just as stong as a 'conventional' finger-trap/bar-tack. Derek
-
I was under the impression that the speed bag was for the main, not the reserve. Derek
-
What does renewing your driver's license have to do with safety? Get caught driving without one........ Derek
-
I did that once, even offered to show video of a jump w/ a non-rated JM. I was told "What do you want me to do, take away a rating he doesn't have?" USPA relies on GM and individual membership dues for its existence. If USPA were to kick a DZ out of the GM program for using non-rated Instructors, then they would no longer receive the GM dues and the DZ would no longer be obligated to require USPA membership of it's jumpers. Both result in loss of revenue for USPA. The fox is guarding the hen house. USPA won't cut its own throat. This was the DZO of a large DZ, revenue producing for USPA. So nothing was done. Derek
-
The caps prevent the inserts from sliding out of the channels and through the 3-ring locking loop in the event the tacking loosens/fails. This only works if the cables are long enough to prevent the inserts from sliding down, i.e. the cap hit the end of the cables before the other end of the insert goes through the 3-ring locking loop. I wouldn't recommend trimming the cables in case you ever replace the inserts with capped inserts. Also, you can put the inserts completely at the top of the channel on the rear risers, preventing any cable from being exposed at the top of a non-capped insert. Derek
-
I have done exactly that with a PD-170 and a Stiletto 97. Nice openings on both. As long as the locking stows hold the D-bag closed until line stretch, it doesn't make any difference. The rest of the lines are stowed (in rubber bands on mains and a Velcro pouch on reserves) so that they don't snag on the container flaps during deployment. In order for loose stows to result in a hard opening, the canopy must come out of the bag before line stretch (bag strip/ bag dump). This can't happen if the locking stows hold the bag shut until line stretch. Derek
-
No one. A USPA Group Member DZ 'pledges' to follow the BSR's, but no one enforces that. This is why the GM is almost worthless. Find another DZ. Derek
-
Who has actually flown a highly loaded reserve?
Hooknswoop replied to gus's topic in Safety and Training
Play nice guys -
Who has actually flown a highly loaded reserve?
Hooknswoop replied to gus's topic in Safety and Training
I have flown a MR-109-M and a PD-106R loaded at 1.7/1.8:1. I have landed both at over 5,000 ft MSL. I managed to stand them up, but I wouldn't recommend it. They were very touchy to fly and land. The PD had a deeper flare and was harder to stall. 7 cell, F-111 canopies just aren't forgiving. Derek -
I honestly don't know, that isn't who signed the e-mail. Considering that is where he wants to land, good odds that it is for him or a member of his team. Derek
-
“Caring for Your Kill Line Pilot Chute” Kill line pilot chutes are a high wear part of your skydiving equipment requiring periodic inspection and maintenance to ensure that they will continue to function properly. Pilot chutes are deployed at 120 mph, lift the bag off your back, then it rapidly collapses as the canopy leaves the bag, and finally they are dropped onto the ground with each landing. Who hasn’t been walking back to the packing area to the calls of “dragging!”, only to discover you have been dragging your pilot chute across the ground? Kill line pilot chutes wear at several points. The following is what to inspect and some suggestions for increasing the life span of your kill line pilot chute. The Spectra kill line shrinks from the heat generated from sliding through the bridle as the pilot chute collapses and the bridle stretches over time, affecting the original calibration. Because the change is so gradual it often goes unnoticed until you begin to experience hesitations on deployment. To check for correct kill line length, cock the pilot chute and watch the kill line. Does it become taunt before the two white ribbons that run from the apex (the top of the pilot chute) to the bridle? If it does, then the kill line is too short, not allowing the pilot chute to completely inflate. When cocked, the two white ribbons should be taunt and there should be some slack on the kill line. Also, if the handle of the pilot chute being pulled through the small opening at the base of the pilot chute on deployment, the kill line is too short. Your rigger should be able to replace the kill line, or if the kill line was manufactured with enough excess line, your rigger can simply extend the kill line. Check the stitching that holds your handle to the pilot chute. If the handle rips off, you would have a total malfunction. Check the bridle, especially where the pin attaches to the bridle. If any of the stitches have come out, have your rigger repair it. If the pin rips off of the bridle you would have a pilot chute in tow malfunction. As you fly your canopy, the deployment bag is free to spin around the bridle. Eventually the bridle will wear out and break at the grommet. Have your rigger use waxed nylon cord to tack both sides of the rapide link to the reinforced part of the deployment bag to prevent the bridle from rotating in the grommet. Some manufactures sew the pilot chute bridle to the deployment bag, eliminating this problem. The disadvantage of a sewn-in pilot chute is they are difficult to replace, usually a job for a rigger. Lastly, have your rigger install stainless steel rapide links instead of the plated links. They won’t corrode, reducing wear on the bridle. Whether your pilot chute is a kill line or not, the Z-P or F-111 fabric wears just like the fabric on a canopy. The porosity of the fabric degrades with use, decreasing the drag of the pilot chute. Eventually the pilot chute will not have enough drag to deploy your main canopy, leaving you with a pilot chute in tow or a bag lock. An indication that your chute may have problems is a pause between throwing your pilot chute and the canopy coming out of the bag. A patch on a pilot chute would be difficult to sew and could cause it to spin on deployment, creating lines twists. As the mesh wears, holes will develop. Once the mesh tears the hole will become larger quickly. Replace a pilot chute with holes in the fabric or mesh. Check that the tape on the mesh runs at a 45-degree angle to the 'grain'. If it doesn't the pilot chute can distort, reducing its effectiveness. Checking your pilot chute every time you do your 30-day three-ring maintenance is simple and could prevent a malfunction. If you are not confident inspecting your pilot chute, have your rigger help you. An ounce of prevention is worth a pound of cure. Derek
-
Military Square Parachute Identification. Can you help me?
Hooknswoop replied to BravestDog's topic in Gear and Rigging
MC-4 Main or Reserve Parachute Line Trim Specs: All A, B, C, and D lines equal in length within 1/2 inch Steering lines equal in length within 1/2 inch A to B: 3 inches +/- 1 inch B to C: 9 inches +/- 1 inch C to D: 12 inches +/- 1 inch A to steering 15 inches +/- 1 inch (brakes set) D to steering 15 inches +/- 1 inch (brakes released) The center A and B lines are continious. The slider is 27 x 28 inches. The canopy measures 28 1/2 ft x 13 ft, 370 sq ft, and is a 7 cell. Para-Flite Military Square Canopies: MT-1S Main or Reserve (5 cell): 270 sq ft MT-1X Main or Reserve (7 cell): 370 sq ft MC-5 Main or Reserve (7 cell): 370 sq ft MT-1Z Main or Reserve (7 cell): 308 sq ft MT-1Z Main (7 cell): 370 sq ft PARIS Main (17 cell): 380 sq ft Derek -
That is why it is better for the tandems to exit last at altitude, not first, at a lower altitude, which is done for purely economical reasons. In a serious emergency, one upper hook is enough to have attached prior to exit. It doesn't take very long to make one connection. What can take time is trying to force someone out of a plane that isn't ready and still thinks they haven't been hooked up. Fun jumpers making an emergency exit ahead of a tandem give the tandem instructor time to connect both upper connections, maybe the lower two connections, and tell the passenger what they are doing and what they want the passenger to do. If there is no video person, who is going to open the door? Tandems out first is a bad idea. Derek
-
I am very confused. Does the Firebolt use the same fabric as the Silhouette from PD? If so, then the Silhouette should be out lasting all other ZP canopies. It is well known that a ZP canopy will outlast an F-111 canopy (forgive the ZP/F-111 terms, it is just easier to use them). How would using an F-111 bottom skin extend the life of a canopy? Pressurization is very important to a canopy, especially for landing. The more pressure that is bled out through the fabric, the less it retains it shape and it's effective surface area goes down. This results in a higher real wing loading and higher stall speed, which translates into having to run it out more. Derek
-
Got this question via e-mail. Can anyone help? Derek
-
I haven't attended one, so I would be the wrong person to ask. A new thread asking for opinions on rigging course might elicit some opinions from graduates of these courses. I do think that having some rigging experience prior to attending a rigging course is essential. Initially, learning to be a rigger is time consuming, and a slow process. Getting through a few inspections and repacks prior to attending a rigging course will allow you to spend your time taking advantage of the Instructor(s) knowledge and refine your skills more efficiently than going in cold. Also having passed the written test prior to attending will free up more time better spent rigging. Regardless of which route you go, after getting your ticket don't hesitate to call on another rigger for advice or information. Not knowing is not a sign of weakness, not asking is. Derek
-
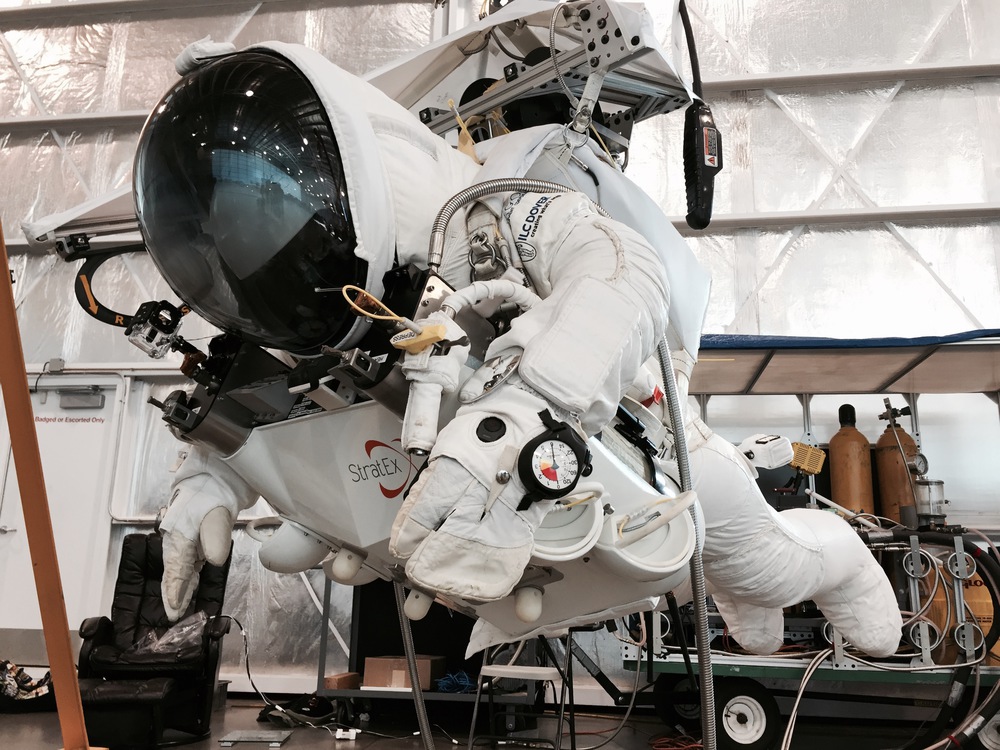
No altimeter That collar would beat the crap out of him in freefall/no jumpsuit Strap hanging off the back onto the floor No gloves Derek
-
It wasn't too bad, once Skymama showed me how to make the links, lots of cut and paste. I found at least one new resource while writing it, so it was definately worth it. Derek
-
That should be fine. It might take a little longer to dry, but still still be dry in less than 3 days, easily. Derek
-
Lines can soak up a lot of water. Humidity doesn't help it them dry either. Let it hang in a cool, dry area and it should be dry in a day or two at the most. Derek
-
So, You Want to Be a Rigger? Parachute rigging can be a rewarding and educational experience. The more you know about your gear and understand how it works, the safer you are and can make better-educated gear decisions. Parachute rigging is serious business and is not to be taken lightly. Earning the Senior Parachute Rigger's Certificate is no easy task and symbolizes a tremendous achievement. The following is an explanation of the process to becoming an U.S.A. FAA Certificated Senior Parachute Rigger, from the minimum requirements to how to complete them. Federal Aviation Regulation (FAR) Part 65 lists the requirements and privileges of a Senior and Master Parachute Rigger. Also, the, Airworthiness Inspector's Handbook 8300.10 , is the FAA's guide to Part 65 pertaining to Parachute Riggers and is a good source of information. Also AC 65-5B is available. To be eligible to be a Parachute Rigger, you must be 18 years of age and be able to read, write, speak, and understand the English language. The requirements to become a Senior Parachute Rigger are: 1. Present evidence satisfactory to the Administrator that he has packed at least 20 parachutes of each type for which he seeks a rating, in accordance with the manufacturer's instructions and under the supervision of a certificated parachute rigger holding a rating for that type or a person holding an appropriate military rating; 2. Pass a written test, with respect to parachutes in common use, on -- (1) Their construction, packing, and maintenance; (2) The manufacturer's instructions; (3) The regulations of this subpart (Part 65) 3. Pass an oral and practical test showing his ability to pack and maintain at least one type of parachute in common use, appropriate to the type rating he seeks. Completing these requirements will take commitment, time, and effort. The following is a guide to accomplishing each of the requirements. Military riggers or former military riggers. Special certification rule: In place of the above, an applicant for a senior parachute rigger certificate is entitled to it if he passes a written test on the regulations of this subpart and presents satisfactory documentary evidence that he -- (a) Is a member or civilian employee of an Armed Force of the United States, is a civilian employee of a regular armed force of a foreign country, or has, within the 12 months before he applies, been honorably discharged or released from any status covered by this paragraph; (b) Is serving, or has served within the 12 months before he applies, as a parachute rigger for such an Armed Force; and (c) Has the experience outlined in #1 above. In short, as long as they meet the requirements, they are only required to pass a written test covering FAR's Part 65 and Part 105. Another option for completing the requirements and earning the Senior Parachute Riggers license is attending a rigging course. They vary in length and cost, but are usually 7-14 days long. The pass rate is generally very high at these courses, but they can be expensive. Usually there is a Designated Parachute Rigger Examiner, (DPRE) on staff. These courses are advertised in Parachutist and Skydiving Magazine. United States Academy of Parachute Rigging , Para Concepts , Action Air Parachutes , and Skydive Marana , are a few that offer a complete course. 1. Pack 20 approved parachutes- The best place to start is with your rigger. Ask them if they are willing to take you on as an apprentice. You will need to order a logbook ( Para Gear , $9.75, Item #S7290, on page 165 of catalog #67) in order to keep the records required by the Federal Aviation Administration (FAA). Watching your rigger inspect and pack a couple reserves and studying the packing instructions will make it less painful when you inspect and pack your first reserve. Be sure to pack several different types and sizes of reserves and harness/containers. It is a good idea to learn from a couple of different riggers too. Each rigger has different techniques and tips. Do your homework. Review packing instructions beforehand. Take full advantage of the time spent in the loft. Don't buy any tools until you have inspected and packed several reserves into different containers. This will give you the knowledge to either decide which tools to buy and which tools to make yourself. Not only is making your own tools cheaper, but also you can make them to your exact specifications. Begin collecting rigging information. Download manuals from manufacturers web sites. (A list of web sites is at the bottom of the page.) You will need the manual for every reserve canopy and the manual harness/container you pack. Also begin to collect Service Bulletins (SB's) and Advisory Directives (AD's) for gear. They can be found on manufacturer's web sites, the FAA's web site , the Australian Parachute Federation maintains a great list of SB's, and AD's. Parachute Industry Association contains links to manufacturers and SB's/AD's, and once you have your rigger's ticket, PIA has a Rigger's Forum . You can also e-mail, write to, or call a manufacturer and request a SB or AD be mailed or faxed to you. A must have for any rigger is Dan Poynter's Parachute manual , Volume I and II. They are considered the 'bible' of rigging. Also have a copy of Advisory Circular 105-2C . You should also learn how to pack rounds, as you may be required to pack one for the practical test. Once you have your certificate, you can pack round reserves, found in most pilot bail out rigs. In addition to the 20 inspections and repacks, you will need to learn how to sew a patch, finger trap and sew lines, hand tack, set grommets, perform maintenance, and know the FAR's pertaining to parachutes, Part 65 and 105. 2. The Written Test- The written test consists of 50 multiple-choice questions. 2.0 hours are allotted to complete the test. There are no prerequisites to taking the written, you just have to pass it prior to taking the oral/practical test. The minimum passing score is 70%, the average score in 2002 was 89.91% with 182 applicants, and a 97.8% pass rate (178/182). You have 2 hours to complete the test. The good news is all the 290 possible questions are available at: Bank: (Parachute Rigger) Airman Knowledge Test Question Bank (249k), courtesy of the FAA. The bad news is that the FAA doesn't include the answers. Para Publishing offers study guides for the written and oral/practical which include the answers and explanations to the questions. The written test was updated on 6/9/03, and the study guide may not have been updated to reflect the new questions. The Parachute Rigger Knowledge Test Guide (40.5k) (updated as of October 12, 2003), is a FAA guide to the written test and includes contact information for the computerized testing centers. AFS 630 is the one-stop shop for links to Advisory Circulars, Airman Knowledge Test Questions, Airman Knowledge Testing Sites, Airman Knowledge Testing Supplements, Airman Knowledge, Airman Knowledge Testing information, Other Testing information, Practical Test Standards, Test Statistics, Training Handbooks, and Subject Matter Knowledge Codes. A test supplement with figures will be provided for the test. If you wish to preview it, it is not downloadable from the FAA’s web page. You may purchase it from Aviation Supplies and Academics, Inc (ASA) at www.asa2fly.com for $10.00. The Airman Knowledge Testing Center Lists , computerized test locations. Call ahead to make an appointment. One option is LaserGrade Computer Testing. Their number is 800-211-2754. Call the actual testing site first for their site number. The cost is $80.00. You can also take the written test for free at your local Flight Standards District Office, ( FSDO ), but it can take 3 weeks to get the results as opposed to immediately with the computerized test. You will need to bring a picture I.D. and the completed 8610-2 (signed by the FAA) to take the written test. 3. The Oral and Practical Test- To take the Oral/Practical test, you will first need to get your supervising rigger to give you a letter stating that you have packed at least 20 reserves under their supervision and are prepared to take the oral/practical. Download and print out 2 copies of FAA form 8610-2 . Fill these out, legibly and without any mistakes, and take them, your written test report (with a passing score, of course), your logbook, a picture ID, a permanent mailing address, and the letter from your supervising rigger to your local FSDO . FSDO 's have tightened their security procedures. You will have to sign in and be escorted to the appropriate office. Call ahead, as an appointment may be necessary or make your visit easier. The Parachute Rigger Examiner's Handbook includes example forms and guidance to the DPRE , for completing paperwork and administering the exam. A new (June 2003) FAA publication, Parachute Rigger Practical Test Standards (89k) describes tasks that can be assigned and the standards for each task. Once you have the 8610-2's signed by a FAA official, find a DPRE . Click on the "DME/DPRE Examiners" button, select the state and click "search". Contact the DPRE and make an appointment to take the oral/practical test. Be sure to ask about cost of the exam, what to bring, and what to expect. Each DPRE is different, for example, some DPRE's do not require an applicant to pack a round parachute as part of the exam. Asking new riggers about the DPRE they were examined by and will give you an idea what to expect and which DPRE you want to test you. The DPRE will review your logbook, 8610-2's , and picture ID. Then the exam will begin with the oral questions from a bank of questions. The DPRE will ask you a few questions from each subject matter category from the bank of questions. If you do not know the answer to the question, say so, but be sure to say where you would look up the answer and be prepared to do exactly that. The DPRE may wish to make sure you know how and where to look up the information, and are willing to. For the practical, be prepared to completely inspect a reserve canopy and container and pack it. The DPRE may have you repack your rig or may have you inspect and pack a rig they supply. You may have to demonstrate packing a round parachute. Be sure have the manuals for the canopy and harness/container and use the packing instructions. Take your time and do it right. For the canopy patch, refer to patching instructions as you work. Don't leave anything to chance and don't rush. The DPRE may have a few sewing projects for you. Make sure you understand what exactly the DPRE wants you to do. If you pass, the DPRE will issue a FAA Form 8060-4, Temporary Airman Certificate, which is valid for 120 days. On it, will be your 3-digit seal code. This is the code that will be on your seal press. Your certificate number will be your Social Security Number, unless you request a different number. The FAA will mail you your permanent certificate. FAR FAR 65.21 specifies that if your address changes, you have 30 days to notify the FAA of your new address. You can mail in form 8060-55 or submit the new address online . You can purchase your seal press from ( Para Gear $59.75 Item #S7330, page 165, catalog #67). So, now you passed and are now a FAA Certificated Senior Parachute Rigger, congratulations! Now the real work begins, knowing that other people's lives depend on your workmanship. The Rigger's Creed- "I will be sure- always. I will never let the idea that a piece of work is 'good enough' make me a potential murderer through a careless mistake or oversight, for I know that there can be no compromise with perfection." Links to Manufacturers: Strong Enterprises National Parachute Industries, Inc Sun Path Relative Workshop Performance Designs Icarus Canopies Flight Concepts International Flight Concepts International Rigging Innovations Mirage Systems Para-Phernalia, inc Free Flight Enterprises Sunrise Rigging Trident Harness and Container, Inc Jump Shack Velocity Sports Equipment Big Air Sportz Atair Aerodynamics Aerodyne Research Butler Parachute Systems, Inc Para-Flite Incorporated Precision Aerodynamics, Inc Airtec USA FXC Corporation North American Aerodynamics, Inc Pioneer Aerospace Corporation PISA Federal Aviation Administration Links: The Parachute Rigger Knowledge Test Guide Bank: (Parachute Rigger) Airman Knowledge Test Question Bank Federal Aviation Regulations Airworthiness Inspector's Handbook 8300.10 Designated Parachute Rigger Examiner Flight Standards District Office Parachute Rigger Examiner's Handbook Parachute Rigger Practical Test Standards FAA Form 8610-2 FAA Form 8060-55 FAA AD's Advisory Circular 105-2C AFS 630 AC 65-5B Other links: Australian Parachute Federation Para Gear [url http://www.logsa.army.mil/etms/find_etm.cfm] Site for U.S. Army Manuals [/url Derek
-
Javelin Student conainer blamed on students death!
Hooknswoop replied to Rdutch's topic in Gear and Rigging
Salt air and sand are both detrimental to the harness/container. The closer to the ocean, the more salt air and sand the gear is exposed to. I don't know the cause, just looking for one. Derek -
Javelin Student conainer blamed on students death!
Hooknswoop replied to Rdutch's topic in Gear and Rigging
Sun Path did issue this SB for their harnesses with an adjustable Main Lift Web. It is on their web site, http://www.sunpath.com/ Seems the harness failed. I wouldn't want to be the rigger with my seal on that rig. Anyone know how close to the ocean the DZ is? Derek
