My DZ location is wrong on the map. How do I fix that
If the location of your DZ wrong on a map then it is most likely because we don't have to correct location information or because the latitude and longitude data that we do have is not granular enough. We need at least the degrees, minutes and seconds for both the latitude and longitude to make the mapping reasonably accurate.
Send any corrections to: support@dropzone.com
By admin, in Dropzone Locator,
I logged in but can not access some areas of the site.
If you are sure that you have entered the correct username and password and for some reason is still denied access to some areas of Dropzone.com then here are some things you should try before you contact us. Please note: this does not apply if your login information is being denied of course!
Sometimes, with firewalls and cookies and all the different browser and security settings possible it happens that the cookies that were set to track your login status on Dropzone.com gets corrupted. There's an easy way to clean this up and reset your cookies. This often resolves login problems. Follow these steps:
Log out first - Go to your Account (link in the top right corner of every page) and if you are logged in, click on the Log Off Button
Clear the cookies from your browser - do a quick Google search if you're not sure how to do this for your browser
Close all browser windows
Open up a new window
Log in again - Do this either from the Home Page or go to your Account
Check to see if your access to all areas have been restored.
Remember, this only applies if you've logged in successfully but was denied access to parts of the site. If your Username and Password combination is declined then you may have forgotten your password. Click here to learn how to request a temporary password to log in and change your password.
By admin, in Account Help,
Why can't I access the Driving Directions to a Drop Zone
Dropzone.com Premier Members can get easy and quick driving directions from any address to location to any Drop Zone. To get access to this functionality, please upgrade to Premier Membership! Here's a full list of additional benefits.
By admin, in Dropzone Locator,
Canopy Skills Drills
Learning to fly our parachutes is absolutely necessary for long-term survival in this sport. The philosophy that the canopy is simply a means to get down from a skydive is gradually becoming a thing of the past. This may be as a result of individuals with such an attitude dropping out of the sport due to canopy-related injuries, or from the insurmountable fear that comes as a result of a lack of control over their experience. Regardless, many jumpers have been taking an increased interest in flying their parachutes better.
Reading and talking about canopies is the beginning of this process. We must understand the principles that allow our canopies to fly. To make a real difference in our capabilities, however, we need to physically experiment with our parachutes in flight. We must practice in the real world.
Here are a few exercises that will increase your abilities to save your own life, and enhance your feeling of control while under canopy:
Pitch Control Exercises
Manipulate the canopy on the pitch axis using the brakes.
Look at canopy to notice the amount of pitch axis change.
Notice the difference between "soft" and "sharp" inputs: slow application vs. quick.
Why?
Controlling the pitch angle is how we manipulate the angle of attack of the wing. Without a dynamic change to the angle of attack, we will be unable to increase the lift of the parachute enough to change the direction of flight from its normal full flight glide to level flight. This maneuver is essential for safe landings.
Pitch Control With Bank Angle
Begin a turn using a single steering toggle.
Apply the opposite toggle while still in the turn.
Experiment with soft versus sharp inputs to negate decent.
Look at canopy to notice pitch changes.
Why?
Having the ability to control the pitch axis while in a bank is what gives the pilot the ability to control the decent rate while in a turn. The natural tendency is to loose altitude in a turn, but this is not necessarily the result of turning with bank angle. By increasing the angle of attack while in a bank, we can increase the amount of lift that the parachute is producing, and even alter the flight path to level flight despite significant bank angle.
Dive Arrest: Toggle Turns
Place the canopy in a spiral dive using a single steering toggle.
Arrest the dive as quickly as possible by sharply applying the opposite toggle as well as the inside toggle; the inside toggle is not applied until the two are matched in the degree of input. When the toggles are matched, a short stab of collective brake pressure is usually all that is needed to achieve level flight.
Exercise both banked recovery and wings level recovery.
Why?
Turning too low is the preliminary cause of many injuries in our sport. Unfortunately, most canopy pilots assume that bank angle must be eradicated before arresting the dive. This leads many to waste valuable altitude in the process of leveling the wing. In situations with very little altitude remaining, this may delay the collective brake application until it is too late. By rehearsing a transition to zero decent while still in a bank, the pilot becomes accustomed to applying the toggle on the outside of the turn as a learned instinct, reducing the chances of a turn leading to serious injury.
Dive Arrest: Front Riser Dive
Place the canopy in a dive using the front risers.
Rehearse dropping the front risers and quickly stabbing the brakes.
Rehearse both straight front riser dive recovery as well as turning dives.
Why?
While acceleration on final approach can be great fun and usually leads to longer swoops, the acquisition of speed is not really the hard part. What keeps us alive is the judgment and skills necessary to save us when we dive the canopy too close to the ground. If we rehearse the solutions to the dangers, the likelihood of a dive resulting in serious injury is reduced. Letting the front risers up slowly may be the best way to get a long swoop when the dive is rounded up slowly and with ample altitude. Unfortunately, this muscle memory may not serve us when we are really low. In the time it takes to smoothly let up on the front risers we may find ourselves planted in the ground like a shrubbery. Dropping the front risers allows the pilot to keep their hands down, ready to stab the brakes aggressively to arrest a mortal dive. A short, sharp, shock on the brakes may be all that is necessary to place the jumper back under the wing, and to the higher angle of attack that saves their life.
Slow-Flight Practice
Place the canopy in 90% brakes and hold for 60-90 seconds.
Make controlled heading changes of 45-90 degrees.
Notice the difference in responsiveness as compared to full flight turns.
Notice that lifting a toggle on the outside of the turn reduces the risk of stalling the wing on the inside of the turn.
Why?
Most pilots spend the majority of their canopy ride in full flight. This means that the feeling of the canopy in this mode is most comfortable to most people. It also means that flying in deep brakes places many out of their comfort zone. This means that most people are feeling somewhat uncomfortable just prior to putting their feet on the ground every single jump. In fact, this anxiety often causes people to hold their breath, and then offset their steering toggles toward the end of the landing in order to get to the ground sooner. They simply want this part to be over. In order to land with great consistency, we must become intimately aware of the flight performance of our parachutes in very deep brakes. The more time we spend in this flight mode, the more comfortable we will be. If we are to land well, we must be as comfortable with deep brakes as we are with full flight.
Brian Germain is the author of The Parachute and its Pilot, a canopy flight educational text. Brian is also the President of Big Air Sportz parachute manufacturing company, and teaches canopy flight courses all over the world. To learn more about parachutes, or to order the book, go to: www.BrianGermain.com .
By BrianSGermain, in Safety,
ERAU Skydiving Club
Embry Riddle Aeronautical University is not only one of the top ranked aerospace engineering schools in the country, but it also produces a large number of our airline pilots. The university sits just four miles from Daytona Beach, one of the world’s most famous beaches - home of Bike Week, Spring Break and even the birthplace of NASCAR. While some ERAU students spend their free time relaxing and soaking up the sun, a select group of students use the beach as a backdrop for their aerial playground.
ERAU Skydiving Club offers the ultimate thrill to students, faculty and staff, who wish to participate in a tandem or complete their AFF course and become a licensed skydiver. ERAUSC utilizes the impressive facilities at Skydive Deland, located in Deland, Florida, only 15 minutes from the university. Skydive Deland graciously offers discounts to club members.
Within the first three weeks of school this semester (hurricanes permitting), the Skydiving Club has grown to over 40 members. Over a dozen new AFF students have completed their ground school and are ready to start becoming skydivers.
ERAUSC’s popularity has grown throughout the local skydiving community over the past year. As a university, ERAU has looked past the negative stereotypes of the sport and now embraces truly what skydiving tries to accomplish. This is evident by the request for demonstration jumps into almost every major event for the university, including ERAU’s homecoming air show and static display this November.
This year, ERAUSC has vowed to promote the sport of skydiving to even a larger number of students and expose them to every aspect of the sport. As of now, four separate teams, including three freefly and one female 4-way team are training to compete in Collegiate this year, once again being hosted in Lake Wales, Florida.
For these ten college students, classes are spent day dreaming about their next opportunity to jump from a plane, rather than fly one. Unlike most people who compete in the USPA Nationals, many of these students have full time jobs and are full time students. Four of the students are part of the Reserve Officer Tanning Corps program for the Air Force and Army, some are pilots, and even a few are engineering students. One competitor has even been working for NASA for two years.
The teams are not sponsored by local skydiving companies or dropzones. Part of what makes Collegiate such a great sport is that most of the competitors did everything in their power to raise money to compete. Very little funding is available through schools or local companies to support such a dream. It is nice to see how dedicated these college skydivers are to our sport.
By Airborne03, in News,

2nd Annual Royal Gorge Go Fast Games
DENVER, CO (November 5, 2004) – The Royal Gorge Go Fast Games returned to the world’s highest suspension bridge in Canon City, Colorado October 8-10th, to showcase athletes in B.A.S.E. jumping, "highlining" and big wall speed climbing – the only event in the world that combines these breathtaking extreme sports. The invitation-only event drew athletes from around the world – including Germany, Switzerland, Brazil, Spain, Australia and the United States.
Highlights of the three-day Royal Gorge Go Fast Games included hundreds of B.A.S.E. jumps and aerials from the world’s highest suspension bridge and the world’s longest single span tram; as well as "highlining" demonstrations by Outside Magazine’s 2003 Man of The Year, Dean Potter, as he walked thin nylon webbing stretched between two cliffs, with nearly a thousand feet below.
"The Go Fast Games are the ultimate in extreme sporting exhibition/competition, and this year’s event was a huge success for both the athletes and event organizers," said Heather Hill, VP Communications, Go Fast Sports & Beverage Co. "The Go Fast Games provided spectators a site they wouldn’t see anywhere else, and offered the athletes a venue like no other in the world at the Royal Gorge Bridge."
New to the Go Fast Games for 2004, the big wall speed climbing competition brought some of the top names in climbing to race up the 1,000-foot pre-set route for the $2000 cash purse. 1st Place and $1,000 went to Team Mad Rock (Brian Gallant and Michael Johnson) of Colorado Springs, with a time of one hour and twelve minutes. Only one minute behind, 2nd Place and $600 went to Team Go Fast! (Clayton Reagan and Wayne Crill) of Ft. Collins, and Team Sharp End Publishing (Alan Lester and Fred Knapp) took home $400 in 3rd Place with a time of one hour and twenty-two minutes. The course record was set by teammates Dean Potter and Adam Stack with a time of 42 minutes, 13 seconds; however, their "simul-climbing" (i.e. not changing lead climbers) disqualified them from the standings.
Requests for invitations to the 3rd Annual Royal Gorge Go Fast Games are already in demand as athletes once again hail the world’s tallest span bridge as a "must-do jump. " This year’s venue accommodated three times as many B.A.S.E. jumpers as last, and event organizers are positive that "The Games" will continue to grow. "Safety was clearly the No. 1 priority—dangerous jumpers were reprimanded making the atmosphere responsible and non-competitive, " said BASE jumper David Royer.
"This is one of the holy grails of B.A.S.E. jumping," says Chris Pope - an eight-year B.A.S.E. jumping vet that said this year’s opportunity to jump the Gorge was too good to pass up.
To view more photos from the 2nd Annual Royal Gorge Go Fast Games, see Mark Lichtle’s Gallery on dropzone.com.
What is B.A.S.E. jumping?
B.A.S.E. jumping is an acronym for the four types of fixed objects that are utilized for these foot-launched skydives: (B)uilding, (A)ntenna, (S)pan, and (E)arth. Unlike parachuting from airplanes, B.A.S.E. jumpers typically use only one parachute, as the generally much lower altitudes don’t normally leave time to use a reserve parachute. The Go Fast Games feature B.A.S.E. jumping from the Royal Gorge Bridge and from the world’s longest single-span aerial tram.
What is Big Wall Climbing?
Big Wall Climbing is the most complex, endurance-testing discipline in the sport of rock climbing, and generally climbers will take several days to ascend a wall – carrying all supplies with them and spending multiple days and nights on the largest rock faces in the world. The Go Fast Games feature Big Wall Speed Climbing, where teams ascend the steep faces of the Royal Gorge in record time, and in plain view for the spectators to see.
What is Slackline/Highline?
Slackline is a fusion of balance, strength, and concentration. From its beginning in the early 1980s as a way for climbers to hone these skills it has become a sport of its own. Slackline can be done thousands of feet off the ground, or 3 feet off the ground – it is similar to walking a tightrope, but without the use of a weighted bar for balance. The Go Fast Games feature highline demonstrations over 1,000 feet above the Arkansas River.
About Go Fast Sports & Beverage Co.
Go Fast Sports & Beverage Co. is the producer of Go Fast Energy Drink and Go Fast Sports Apparel. Headquartered in Denver, Colorado, Go Fast is involved with sports and athletes of all kinds – from triathlon, parachuting and mountain biking, to B.A.S.E. jumping, climbing, skier-x, motocross, kiteboarding and more. For more information, please visit www.GoFastSports.com , call 303.893.1222 or email Heather@GoFastSports.com
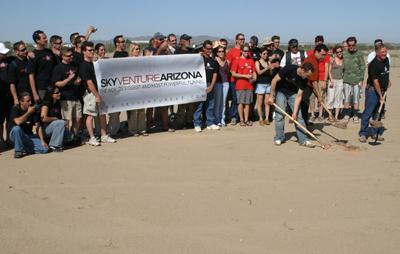
Skydive Arizona Tunnel Construction Underway!
On September 7th, Skydive Arizona celebrated a ground breaking ceremony for the largest SkyVenture Wind-Tunnel ever, to be located right on the dropzone. Since then, construction has been underway for the only 14 foot tunnel that will satisfy flyers of all flying styles, using four 400 hp engines. Construction is expected to be complete in less than 70 days.
There are many advantages to having a larger tunnel. This 14 foot diameter chamber will provide extra room for novice Relative Work flyers to practice 4-way. The additional room will increase the comfort level for newer tunnel flyers as they gain experience and adapt to the confined space.
A total of 1,600 hp will easily lift Freeflyers and enable them to sharpen their skills within a few flying sessions. SkyVenture Wind-Tunnels have successfully proven themselves as extremely effective training-tools over the last years.
Skydive Arizona’s world-champion staff will cater to your training needs and bring out the best in you. Competitive skydivers will be able to jump during the day, relax in the afternoon, and tunnel fly at anytime that fits their training schedule. Tunnel coaching will be available from highly experienced Tunnel flyers, in RW, Freefly, Freestyle and “Funstyle”. Arizona Airspeed, innovators of the tunnel-camp training concept, will provide coaching at any level with at least one Airspeed tunnel-camp per month.
The tunnel facilities will host a Health-center with Yoga, Acupuncture and Guided Meditation, to add to the already offered services of Massage, Reiki and Pilates at the dropzone.
Come to the sun, take advantage of the largest fleet of skydiving aircraft, rely on the Arizona weather and fly with the best.
Skydive Arizona is the mecca of skydiving, with over 150,000 skydives made annually. As a global destination point for travelers the inclusion of the wind tunnel only serves to put the crowning touch on the most complete full service skydiving resort in the world.
Whether you are a competitive skydiver, or someone that is looking to hone their skills SkyVenture Arizona is here …for you!
Thermals 101: A Paraglider’s Perspective
I am much more experienced in paragliding than skydiving and in paragliding we really respect the thermals as they are what we need to fly – but at the same time can cause all sorts of havoc close to the ground.
Thermals are bubbles of rising air. They might extend all the way from the ground to a cloud or they might be just a bubble. I have been told to study a 1970 hippie lava light, as the rising lava in the light is nothing more than a thermal.
If a thermal bubble leaves the ground and rushes up in a column of air, there is a void that must be filled - with the same amount of air going down or sideways outside the thermal as is going up in the thermal. Again, think of the lava light – as the lava rises, the oil fills the void where the lava was. In other words, if you land near a thermal that is bursting, you can be in the middle of a gust of wind that is going down or sideways filling the area under the thermal. I have been in a thermal that went up at 1,400 feet per minute – which is faster than a lot of jump planes. Somewhere there must have been air going down 1,400 feet per minute to fill the void.
If you see a wind indicator (wind sock) quickly change directions, you might have just witnessed a thermal near by. On a quiet day in a field of tall grass you can hear them leave too, just a quick rustle of the grass is all you hear.
A lot of times thermals are the most aggressive close to the ground as they are narrow and get wider as they go up. They can be explosive off of a super heated asphalt driveway or black roof. There are some “surface tension” forces that keep the thermals close to the ground until they break off. If the wind changes a bit, it might be all it takes to make a thermal release.
In paragliding, you know you are about to enter a thermal when you start to feel turbulence or even go down a bit. You actually judge your angle of attack into the thermal by looking at how the wing turns as you enter it. If your wing flies straight but surges back evenly, you entered it straight on. If your wing turns, part of your wing hit the thermal first causing the turn. If your wing surges forward, you probably just left the thermal.
It is very easy on a large paragliding wing for half of your wing to be in a thermal and the other half not – causing all sorts of fun things – like asymmetric collapses. You could “hear” them in your wing all the time, they sounded like fabric getting loose then springing tight. Big asymmetrics could collapse more than half a canopy.
On very active thermal days, only the advanced would dare to fly paragliding canopies/wings because you could experience all sort of "asymmetric collapses” or other dynamic unexpected events.
Paragliders are rated by DHV ratings, 1 thru 4 where 1 is the safest to fly, which rate their handling in stalls and collapses. My DHV 1 GIN Bolero glider turns 90-180 degrees in an asymmetric collapse and must spontaneously recover to get the DHV 1 rating. Gliders rated higher might need pilot intervention to recover from a collapse. Turning = loss of altitude = hit the ground hard any way you look at it. Have you ever studied what might happen to your canopy under an asymmetric? How do you fix it?
To avoid thermals close to the ground, I avoided ground treatments that absorb heat, like rock (pea gravel) or cement. In paragliding – we liked the green soccer fields, but I don’t think DZ have those.
Thermals are caused by heated air on the ground being abnormally hotter than the air above. They “break” off of any pointed object, as small as a shrub. We were taught – turn the ground upside down after a rainstorm and anywhere water would drip off is where thermals rise. It is a mistake to think thermals only happen on hot days, because temperature difference, not just warm air, causes thermals. If the atmosphere is cold and the tarmac is hot – expect a greater thermal than normal even if the outside air temperature is freezing.
There are all sorts of mathematical equations used to predict thermals and the strength of thermals, some available on the 1-800-WXBRIEF FAA Flight Service Center pre-flight briefing system, such as the “wave soaring forecast” and the “K index”. The K index measures stability in the atmosphere. You can also speak to a pre-flight briefer who can help interpret the data – but since I don’t speak pilot, I was always intimidated to talk to the humans and only played the recorded messages.
If you are interested, you can study the “lapse rate” which is the phenomenon that as air gets thinner higher you go up in the atmosphere, the air pressure goes down and so does temperature. Physics says pressure and temperature are related due to fact higher pressure causes molecules to be closer to each other. Pure science says that the “dry adiabatic lapse rate” is 5.5 degrees per 1000 feet. This means, if you jump out of a plane 12K above the ground, expect it to be 66 degrees colder at 12K than at the DZ because the air is under less pressure.
But our flying areas do not exist in scientific test tubes – there is instability in the atmosphere. If the actual temperature, lets say 2K up, is more than 11 degrees colder than the ground temperature – you are bound to experience even more aggressive thermals than normal as the atmosphere tries to find balance.
Oh, thermals cause clouds – the reason why paragliders fly “cloud streets” of thermals across country. It is possible to experience “cloud suck” also, where the thermals are so strong you get trapped in a cloud and must use advanced techniques to lose altitude.
Note – I am not an expert at this. Someone with more experience is invited to correct me. But my point is: aggressive thermals can cause turbulence close to the ground, which can very easily cause landings to be rough.
Sit Fly: How to Move and Dock!
So, you can sit fly with your friends in a group or fly in a two way. The first step to being a free flier, Congratulations! Once you have reached this level you might ask yourself “what’s next?” Today is your lucky day because this article is for you!
After you have learned the basic position which we will cover in a second, the skill set you want to learn is 6 points of motion and then docking. This will allow you to interact with your friend in the sky and not just be a base.
Sit Fly: The Position
Serving as an introduction to free fly, this position is pretty difficult to get without some instruction. The idea is to sit in the sky just like you are sitting in a chair with a few minor exceptions. First you want to have your legs about shoulder width apart.
Second, you want to have your heels aligned with your knees as not to catch any air on your shins. The foot should be flat just like if you had it sitting on the ground. It is imperative to have even consistent heel pressure when you sit fly, or you will be on your toes which makes it difficult to improve your mobility. Keep your feet pointing straight forward at all times! In sit fly your body follows your heels and your hips so you need to have a strong platform to work from.
Third, you must consistently have a 90 degree angle at your hips to fly strait down. Sit up not back. Pretend you have a string pulling your head strait up while keeping that 90 degree angle. Sitting up will then add a quaint arch to your torso which will help you keep from falling back. Lastly, relax your arms so they keep right at head level. Do not press down on your arms in the neutral position. Pressing down the arms is a common fault of most new sit flyers. It causes you to press your torso forward catching air on it and then consequently backsliding.
If you have problems with the position get some coaching in the wind tunnel, SkyVenture has made learning the sit fly position a snap for the student and the instructor. Let’s move on to movement, shall we!
Sit Fly: 6 points of Motion
Speeding up will be the first point of motion we learn. Simply press your heels down while keeping flat feet and having your hips, torso and heels in alignment. It is not necessary to straighten you legs. A small adjustment of your surface area will increase your speed greatly. Practice sitting up against a wall in the sit fly I described above, then by pressing through your heels stand up to a half squat, not all the way up and then settle back down into the sit. Do it slowly, erratic movements usually create horizontal space, so stand up and down smoothly. The reason we try not to straighten are legs at first, is because straight limbs usually create stiffness. In order to keep control of the position you must be supple.
Slowing down is the next thing we learn. This can be done a few ways. I use them all, so it would be best to learn as many ways as you can. The first way to slow down is to press your arms down. Remember to keep sitting up while you do this or you will back slide from leaning forward. The second way to slow down is to bring your knees in a bit and then flare out your heels. This is my preferred way to slow down. This position increases your surface area a lot because your legs are a larger wing then your arms. This is also ideal because this leaves your arms free to dock or to use sign language to your friend. This position became popular in the wind tunnel because larger people needed to use there legs to keep them off the grate. Lastly if you really need to slow down learn to back fly in the wind tunnel. The back fly position will help you close huge vertical gaps quickly, for example if your friend corks up. A word of caution, learn to back fly with a coach in the wind tunnel before you use it with your friends. Using the back fly position without proper control can cause a vertical speed variation between you and your partner which can cause a high speed collision if you are not careful.
Moving forward is our next task. Forward motion is the hardest yet most used motion in sit fly. It is technically difficult to learn so it might take some time. It is the most used point of motion because most people are back sliding in sit fly or back slide when they try something new. To move forward, get back in the half squat position or the downward motion. Then press your hips forward as far as you can while keeping your heels shoulder width apart and your feet facing forward. The best way to practice this is on the ground by leaning as far back as you can while free standing. Forward is a balance move that is why it is so hard. It also takes a little momentum in the sky to move forward so you might have to hold the position a few seconds before you actually realize you are moving. Keep those heels down!
Moving backward is the easiest of the 6 points of motion. Most people are back sliding at first when they learn the sit fly position. To move backwards simply keep in the sit fly position and lean forward a bit. It doesn’t take much to rocket backwards, so immediately go back to the neutral position.
The last two positions are side sliding left and right. They are tough. We won’t go into them in depth here because that would be a little advanced for this article. Besides carving is much more fun and seems to be a little more useful in every day flying. To carve go forward with a slight turn in your hips.
Sit fly: Docking
Docking your friend for the first time is probably the most fun you can have sit flying. This move is tough for some so listen up! First you must get your arms level with what you are going to dock. Move up or down. Then move forward slowly and stop at the target you want to dock so it is just out of your reach. Stabilize your heels by pressing down slightly. This is the key to docking; if you turn while you dock it is probably because your feet slide one way or the other. After you have stabilized reach with your hand up at the target not out. If you reach out your torso will follow and you will back slide, maybe pulling your friend with you. Make sure your arm is 90 degrees from your torso. Try not to shift with your torso. Have your arm and hand move independently of your torso. Fly your hand into the target and then dock the hand or foot lightly. If you grab on too hard you might contort your position so you fly away. Dock lightly. If you feel tension in the dock let go and go back to neutral, breathe deeply and try again.
Keep in mind that this stuff is not easy for everybody. Don’t be afraid to ask for help or to get coaching. The SkyVenture wind tunnel is also a great tool when it comes to learning these basics of sit fly.
Steven Blincoe is the Founder of The New School Flight University. He has 4,000 free fly jumps and over 300 hours in the SkyVenture Orlando wind tunnel. You can contact him at 530-412-2078 or info@blincoe.org
for advice.
By stevenblincoe, in Disciplines,

Landing Challenges
Most of your landings will be normal and in the center of the drop zone, but unusual things do happen like landing in water, in sudden high winds, descending through power lines or trees.
Turbulence
As mentioned earlier, bumpy air may be encountered at any altitude and it has been known to close end cells and upset canopies. Jumpers have been robbed of their wings to be left back in freefall at 75 feet. Bumpy air may occur on windy days and on hot, no-wind days. Keep your canopy inflated during turbulence by flying at one-quarter to one-half brakes and make gentle turns. If turbulence causes a partial canopy collapse of your canopy, bring the steering lines down to half to
three-quarters brakes to help the canopy to reinflate.
Turbulence near the ground may be caused when wind flows over obstacles such as buildings and tree lines. Avoid landing on the downwind side of any obstacle. The air may be bumpy or descending. The stronger the wind, the farther downwind the turbulence will exist and the taller the object, the higher the turbulence will be. Turbulence can be significant downwind as far as twenty times the object’s height. For a fifty-foot tree line, that could mean 1,000 feet downwind turbulence.
Turbulence also occurs behind other ram-air canopies. Stay away from the area directly behind another canopy about 45 degrees up from the trailing edge.
Dust Devils
Dust devils are very dangerous. They can rob you of your canopy when you need it most — near the ground. Look for the spinning dust clouds. Unfortunately they can’t be seen over grass.
One jumper landed, his canopy deflated and then it was reinflated by a dust devil. The swirling wind picked him up and then threw him back on the ground. He died from the impact. In windy conditions, pick up your deflated canopy immediately. In bad conditions, stand on it.
High winds. If you find yourself in high winds, look behind you as you back up. Many jumpers back into power lines and fences. When landing in high winds, let go of one toggle as soon as your toes touch the ground. Keep the other toggle at the flare position and quickly pivot 180 degrees in the direction of the depressed toggle. Steer the canopy into the ground. Run toward and around it to collapse it. If necessary, continue pulling on that toggle and reel in its line to pull the canopy out from under itself.
Once you are on your feet, stand on the canopy and remove your harness. Don’t let it reinflate and start dragging you all over again.
Thunderstorms
Thunderstorms are violent vertical lifting of air masses, a phenomenon which can build cumulonimbus clouds from near the ground to anywhere from 50,000 to 75,000 feet. Thunderstorms possess violent updrafts and downdrafts along with lightning. While the West Coast of the U.S. has only around five thunderstorms each year, the northeast has 20, and Florida 80 to 90. Jumpers have been caught in cumulonimbus clouds for some pretty scary and wet rides. When the storm clouds appear, put the gear away.
The Tree Landing
The tree landing is rarely hazardous if you “center” the tree. Your canopy will lower you gently into and through the trees as you slow further, breaking the thinner branches. You will probably go all the way through to the ground and make a normal parachute-landing fall on
the other hand, if you clip a tree with a wing tip, your canopy may collasp, dropping you to the ground.
If you can’t avoid the trees, face into the wind to minimize your ground speed, pull half brakes, and place your feet and knees tightly together so you won’t straddle a branch. Do not attempt to brake your descent by grasping limbs; you are better off going all the way through to the ground slowly than ending up sitting in the top of the tree. Prepare for a PLF. If you come to rest short of the ground, check your position. Students should wait for DZ personnel to come to their aid.
If your feet are within three feet (1m) of the ground, unfasten your chest strap and then your (solid saddle) leg straps and drop to the ground. If you do not undo the chest strap first, you could injure your neck as you fall away.
If you are up quite a way, relax and wait for help. If help does not arrive, you may have to climb down. Perhaps you are way off the DZ and dusk is approaching. It’s hard to shout continually, and it is nice to have a whistle in times like these. You may deploy the reserve canopy without activating the cut away mechanism (for S.O.S. type equipment, pull the metal cable out of its housing without disturbing the plastic-coated breakaway cables), let down the canopy and lines and then climb down hand over hand. If you let the narrow lines slip through your fingers and aren’t wearing gloves, you will receive painful friction
burns, so go hand over hand.
Keep your helmet on until you have both feet firmly on the ground. Its purpose is to protect your head from takeoff to touchdown, and you aren’t down yet.
Power Lines
You must avoid power lines at all cost; the danger is just too great. Look for the high-tension wires. If you are at an unfamiliar DZ or land off target, look for poles; wires run between them invisibly. Keep power lines continually in mind from the time you open so you can avoid them. High-tension lines don’t look dangerous, but they strike with the speed and power of lightning. They may electrocute you in an instant or put you in the hospital with severe burns; it isn’t at all pleasant. If there is any question about clearing the lines, turn and run with the wind until you are past them and make the decision high enough. It will be better to land downwind than to land in power lines.
If landing in the wires is inevitable, it is essential that you avoid touching more than one wire at a time. Any bird will tell you that it takes touching two wires to get zapped. If you are going into the wires, face your canopy into the wind to minimize horizontal drift, pull half brakes to make your final descent as close to vertical as possible. Drop your ripcord or anything else in your hands. Place your feet and knees firmly together with the toes pointed to avoid straddling a wire. Look for wires and wriggle and squirm as necessary trying to avoid touching more than one at a time. If you come to rest near the ground, check below to see what is underneath you. If there is no hazard below you and it is less than five feet to the ground — and assuming it is the main canopy that is hanging you from the wires you might decide to execute a breakaway and get away from the danger area as quickly as possible, but it would be better to wait for calmer heads to give you guidance in this matter. If there is a hazard below you or if it is your reserve parachute that is hanging you from the wires, you must wait calmly for competent, professional help. Any movement on your part may force an electrical contact. If a local resident walks up desiring to help you, ask them to call the power company and the DZ in that order. Warn would-be rescuers not to touch you or your gear until the power has been turned off. They could complete a circuit between you and the ground with fatal results.
Once you get to the ground, be alert for broken power lines, they are like snakes hidden in the grass and they not only strike, they sometimes start fires. Never pull on a canopy attempting to remove it from the wires, it may be your very last good deed. Let the power company do it; it is their kind of work.
Water Landings
There are two types of water jumps — those you plan and those you don’t. An intentional water jump is an exciting, rewarding combination of aviation and water sports. But being unexpectedly blown out over a body of water is cause for great concern. In fact, while few jumpers have perished in a planned water jump, 48 perished in unexpected water landings between 1967 and 1984. These figures have dramatically decreased now that the use of ram-air canopies has become universal and floatation devices for operations within one mile of water are mandated by the BSRs.
The procedures for these two very different types of landings are not the same.
In an intentional water landing you will slide back in the saddle, undo the chest strap, the bellyband (if there is one), and loosen both leg straps slightly (unless you have a full saddle harness, in which case you can release one leg strap up high, then the last leg snap upon splashing down). This procedure is also recommended if you find yourself being blown unexpectedly out over the ocean or other immense body of water. When there is absolutely no question that you are going for a dunking, you should inflate your floatation device. Don’t get out of your gear until you get wet. Don’t break away when you think you are about to get wet. Depth perception over water is deceptive. You may think you’re at 20-feet, but you’re probably much higher. Without knowing how deep the water is, you almost guarantee yourself a landing injury if you don’t steer the canopy all the way to the surface. For landing purposes, assume the water is just a few inches deep. Take a deep breath and prepare to do a PLF. Line up your landing into the ground winds (you may have to use the sun’s position for a reference) and once you are wet, swim or work your way forward out of your gear. Don’t try to save the gear at first. Remember that it is replaceable, you aren’t. Worry about the gear later, when you are safely away from it. Better yet, let someone else (such as your water landing crew) worry about it.
When making an intentional water jump, conditions are good, the jump is planned and the necessary flotation equipment is worn. The ingredients for tragedy, on the other hand, are born by being unprepared for the unexpected.
The Basic Safety Requirements insist on carrying flotation gear when parachuting within one mile of any water deep enough to take a life, but there are times when one mile is not enough. A bad spot on a big load with high upper winds, sudden radical wind changes, or a popped round reserve as you exit at twelve grand, for examples, may carry you far from the friendly DZ. Some water requires more protection than just flotation gear, such as when a jumper punches through the ice in the wintertime.
Most unintentional water landings are also unexpected. They take place in narrow rivers and small ponds; so small that you don’t know you are going into them until just a short distance from splashdown. There is no time to do much water-landing preparation, particularly if you are trying to avoid trees. As a result, you are going into the water in all your gear and your chances are poor.
On the other hand, if you go through the intentional water landing procedure just in case and then miss the water only to land in the trees because you couldn’t spend enough time steering, you may subject yourself to other dangers.
The greatest danger in water landings is becoming entangled in the net-like canopy and lines. In fact, we should think of: panic-canopy-entanglement-drowning. All are challenges, very much related, and either of the first two can lead to the others. If there is little wind in the small tree-protected pond, the canopy will deflate and fall straight down on you in a huge mess of tangled nylon fabric and lines. If you panic, you are sure to become caught in the trap. It seems logical, then, to try to avoid the canopy, or better yet, avoid the water landing.
The procedure recommended for unintentional water landings is as follows: You are at 1,000 feet and the wind is backing you toward a water hazard. If you continue to face the wind, you may land short of it and if you turn to run, you may land on the other side of it, but one thing is for sure: you will land in the vicinity of it. So, take the action outlined below and then at double to triple the height of the trees, face into the wind to minimize your ground speed, pull your
toggles to half brakes, and place your feet and knees firmly together in preparation for a PLF.
Two Action System (TAS)
Continue to steer, activate your flotation gear if you have it, undo your chest strap and your belly band if there is one. Loosen your leg straps so that you can slide the saddle forward a bit. Disconnect the RSL. Then, just before touchdown, reach for the canopy release handle. At the moment your feet get wet, not one moment sooner, activate the releases. The tensioned canopy will recoil upwards and even a mild wind will carry it away. Altitude is very difficult to judge, especially over flat ground or a large body of water. One is always tempted to drop out of the harness just before touching down, but what appears to be just a leg length may really be building height, so don’t break away until your feet are in the water.This procedure will leave you floating with your harness and reserve on but with the dangerous unpacked main canopy gone. Roll over on your back and take off the harness. Actually, the harness won’t hurt or restrict you and the packed reserve will even provide positive flotation. In fact, the reserve won’t become negatively buoyant for about three minutes. So, you can use it for temporary flotation.
Single Operation System (S.O.S.). With the S.O.S. system, if you jettison the main canopy, the Stevens lanyard will activate the reserve. Allow yourself to get wet, bend forward and then swim or work your way forwards out of the loosened leg straps as quickly as possible. Get clear of the canopy.
If the canopy does land on top of you anyway, grab it and follow/walk a seam to the edge of the canopy. There is no reason to panic as you can always lift the porous fabric to form a space to breathe. Once clear of the canopy, swim away using mostly your hands until you are clear of the lines. Keep kicking to a minimum, as pumping legs tend to draw lines and fabric toward them.
If you should land in a river, even a slow moving one, you want to jettison your main as soon as possible. If it catches in the current it will drag you under and/or downstream away from your rescuers.
Besides your reserve, certain other pieces of your gear may provide some flotation. Pneumatic soled jump boots, full shell helmets, knotted jumpsuits, etc.; they are all there for those who think to use them.
You must undergo (dry) unintentional water-landing training for your USPA A license and (wet) live water training with full gear for the B license. These requirements have probably saved hundreds of lives so far.
Buildings
Landing on a building presents two distinct hazards. First, you might go through the roof of the building, which may lead to a broken or cut extremity. Second, if it is windy, you might find yourself being dragged off of the building and going for a second extremely hazardous landing. If you feel your life is in danger (such as being dragged off a high building), break away from the main as quickly as possible. Don’t worry about the reserve inflating — it won’t have enough of a
chance to do so. If it is your reserve that put you on the building, try to collapse it as quickly as possible. If that doesn’t work, you’re going off the building in the wrong position for a second landing and there probably won’t be much of a chance to get into a PLF mode, but try to anyway.
Other Obstacles
There are many other landing obstacles that are potentially hazardous to parachutists such as ditches, fences, hard roads and even some unique ones like hot water geysers. These hazards at your DZ will be pointed out to you in your first jump course, probably with a marked aerial photograph. When visiting a new drop zone, be sure to check in with an instructor or the Safety & Training Advisor for a briefing on their local hazards and recommended alternate landing areas.
When you are in the air, look for the danger areas. Invisible
barbed wire runs between visible fence posts, power lines run between power poles, isolated buildings are served by electricity. Power lines, ditches, and fences often border roads, airplanes land on runways, etc. This should all be obvious, but sometimes it’s not. It is all new to you and the view is different: you are looking down at the terrain now, not horizontally.
If an obstacle presents itself, steer your canopy to avoid it. Turn your canopy to run and land beyond it, if necessary. If you are going to strike an object, hit it feet-first. Successful landings under a parachute are like those in an airplane: the ones you walk away from are good. It is far better to land outside the target area and walk back than land on a fence and be carried back. Don’t let get home-itis get you. If you pass over the obstacle very low, you may not have sufficient altitude to turn into the wind for landing. It is then preferable to crab the canopy slightly and try to do your best forward PLF. But, obviously, the best solution is to think and plan ahead to avoid the obstacle in the first place. The most important rule about landing hazards is: Continually make efforts to avoid them. The second rule is: It is better to land flying downwind than to hit an obstacle.