Submit Article

Skydiving News and Articles

Select A Category

Pick a Category

Flying for Food

I majored in Business Management with a minor in Spanish and dreamed of working for an environmentally and culturally sensitive corporation like Coke. My life was on track, and thinking back, I imagine I'd have been quite successful. But I fell for a girl who lured me off course. I was wrapped around her finger and didn't know at the time that she would entirely derail my dreams and change the course of my life. She made me an addict, and today I'm selling the same stuff that became my addiction, and I'm perpetually unemployed between jobs.
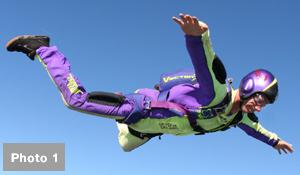
She took me skydiving and now I fly camera for a living. It's a job I hadn't imagined, much less considered, but I like it!
In this article, I'll try to give you an idea of what goes into bidding, planning, and filming for a production, and some of the things that can happen along the way.
Bidding:
The first call from production is normally from a researcher who's never jumped. He or she explains the aerial sequence, or some version of it, and then asks what I'd charge to do the job. Most of the time I can tell that what I'm being told is probably far from what's actually needed. But the researcher doesn't need an earful from me about how little he or she knows about the sport. Her job is to get numbers as quickly as possible, and my job is to give her something that she can take to her boss, some rough numbers, ideas, and a few of my own questions to pass along. All things going well, her boss will call.
The basic bid for a skydiving project includes the location, aircraft, pilots, and skydivers, simple enough if the project requires a couple of jumpers in freefall over the local DZ. Most of the time, however, projects call for something more.
A skydiving sequence for a commercial or movie might call for two hidden rig jumpers grappling for a briefcase over downtown Los Angeles. Suddenly the project requires riggers, custom equipment, ground crew, ground transportation, landowner permission for some parking lot or rooftop, FAA paperwork and permits, police to keep the landing area clear, ground to air communication, sometimes green screen and studio facilities, and especially in the USA, endless and often impossible insurance issues.
When the producers call me with a story to tell. They need me to see the logistics behind the story and to bid accordingly. Sometimes I'll deliver a bid in an hour, sometimes it will take days to complete. The most valuable tool at this point is my rolodex.
SAG:
When I bid a SAG job, my terms include that I will be treated as a performer, just like the rest of the skydivers on the project.
When a producer balks, my argument is simple. I ask them when they last hired someone to perform a stunt off-camera. Camera people sometimes hang off cliffs or race along in cars following the action, but they don't actually perform the stunt, nor do they need the kind of training that goes into flying a camera. Picture this: A stunt driver flips a car over a river. The shot requires a chase vehicle with mounted cameras to follow behind and make the same jump. Imagine telling the second stunt driver he's not on-camera, so he doesn't get a SAG contract.
There are plenty more arguments like this, but they don't always work. A producer might stick to the off-camera argument and that's that, we reach an impasse.
As much as I want the work, I don't bend on this issue. Sometimes I'll get a call from a producer who just wants to know if I'd consider working without a SAG contract, and I'll know that they've reached the same impasse with one of my competitors. That's the only time I'll give in...just kidding!
Skydiving isn't a stunt:
After my rant about SAG, now I say skydiving isn't a stunt, but bear with me. Skydiving is a sport, much like surfing or skiing and skydivers are practicing it on all different levels and making thousands of jumps to better their skills. There are skydiving stunts, no doubt, just like surfing stunts, but skydiving itself isn't a stunt.
In productions, when there are surfing stunts, producers seek out surfers. When there's skydiving in a production, they call in stuntmen. Bummer for those who train! So I've been campaigning pretty hard to promote trained flyers.
I was advised early in my career to keep things "in the family" by some of the stuntmen I met along the way, but I saw things differently and ultimately "broke the code" as it were, to bring in trained jumpers who I knew from the competitive circuit. Some say I "shot myself in the foot", and its true to some degree. Why would a Hollywood stuntman recommend a camera flyer who works with outsiders? So I miss out on some work, but overall my reel is strong, mostly because the performers I film are terrific flyers.
Communication:
Storyboards, often called "boards", are a series of drawings, much like the frames of a comic book, that help us to visualize what the writer or director is hoping to see onscreen. After all, we're making a moving picture.
I know more about skydiving stunts than my clients, but they know more about storytelling than me. Often, a non-jumper will have some gem of an idea that I'd never considered. So I try to listen carefully before projecting too much of myself into the creative process, and my reel is better for it.
When I'm clear about what the director wants, I'll plan skydives that show each storyboard frame in a way that will transition smoothly from one shot to the next, and some skydives just to film "plates". Skydiving plates are aerial scenes without skydivers that are combined with action that's filmed in front of a "green screen".
The Green Screen:
If an actor is featured in the aerial sequence, we'll film him in front of a green screen where we try to match the light and wind as close as possible to the real action. When we do it right, I can claim the shot as my own. When we do it wrong (picture Elvis surfing), I'll blame production for screwing it up.
The green screen is both my friend and enemy. As a friend, it puts Lucie Lu into the action, and gives the impression that I'd filmed impossible things. As the enemy, it entirely replaces me. Insurers and lawyers, curse them all, sometimes drive the simplest of aerial stunts into the studio to be faked. And some directors feel that they can make skydiving look real, or better than real, in studio, with fans wires and green screens. Fortunately, the fake stuff just doesn't look all that good, so I'm not out of a job yet.
The Helmet:
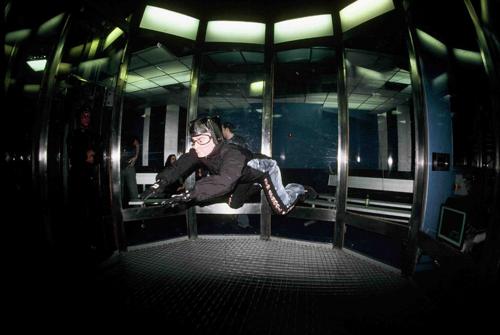
I jump a modified 35mm motion picture camera with a video assist camera that lets the director see what I've filmed after each jump, and stills. My helmet weighs about 20 pounds. On some jobs, depending on the cameras I carry, the helmet can weigh up to 30 pounds. It's like jumping a bowling ball strapped to the top of my head. People ask how I handle the weight, what sort of workouts I do to build my neck and shoulders. The answer is, not all that much. I'm relatively fit and have done a few shrugs with dumbbells, and I swim to stay loose, but nothing extraordinary.
There are a lot of camera flyers who are far stronger than me, but suffer neck and back problems from jumping even light cameras. Maybe it's genetics. My father is 73 and has never seriously hurt his back. Considering some of the disgusting deployments I've endured over the years, I can only guess that I have him to thank for my longevity in this business.
Now I've been to the chiropractor a couple of times and its like "OK Joe, take a deeeep breath….. gooood, now let it out slowly and just relaaaax…. I'll just take a running start from the other side of the office and slam into your spine, and then twist your head around so that you can take a good look at your own ass." So I swim. It seems to keep me straight.
Before production:
At least a few days before a job, someone from the team will entirely take over coordinating. I'll have some input, but my attention is best focused on what the director wants and how to get it. I think over the boards, configure my helmet, choreograph and dirt dive with the team, set exposures, check my gear, and so-on. I don't multi-task well enough to worry about other details at the same time and I'm not concerned with being credited as a coordinator. Ultimately, I'm in this business to fly camera.
Production Day:
A lot of things have come together to get this far. Depending on the size and complexity of the project, anywhere from ten to fifty people or more will converge on set. It's refreshing to finally get out there to film, and by far, production is my favorite part of the job. It's also time to step up and deliver on a variety of levels. The pressure to perform reminds me of what if felt like to compete.
Competition experience is probably my biggest asset as a camera flyer. Training to compete taught me a lot about flying the camera aggressively, and competing taught me about teamwork and about staying loose under pressure.
The Team:
I rely heavily on the team around me. And my work is only as good as the team's work, Cliché, perhaps, but true. Flying with Rob Harris in skysurf competitions, I had my part on the team, and even part of the score. Mostly, though, my work supported Rob's performance, and I found myself cheering for him in flight. When Rob had a good round, I had a good round. When he won, I won.
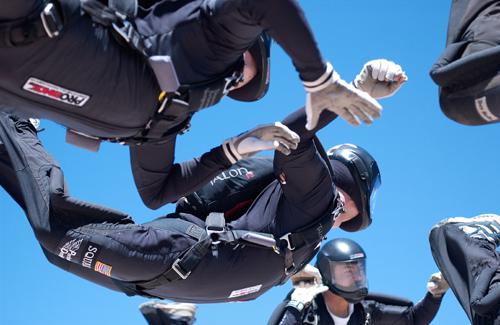
Whenever possible, I fly with skydivers who've trained to compete on some level, and who perform well under pressure. On the ride to altitude, we're generally pretty quite, breathing and visualizing, eyes closed sometimes, rehearsing the dive. And it works. In the air, we're more fluid and relaxed, communicating but not over thinking, just doing what we'd planned.
A rigger who can keep a cool head under pressure is also a great asset on any production. On hidden rig projects, for example, almost everything is riding on the rigger's work. Hidden rigs look spectacular when they work, but the slightest flaw can cause the rig to be exposed or even to blow the wardrobe clear apart. So I find myself cheering for the riggers as much as for the performers in front of me. And when it all comes together, we're golden.
Harder than it looks:
"Easy" shots on the boards can be deceptively hard because storyboards invariably call for moves we haven't practiced or even tried. I've seen talented skydivers entirely caught off guard by some simple change in a move that causes them to flail around like a first jump student.
Try back layouts while "drinking" a soda, or "talking" on a cell phone, or maybe straddling another jumper without tumbling, or flying feet to earth while swinging a baseball bat. The list goes on and often includes hiding rigs or parts of rigs, or grappling while holding props, all the sort of things one rarely trains to do.
On most jobs, we don't have the chance to practice new things before filming, so we'll just take our best guess and go for it. The challenge for me is to predict fall rates and how much slide there will be. I can react as things move and chase the action around the sky, but my shot is a lot better when I'm able to fly proactively.
Things I don't like:


Assumptions: "Well, I assumed you'd have a black rig here for me, so I didn't bother to bring one", or, "I thought they were taking that frame off the boards. That's why I didn't bring the prop", or "Nobody called me about it, so I just assumed you wanted the cables to be built like this".
Screwing up: More than once, I jumped with the lens cap still on, jumped without a load of film, forgot my battery, forgot to turn the camera on, left my leg straps loose, forgot to latch on the helmet, set the focus for under a foot, exposed the same film twice, got onto the wrong plane, pulled too low, brain-locked in freefall, forgot to clip on my wings, walked to the plane without a rig, exited over the wrong place….. There but by the grace of god go I.
Grandstanding: The last thing I want to hear on set is some skydiver making a big announcement for everyone to hear, like "You might get some idiot to do it, but you'll never tape over that handle as long as I'm wearing the rig", or "If you want to see a helicopter crash, sure, hook that line to the skid". Of course we have to set and enforce our own parameters for safety, but it isn't us against them. With a bit of diplomacy, we can explain our limits without embarrassing our clients.
Jerk Producers: It's rare, but it happens.


Producer: "The director needs you to pass close to the cliff like on your reel."


Me: "If the winds calm, great, but right now they're blowing at 20+ miles per hour."


Producer: "Look, nothing personal, pal, but I've been in this business longer than you think. I hope you understand I didn't come all the way out here to pay for excuses."


Me: "Ok, let me talk with the guys" A few minutes later…."OK, we figured it out. We'll fly 100 meters from the wall. If the wind calms, we'll fly closer. And, we'll hang onto the exposed film until all payments for this job are received, nothing personal."


I suppose there are reasons to become jaded over the years in this business, but it isn't worth the negative energy. Most productions are great, and some are epic! And most producers are good people, and good at what they do.


Things I don't like (part 2):


Crash landing in an airplane
Hitting power lines in a helicopter
Landing on thin ice
Seeing another jumper get hurt
Landing in a yard with guard dogs
Being lost at night under canopy
Opening too far offshore
Hard openings
Extra heavy cameras
Whining (oops)

What I like:


Flying camera to tell a story
Visiting cool dropzones
Meeting great people
Traveling
Having family time between jobs
Planning unusual projects
Working through the physics of how objects fly
Getting the shot
Working with talented skydivers
Dropping big things like cars
Bragging about my cool job
Being called a "Bald Headed Action Figure" by my kids
Back in college, If someone said I'd fly camera for a living one day, I wouldn't have even known what they meant. And when I think back on the series of events that led me here, so much fell into place in ways I could never recreate. It makes me wonder where I'll be 20 years from now. I should thank the girl who lured me away from suits and polished shoes, maybe bring her something nice when I go home tonight.
~ Joe

Joe's Photo Galleries on Dropzone.com
Skydive.com - Joe's new project
Skydive.tv - Joe's web site

By admin, in News,

New ownership for Aerodyne Research

As reported earlier our former owners eliminated the parachute business from their holdings. The factory in Durban, South Africa, was sold to the Zodiac group together with the military product catalogue.
Aerodyne is happy to announce that we have organized new owners for Aerodyne Research and the line of Aerodyne sports products. We are pleased to welcome Vidar Antonsen and Ole Petter Hjelle (Ole Petter is the team captain of the Norwegian national FS4 team Arcteryx) as members of the Aerodyne team. Both are from Norway and active skydivers themselves. Although, they will not be involved with the daily management, we view this as a positive development for the company to have their support and assist Aerodyne Research to become an even stronger player in the parachute industry.
President Edward "Bushman" Anderson reports: "Right now we are setting up a new manufacturing facility in the Durban area, in South Africa. The facility will be located in a brand new air-conditioned building and we are installing state of the art machinery. We are also very fortunate to be able to retain many key staff members. Our current Technical Director Dominic Hayhurst will be the Managing Director of Aerodyne Research Manufacturing.
At the same time we have teamed up with Aero Tech in Florida for the production of the Icon harness-container system. Aero Tech is a very professional operation headed by Terry Pike who has more than 30 years experience in the industry. Thiago Muradas, who is a co-designer of the Icon and has been involved with production and R&D; from the start, will supervise training and production."
Aerodyne expects that the changes in production can be implemented smoothly and swiftly but has taken measures to ensure steady supply to its distribution partners. Arnold Collenteur, director of European sales, explains: ". In addition to main canopies and Smart reserves, we now stock Icon container systems. These Icons come with a harness finished to the custom measurements provided with the order. This way our distributors are able sell complete systems to our customers this summer, and deliver in a matter of weeks. Aerodyne is one of the few sport parachute manufacturers that can supply complete systems to our customer's specific needs."

By admin, in Gear,

The Stall

The stall is one of the least explored and most feared aspects of flying. Avoidance of this flight mode causes many canopy pilots to be uncomfortable with flying slowly, and unpracticed in this important art. This article will discuss the governing variables relating to the stall, in hopes that this knowledge will help parachute pilots to become less afraid of this essential aspect of the flying experience.
First we must explore what a stall is. The assumption made by most canopy pilots is that the stall is caused by slow speed flight. This is not true. It is correlated with low speed flight, but a wing can stall at high speed too. A stall is caused by an excessive angle of attack. When the relative wind flows over an airfoil, it is bent in the general direction of down. This causes an opposite force called "Lift". When the orientation of the airfoil is changed to a higher angle with respect to the relative wind, it is said to have an increased angle of attack.
Air is quite cooperative. It is willing to be redirected and still flow in a fairly organized manner…up to a point. At a specific angle, all airfoils fail to bend the air into submission. This discrete angle of attack is referred to as a stall. It is coupled with a sudden drop in lift, and thus a significant increase in decent rate. Whether you are flying an F-16 or a Lotus 190, recovery from a stall is always the same: the pilot must reduce the angle of attack. On an airplane this requires forward pressure on the yolk or stick. On a parachute, we are simply required to let off the downward pressure on the toggles or rear risers that has increased the angle of attack in the first place.
Each parachute stalls and recovers differently. Depending on several governing variables, some parachutes will recovery nicely from a stalled configuration no matter what the recovery technique, while others will require very careful execution. Let's take a look at these issues one by one.
The characteristics of a stall on any ram air canopy are based on two main variables, and several lower order variables. The most significant governing variable is the flight mode when the stall is reached. If the canopy is in a sink, rather than level flight (zero decent surf), it will tend to stall in a more forgiving and docile manner. The second primary variable is the attitude about the roll axis when the stall is reached. In other words, if there is any bank angle when the stall precipitates, it will cause the lower wing to stall first, resulting in significant yaw energy, which can result in line twists.
There are several other things to consider when testing the stall of a canopy, including: canopy design, density altitude, wing-loading, aggressiveness of the control input, and most importantly, recovery technique. This will be discussed next.
If the wing is allowed back into forward flight quickly, it will dive aggressively toward the ground, causing a drop in the angle of attack, as well as the lift and therefore the overall line tension. This may allow the wing to surge below the suspended weight (you), and possibly cause a jumper/canopy entanglement. Further, if the release of the brakes is asymmetrical, the lack of line tension can allow the wing to surge unevenly about the yaw axis, causing line-twists.
The key to stalling any wing is to enter the stalled configuration in a sink, with the wing level and static about the roll axis. As soon as the stall is reached, the toggles (or rear risers) should be released only a few inches to allow for only a slight drop in the angle of attack. As soon as the brakes are released, the jumper should be prepared for a sudden increase in toggle pressure, as the tail of the parachute is about to get hit with a pulse of relative wind. If the pilot is unprepared for this, the toggles will usually be pulled upward and possibly in an uneven manner, often resulting in an aggressive stall recovery that may result in line twists.
When the brakes are released quickly to the full flight position, the wing doesn't have much drag. This means that there is very little to prevent it from surging forward in the window. When the brakes are released slowly, and then held down just above the stall point, the wing has a great deal of drag. You have two big barn doors at the back of the wing helping to prevent and aggressive surge.
Further, as you become more familiar with the stall and recovery characteristics of your wing, you may begin to fly "actively" with respect to the recovery process. In other words, as soon as the wing begins to fly forward in the window, the pilot jerks on the brakes to dampen the forward surge. It is important to do this minimally enough to prevent re-stalling the wing. A well-timed reapplication of the brakes during the recovery process will significantly reduce the amount of altitude lost in the stall. This can be very useful in the event of a low altitude stall. This maneuver can be practiced in relative proximity to another canopy in deep brakes. Be sure to keep your distance when you do this. By definition, a stall is a loss of control of the wing.
Rear riser stalls tend to be sharper at the onset, but quicker on the recovery. Therefore it is advisable to stall the parachute on the rear risers first before attempting to stall it on the brakes. Further, such maneuvers should always be performed at an altitude that will allow for a safe cutaway.
Given all of these concerns, one must ask "Why should I stall my parachute in the first place". There are several valid reasons why each jumper should rehearse stalls at altitude.

In high angle of attack approaches, such as may be necessary in a tight landing area, stalls can happen inadvertently while maneuvering. This is why it is also important to practice slow flight maneuvering by lifting the toggle on the outside of the turn, rather than depressing the one on the inside of the turn.
In order to reach a (near) zero ground-speed on a no-wind day, the pilot must have full "Toggle Authority". In other words, if the toggles are set too long, the pilot will be unable to access the slowest possible airspeed, and therefore will be forced to land with more ground-speed without the advantage of a headwind. Being able to finish the flare completely and then let up after landing to prevent the stall from pulling you onto your heels in an essential part of any no wind landing.
When you decide to practice stalls, I suggest taking the process step by step. Simply honking your brakes down with your eyes squinting in negative expectation usually results in a wild ride, and sometimes a cutaway. Try hanging out in slow flight for a while. Bring your toggles down to a bit more than half brakes and leave them there. If you are above the stall point, it isn't going to just stall all by itself. Watching people fly in deep brakes is usually similar to watching them light a firecracker. Your parachute isn't going to explode…promise.
When you get your canopy into the deep brake mode, take a deep breath in and let it out slowly. Relax your muscles. Let your legs hang limp. I find that nervous pilots can't connect with their parachute because it isn't touching their bones. If you soften your muscles, your will allow the leg straps to sink into you so that you can feel what is happening with the newest addition to your body: your wing. By truly relaxing under canopy, we begin to sober up from the adrenalin that is blurring our vision and skewing our perspective toward the negative.
Stalls are an essential part of flight. If you are to be fully in control over the wing, you must explore all aspects of your parachute's performance envelope. Ultimately, flying slowly is the most important aspect of flight because we land in slow flight. The more comfortable you are with your slow flight skills, the better your touchdown will be. Remember, the definition of a good flight is one that ends well.
BSG
www.BrianGermain.com
BIGAIR SPORTZ

By BrianSGermain, in Safety,

Body Language: Helping Your Canopy Open Better

Many factors determine the way your canopy opens. The design of the canopy and the way it is packed are two important factors, but body position also plays a major role.
We learn to deploy our canopies in a basic, stable position as students, and many of us don't give this skill much more thought after that. Unfortunately, we sometimes develop a few bad habits that have a negative effect on our openings.
Even after making thousands of jumps, people have been surprised to find that a few small adjustments to their body position during deployment can significantly improve their openings.
This article is about deploying a parachute, one of the most important things you do on every skydive. It might be a good idea to practice these techniques on the ground before trying them in the air. You might even want to make a solo jump and try some practice pulls using these techniques before it's actually time to deploy.
If you are not a licensed skydiver yet, or have just recently earned your license, you should discuss this article with your instructor before trying anything you read here. He or she may want you to focus on more important skills, like altitude awareness and basic stability, rather than adding anything new to your pull sequence.
No Need for Speed
The speed at which you are falling when you deploy your canopy can have a large effect on the forces generated during the opening. As your airspeed increases, these forces also increase.
Many of today's canopies are designed for relatively slow openings, and some will not be affected greatly by a little extra speed at deployment time. Some jumpers even find that their canopies open better when they are falling a bit faster. This is not something you should take for granted, though.
Higher airspeeds might not cause a canopy to open hard as long as everything else is just right, but small variables tend to have greater effects at higher airspeeds. If you rush your pack job one time and let things get a little sloppy, or if your canopy is starting to go out of trim, extra airspeed could make the difference between an opening that is slightly abrupt and one that really hurts.
Slowing down before you deploy can provide a greater "margin of error" and reduce the effects that other variables have on your openings. Slowing down can be especially helpful if your openings are frequently or even just occasionally faster than you like them to be.
Vertical or "freefly" body positions like head-down or sit-flying allow you to reach much higher airspeeds than "flat" body positions. This extra speed makes flattening out and slowing down before you pull particularly important. Both beginners and experienced freeflyers should keep this in mind when planning their dives. Even if you don't freefly, simply tracking at the end of a belly-to-earth jump can significantly increase your airspeed, and you may still find it helpful to "flare out" of the track and slow down before you deploy.
To flare out of a track, spread your arms and legs and de-arch slightly for a second as shown in. This will help bleed off any excess speed. Keep your arms and legs spread out and maintain a slight de-arch while you wave off, remembering to look around for other jumpers. As you finish your wave-off and start to pull, relax back into a normal arch. If done correctly this doesn't take a significant amount of time and becomes a natural part of your wave off.
What Are You Looking At?
Take a moment to notice where you are looking while you reach for your pilot chute. If you jump with a video camera, look at some of your openings on tape. What do you see in the video as you pull? Are you looking up at the horizon, or down at the ground below you? Do you look back toward your pilot chute handle as you reach for it? Do you look over your shoulder after you pull?
Older skydiving rigs used spring-loaded main pilot chutes activated by a ripcord. Even in the late 1990's this type of system was still used on most student rigs. Those of us who were trained using this type of system were taught to look for the ripcord handle before grabbing it. We were also taught to look over one shoulder and "check" after pulling the ripcord. Looking over your shoulder changes the airflow over your back and helps clear pilot chute hesitations, which are common when using a spring-loaded main pilot chute.
Most licensed jumpers use hand-deployed main pilot chutes, and these are becoming the standard for student training as well. Even if years have passed since they transitioned to a hand-deployed pilot chute, many experienced jumpers still have the habit of looking for their pilot chutes as they reach for them and checking over one shoulder after they throw them. Unfortunately, it's almost impossible to look over your shoulder and keep your shoulders level at the same time. Looking over your shoulder also tilts your container to one side.
Although large, docile student canopies may not get offended if your shoulders and container are uneven, more responsive sport canopies will be much happier if you keep your shoulders level. Having your shoulders and container tilted as the canopy deploys can cause off-heading openings, line twists, and can even cause a hard opening.
Most of us have our pilot chutes mounted on the bottom of the container, so trying to look for the handle is really useless. Even if you still use a legstrap-mounted pilot chute, you probably can't see the handle very easily in freefall. Since hand-deployed pilot chutes are thrown into the clean air next to your body, pilot chute hesitations rarely occur and checking over your shoulder every time isn't necessary.
Some people have a habit of looking straight down as they deploy. This tends to put you in a slightly head-low attitude, which can increase your airspeed slightly. It can also amplify the opening force your body feels, since this force will mainly be transmitted to your shoulders when the canopy reaches the end of the lines. Also, your legs may swing through a wider arc as the canopy sits you up in the harness, making the opening feel more abrupt.
Instead of looking for your handle or looking down at the ground, try lifting your head up and looking out at the horizon as you reach for your main deployment handle. This puts you in a more head-high attitude. The opening forces will be transmitted farther down through the harness instead of being concentrated at your shoulders.Looking at the horizon also helps keep your shoulders and container level as you pull.
After throwing the pilot chute, bring your arms back into a neutral freefall position and think about keeping your shoulders level as the deployment bag lifts off of your back. You can also push your hips down slightly and bend your knees just a bit, as if you were in a very slow backslide. This keeps your head and upper body high.

In the past, some jumpers have recommended "sitting up" during the deployment. This can actually work well as long as it is done correctly, but if you sit up too much or too soon there is a risk of increasing your airspeed or even becoming unstable. Simply lifting your chin, looking at the horizon, arching a bit more, and relaxing your legs slightly has a similar effect to consciously sitting up, and you're less likely to overdo it.
Some people who jump with side-mounted cameras believe it's necessary to keep their heads down when they deploy, to prevent a riser from hitting the camera. This might be an issue if you have narrow shoulders or wear your chest strap very tight, leaving less room between your risers. It also might be a problem if your camera sticks out from the side of your helmet quite a bit. It's best to minimize this problem by keeping side-mounted cameras as small, streamlined, and snag-free as possible. If you're convinced it's necessary to keep your chin down, at least keep a good arch and relax your lower legs to keep your shoulders higher than your hips, and also focus on keeping your arms and shoulders level in the relative wind.
Back in the Saddle

As soon as the canopy sits you upright in the harness, try putting your feet and knees together for the rest of the opening . Putting your legs together helps keep your weight even in the harness and reduces the chances of an off-heading opening. This is especially effective if you are jumping an elliptical-type canopy. Just the weight of your legs swinging around or a small weight shift in the harness can cause some of these canopies to start turning.
If you grab your risers as the canopy is opening it's best to hold the lower part of the risers, just above the 3-Ring system. If you grab the risers up near the toggles you might make the canopy turn by unintentionally pulling one riser or releasing one brake. If you hold on to the bottom of the risers, you can still slide your hands up quickly to steer with the risers or release the brakes if necessary.
Some jumpers try to keep their openings on heading by actively steering with their rear risers while the slider is still up against the canopy. This works with some canopies, but other canopies don't like it at all. You may get better results if you just relax, sit still, focus on keeping your weight even, and wait until the slider starts to come down before making any corrections with the risers.
Watch Where You're Going
In a first jump course we are taught to check our canopies to make sure they open correctly. Although this is important, it can also create a very bad habit. Many jumpers look up at their canopies as soon as they start to open, and continue watching the canopy through the entire opening sequence. Some people continue looking up for several more seconds while they collapse their sliders and release their brakes.
If another person opens close to you, you may only have a second or two to react in order to avoid a collision. Staring up at your canopy for five or ten seconds after you deploy is like driving down the highway while staring up at the roof of your car.
Fortunately, a few techniques can help you avoid this problem.
Many students are taught to count out loud while their canopy deploys, saying "arch, reach, pull, one thousand, two thousand, three thousand…" If you don't do this already it's a good habit to create, and can help you keep track of time during the deployment sequence.
You will hear and feel different things during each stage of the deployment. A second or less after you throw your pilot chute, you should feel the snatch force pull you upright in the harness. This is the force of the canopy fabric hitting the relative wind as it comes out of the deployment bag.
The canopy will then snivel. The snivel is the portion of the opening where the slider stays against the bottom of the canopy, reducing your airspeed before the canopy starts to inflate. There will still be a lot of wind noise during the snivel, and you will still have a sensation of falling. This may last for a second or two, or even for several seconds.
The inflation occurs as the slider moves down the lines and the cells fill with air. Things become quieter once the canopy inflates. Even under a canopy that inflates very slowly and smoothly, you will still feel the transition from falling to gliding. You may also hear the slider flapping above your head once it comes down.
Once you become more aware of these sensations you will find that your other senses can tell you as much about your opening, if not more, than your eyes do. Soon you will feel comfortable looking out in front of you during the entire opening, rather than watching the canopy itself. This allows you to watch for other jumpers, and many people find this reduces off-heading openings as well.
"But," you may ask, "if I don't watch my canopy open, how will I know if I'm having a malfunction?" Take the advice of someone who has cut away a number of misbehaving canopies: you will probably know right away if you are having a malfunction. They tend to feel very different from a normal opening, and you will probably know something is wrong before you ever look up.
If you start to count after throwing your pilot chute, and reach "two thousand" or "three thousand" without feeling the snatch force, there is obviously a problem. This would be an acceptable time to look back over your shoulder and check for a pilot chute hesitation or pilot chute in tow.
Once you know how many seconds the snivel usually lasts on your canopy, you will also know if that part of the opening is taking longer than normal. You can usually feel line twists right away, and if you start spinning wildly you'll surely want to look up at your canopy and see what's bothering it.
What if the opening feels perfectly normal? Unless you need to avoid another jumper right away, you should still look up and check your canopy right after it inflates. You might not notice a tear, broken line, or similar problem until you look up. Even in these situations, if the opening felt normal then the canopy is probably flying well enough to give you a low rate of descent. Assuming you deployed at a reasonable altitude, you should have enough time to do a control check and execute emergency procedures if necessary.
If you've been watching your canopy open every time then you might not feel ready to stop doing this during your very next jump, but you should start developing better habits as soon as possible. Start counting when you throw your pilot chute, and notice how long each stage of the deployment sequence takes. Pay attention to what you are hearing and feeling during the opening. Soon you won't need to watch the whole deployment, and will be able to pay more attention to your body and your surroundings.
Improving your body position and increasing your awareness when you deploy your canopy can produce great results. You might not remember everything in this article during your next jump, but at least think about trying these suggestions one at a time, at your own pace. You might be amazed by the difference a few small changes can make.
About the author: Scott Miller runs the Freedom of Flight Canopy School at Skydive DeLand in Florida (www.freedomofflight.tv) and holds canopy skills camps at other DZ's throughout the year. He has worked at several drop zones as an AFF instructor, tandem instructor, and freefall photographer, and also worked as a test jumper for Performance Designs.
This article first appeared in Skydiving Magazine, Volume 25, Number 7, Issue #295, February 2006. Printed here by permission of the author.

By admin, in Safety,

Mirage Ground Launch Systems

Ground Launching is the newest and fastest growing sport in the swooping community! Foot launching parachutes is relatively easy but having the proper equipment and training will save you alot of time.
After years of research and development Jim Slaton started the Ground Launching Center (GLC) and teamed up with NZ Aerosports in New Zealand to develop parachutes specifically for ground launching called the Daedalus GLX and GLS. Now Jim has teamed up with Mirage Systems to develop the Mirage Ground Launch system.
The Mirage GLX is the top of the line fully loaded ground launch harness that is lightweight and reversible. The GLX comes in blue & black mini diamond material, adjustable harness, risers, multiple riser attachment points, quick link hardware, backpack system, extra pockets on outside of harness, extra padding on shoulders and the harness inverts to become backpack.
The harness forms a seat and the risers can be conneted to the GLX's lower or upper attachment points. This gives pilots the option between flying in the hanging position like a skydiving harness or the siting position like a paragliding harness.
The Mirage ground launch harness comes in two styles for all your launching needs. These models are kept on the shelf and typically shipped the same day. The retail price of the new Mirage GLX is $695.00 and available in small, medium, large and extra large. For more information contact Jim Slaton at mirageGLX@canopypiloting.com or check out http://www.canopypiloting.com/mirageGLX.htm

By admin, in Gear,

POP Access to your Dropzone Mail

Pick up your Dropzone.com mail with your favorite mail reader!
We think for skydivers a Dropzone.com email address is much cooler than Hotmail, MSN, Yahoo or any of the other free mail service providers. When you join Dropzone.com you automatically become the owner of the yourusername@dropzone.com email address. Standard users have access to their mail through our online mail interface (just like Hotmail and Yahoo).
As a Premier Member you can now download your mail with your favorite mail reader! Whether you use Outlook, Outlook Express, Eudora, Pegasus Mail or any of the other mail clients out there, just set up your POP settings and start getting your Dropzone.com mail delivered straight to your desktop!
Much more control...
On Dropzone.com we scan all messages on our servers for viruses and you should never have to worry about possible infections. We also use SpamAssassin to minimize the amount of spam that comes to your Inbox. With all of this done, being able to download your mail to your desktop gives you even more control over your mail. You can run it though your own anti-spam and anti-virus software and archive it as you please. More space...
Even if you choose not to download your mail via our POP server and just continue to use our online WebMail interface, we bump up your availible storage space from 3MB to a whopping 50MB! If you use our POP service then simply choose not to leave a copy of your mail on our server (it will be on your desktop anyway!) and with 50MB you should never run out of space!
Back Continue your Tour

By admin, in Premier Features,

PD Announces Price Increase & New Pricing Policy

In response to escalating costs in petroleum-based raw materials, as well as the impact of continual rising costs of other supplies and overhead expenses, Performance Designs, Inc. is implementing a price increase effective June 23, 2006.
"We've experienced increases of more than 20% in some areas," said John LeBlanc, PD Vice President. "PD has absorbed these steadily rising costs for as long as possible, but it is time to make what has come to be an inevitable price increase on our products. Knowing that our dealers face many of the same cost pressures, we anticipate the same increases will be passed along to the skydivers."
In a related move, PD is modifying its pricing policy to be wholesale-based rather than discount-based.
"This means that while the suggested retail price will remain the same, wholesale prices will be increased on a canopy-by-canopy basis. We are pricing our canopies based on our costs - which our ERP software allows us to measure for each canopy - and using that to determine the wholesale price to our dealers," LeBlanc continued. "We expect PD dealers to begin quoting prices in fixed dollar amounts instead of a discount off of suggested retail, because that is how we are setting our prices to our dealers."
Rob Wilson, PD Marketing Manager, added, "For a long time, skydivers have had to calculate the percentage discount, figure out what that means in terms of price, and then shop around for the 'best' price. We believe the market would benefit from a more straightforward approach to pricing - moving from bothersome calculations to simply: 'this is the price.'"
"We understand the sensitivity to prices," he continued. "But there is another part of the purchase equation called value. We believe that skydivers know that canopies manufactured to international quality standards, that go through multiple levels of inspection throughout production, that are development-tested more than any other canopies in the world and that use the best materials money can buy results in a stronger, better performing and longer lasting canopy.
"For skydivers seeking such quality, value far outweighs price considerations. That is what we will be focusing on in the coming months and years - quality has a price, and it is well worth it."
"Part of our goal is to help the dealers take the focus off of price discounting and put it on helping the skydiver become a better skydiver. Making sure they are getting the right canopy for their skill level and their progression in the sport is a whole lot more important than shaving a few dollars off the price", said Wilson. "This simplified dollar-based approach to pricing is a step in the right direction."
"The key thing is to call your PD dealer, use that conversation to make sure the canopy you want is right for you. And then get the purchase price", he said.
Performance Designs, Inc. is the world's premier sport canopy manufacturer, setting the standard for innovative design, unmatched quality of materials and manufacturing excellence. PD's premise of "the dream of flight" is enjoyed by skydivers on 5 continents across all disciplines. PD products are preferred by skydiving professionals for their superior flight characteristics and performance capabilities. To learn more about PD products and services, or to find the PD dealer near you, visit PD's website at www.performancedesigns.com

By admin, in Gear,

Looking for the perfect team

You might as well be searching for The Holy Grail.
How often have you heard of a team who's had a big argument and broken up before, during or immediately after Nationals, having already spent an exorbitant amount of money? Most of the time this could have been avoided by simple communication, honesty and a little bit of compromise from the outset. Instead, the 'volcano effect' takes hold, and petty grievances, built up over the course of the year, come to an ugly head, usually at an important and stressful event - like Nationals.
Quite often the issue that causes the break-up seems pretty minor a couple of months down the line. But it's an all-too-common practice in skydiving, and one that detracts from teams and individuals being able to perform at their best. Most teams require two years minimum to even scratch the surface of their full potential. It takes time for teams to gel to the extent that they have true communication, anticipation and knowledge of working together. But this all-pervasive attitude, which makes it acceptable to break up a team over somewhat insignificant differences, prevents the sport and individual skydivers from growing and progressing.
It's the syndrome of seeking the 'perfect' team, and it's become so commonplace in skydiving that we could almost be forgiven for thinking it's acceptable.
What is 'the perfect team'
Most competitive skydivers have an idea of what the 'perfect' team is. They look at teams like Airspeed, Deland fire and Sinapsi PD, see these teams communicating and performing well, and make the assumption that to some degree, team members are virtual clones of each other. They never see individuals disagreeing or arguing, and believe these must be 'perfect' teams comprised of 'perfect' skydiving
individuals with 'perfect' personalities. They imagine how great it would be to be part of a team like this, and that their own problems stem from being unable to replicate this perceived 'perfection' in their own teams.Because of this unrealistic expectation, too many talented skydivers waste their time not training with a team at all. There's nothing worse than not training - in fact, some of my steepest learning curves have come from being part of what could be described as 'dysfunctional' teams.
In a similar way, teams waste time by constantly replacing 'flawed' team members in search of the 'perfect' team dynamic; instead they should be working together, getting over personality differences to achieve a common goal, which is performing at the team best.
It may come as a shock but - there is no perfect team!
The truth is that on any team, individuals have their own ideas, flaws and times of stress - and often disagree with their teammates. Our unique qualities and imperfections make us part of this diverse human race, and differences are inevitable. I can't think of a more diverse group of people than Airspeed 8 - our disagreements ranged from how many jumps to do, to physical training and jumpsuit colours (you should see what we finally came up with in 1996)!
Despite this, I often hear how up-and-coming jumpers idealise the top teams and think they always get along perfectly with each other. The result is that when a disagreement naturally occurs on their own team, they assume it's an inherent and insurmountable fault in the team - and subsequently break up or switch members. Differences like this are to be expected, and are part and parcel of team training, no matter what level you're at.
A reply I often hear to this is, 'Yeah, but we're not Airspeed,' - implying it's easier to deal with team disagreements and personality conflicts when you're a professional team; if you have to put up with it for 'work', then somehow, you can. But when non-pro teams nowadays are spending between $5,000 and $25,000 per person per year on this sport - it seems like a few minor differences could be worth dealing with for longer than just one season! More to the point - there's really no alternative, if you want to perform, you have to deal!
It's easy for teams to think their issues are unique, and that problems can't be resolved because of this; however, the case is most likely that the individuals are not willing to work out their 'unique' issues. Usually the problem is nothing more than the result of someone's need to express themselves, and this, in turn, being taken the wrong way. Problems like this could have been resolved months earlier with the input of a good coach, or by using truthful 'pass the rock' sessions where team members get the opportunity to vent and communicate openly.
Teams need to realise that what they're going through is normal, and conflict is part of a natural evolution for every team. There is not a single team that does not go through conflicts. The difference between a successful team and a failing team is that the former works out their differences, whereas the failing team does not. It's not a matter of individuals being unable to resolve their conflicts - it's simply that they are unwilling to. Airspeed has gone through few big decisions without some pretty heated opinions being cast around the room.
Because every team goes through the same cycles of development, it's worth outlining what those cycles are, so they know what to expect. One way of looking at how teams grow and mature is to use Bruce Tuckman's 'forming, storming, norming, performing' model.
Forming - Stage 1

The 'honeymoon phase'
When most teams join up, they all seem to get along - everyone is excited about the new team and keen to get started; this is also known as the 'honeymoon phase'. Most skydivers are jubilant that they actually have a team to skydive with, morale is high, and negative personality traits are kept in check. It's very important in the 'forming' stage to get an experienced coach for guidance and direction. Many teams also benefit from having a team leader, and this is the time to appoint them.
You should also spend quite a bit of time discussing your goals and aspirations as honestly as possible, as this will avoid problems down the line. There could be nothing more frustrating than being in a team where people have completely different agendas - one wants to take the team to the World Meet and another just wants to get the swoop at the end of the dive!
Levels of commitment in terms of number of jumps, tunnel, money and time should be discussed as a priority, and while not every member of the team will have exactly the same objectives here, as long as they are in the same ballpark the team can succeed. It's important to come to a workable compromise and move on - rejecting a team whose goals don't precisely match yours, and ending up not jumping, is much worse than doing only 200 team jumps that year instead of the 300 you wanted to do!
Individual long-term goals can even be different - it's fine if one person eventually wants to become a World Champion, and another just wants to compete for a couple of years before moving on to other things - as long as the collective team goal is agreed upon and compatible for the duration of the agreed term of the team. I refer to this as 'buying into the contract'. The key agreements of this 'contract' are:
Individuals agree to work together to achieve the common goal.
Individuals agree to communicate honestly with each other, more commonly known as having regular 'pass the rocks'.
Individuals value their differences, i.e. they recognise that every person has a different background and personality, and will therefore have different ways of relating and behaving.
Individuals seek to gain insider learning about their impact on the team, i.e. thinking before speaking and recognising that what they say has the potential to impact the team in a negative (or positive) way. Individuals should be responsible and accountable for their actions and words.

Storming - Stage 2

Guess what? The honeymoon is over!
This is the frustrating stage of learning with the team; individual quirks start to come out and team members vie for position as they attempt to establish themselves. Cliques can also start to form within the team - questions and uncertainties come up and the 'contract' itself may be questioned. This is where most teams sow the seeds of inevitable self-destruction.
Simply put, this is the stage where arguments might occur over block techniques, individual performance and styles of relating. Even table manners, personal hygiene and fashion sense can all come under attack! It's important to realise that this is natural human behaviour in a goal-orientated team environment. It's also important for individuals and the team to reiterate the goals they set and believe that the team outcome is more important than individual needs. At this stage, outside help in the form of a coach experienced in dealing with team dynamics is invaluable.
I've heard more times than I'd like to recollect, 'I guess I'm just not a team-player'. I don't believe this to be true. That individual is just not willing to compromise, or never bought into the 'contract' in the first place. People who are described as 'team players' are just more willing than others to suppress their need to be heard all the time. I also believe there's no such thing as a natural team player. Anyone has the ability to become a team player as long as they are willing, at times, to put aside their own ego for the good of the team.
Knowing that the 'storming' stage is normal and can be overcome by focusing and refocusing on the agreed team 'contract' is critical at this time. There's no knowing when the 'storming' will occur, or how long it will last. However the sooner a team recognises it and then accepts it as normal, the sooner the team will leave this phase behind.

Norming - Stage 3
Congratulations - you've got further than most teams and are on your way to performing your best!
This is the phase where the team has recognised individuality as a strength, and has matured as a group. Commitment and unity is strong. It could feel similar to the 'honeymoon phase', but instead of being based on enthusiasm alone, it marks a time of personal growth and acceptance.
Roles and responsibilities are clear and welcomed: the team's everyday interactions and dealings have become like clockwork, and the daily training routine, including team meetings and 'pass the rock' sessions, is more instinctive and needs no prompting.
It's important to realise the individuals themselves have not fundamentally changed, and disagreements will still occur - however teammates have come to understand that having their personal needs met is secondary to team growth. The same disagreements teams had in the 'storming' stage suddenly seem less important and are dealt with more quickly and in a more mature manner.

Performing - Stage 4

The fun part!
In this stage the team has a high degree of autonomy and will be running like a well-oiled machine. The team is able to focus on performance; personal issues that would have held them back previously as a distraction have melted into the background and become irrelevant.
This is also the phase where individual relationships and trust are consolidated within the group. On a personal level, team members trust that each one will always act for the good of the team - communication between piece-partners is open and honest. In the sky, teams feel that everything falls into an instinctual rhythm, more so than a forced or conscious act. Trust in individuals' ability runs high, allowing team members to be sure that others will also fly their slots with confidence. This in turn allows for faster keys, more confident moves, and ultimately, more points.
Teams should expect that disagreements will still occur - even arguments - but now issues are resolved within the team positively. It's also important to recognise that just because a team has reached the 'performing' stage, they may not be the 'best of friends' - however teammates trust and respect each other, because of the understanding that they are all focused on the common goal, i.e. the 'contract'.
This phase is more easily attainable than most people think, or believe. It's the most fun part of training, and the pay-offs are numerous. Individual growth, realisation of your potential, a load more points and the best skydiving you'll ever do are just some of them.
And it's a choice that anyone can make.
Gary Beyer was a member of multiple World and National Champion team, Arizona Airspeed, between 1995 and 2002. He has since retired from World level competition and dedicates his time to team and tunnel coaching. www.onthelineskydiving.com
This article was first published in Skydive The Mag (UK) and is republished here on request and with permission from the author.
Photos by Mike McGowan

By admin, in Disciplines,

Belly Fly 101

You just graduated AFF or you got your A license. You can execute all the skills required of you in the sky. Now it is time to take it to the next level. Tunnel flight can help you hone your skills that you have already, and most definitely help you learn some new skills. The wind tunnel can give you confidence, awareness and much needed experience at a time when it is hard to come by any of those things.
The wind tunnel is perfect for anybody. Wind tunnel coaching through the whole AFF and A-license experience is standard issue for all Central Florida drop zones. Coordinating the circle of awareness, motion, fall rate, turns, docking and practice pulls are all possible in the wind tunnel.
The first thing that you should learn is the relative work position. The position is the root for all movement. The reason is every time you want to move; you always start and stop in the learned belly position. Your chin should be up. Your eyes should be focused in front of you, not looking down. Your arms should be relaxed so they do not cup air or carry stiffness. You should have pressure on your shins so you do not back slide. You should be bent slightly at the knees so you do not constantly move forward. Your body should be symmetrical. Asymmetry causes turning. Your hip should be in its most arched position. Sometimes it takes a bit of moving down to actually get a good arch.
After the neutral position is learned then the 6 points of motion are taught down, forward, backward, up, and sidle siding left and right.
The first thing I teach after the standard position is to move down. The reason is the worst thing that can happen to a newbie in the wind tunnel is to catch air and ascend high up; so the instructor cannot reach you easily. Anything above 8ft high off the net makes it challenging for your instructor and dangerous for you at first. To move down, simply arch more. If that does not do the trick, take up less surface area by getting smaller. You should move right down to the net. Some times I keep first time students on the net for a rotation or two so they do not bounce around. In the lower wind speed it is easier to make mistakes and not fly up against the wall. Once general body awareness is attained, the controller can turn up the speed a little more. The first time student can fly off the net with a little more speed after they can go down. I also teach going down first, so if the student does get up a little higher than they like, they can easily come back down.
The next thing to learn is motion forward and backward. Most people come into the wind tunnel with built in movement in their technique. In order to stay perfectly still you must learn to go forward and backward first. Forward motion is accomplished by putting both feet back at the same time and then relaxing back into the neutral position and coasting to a stop. Moving backwards is done by putting both arms forward in front of you while you relax your legs towards your butt and coast back in to a neutral position for a stop.
I do not teach "braking" until the student can do the first 4 points of motion. The reason is for most students early on braking is too much to think about. Initiating subtle movements and coasting to a stop slowly is more effective in the beginning.
Flying in the sky is like flying on a football field, plenty of room to roam. Flying in the wind tunnel is like flying in a bottle, close proximal flying. Small movements are a necessity. Deep diaphragmatic breathing will lessen the tension carried in the body and relax your mind.
After a student can go down, forward and backward; I teach them how to go up. The two easiest ways to teach a student how to go up is by them taking up more surface area or de-arching with their hip. The easiest way to move up is to get longer with your arms and legs and flatten your torso. This cups air and pushes your body up like a board. The second way to move up is to de-arch at your hip. This will catch air in the pocket your hips and torso make and accelerate you upward.
Each method for going up works in different scenarios. If a person you were jumping with slowed up very quickly de-arching at the hip would be a good way to slow down in the sky. Keep eye contact with the person! If that same jump partner ascended relative to you very slowly then getting longer and flatter would be optimal.
Side sliding would be your next skill to learn. Side sliding is moving sideways while facing forward. It is very important to do this with a straight torso. Bending at the torso is inefficient and usually causes a turn. To keep your torso straight and move side ways, use your arm and leg at the same time to push you across the tunnel. The most popular rookie mistake is to push with just your hand. If you push with just your hand you will turn instead of side slide. You should push both your foot and your hand at the same time. Initiate the movement and then cost to a stop. This will create a seamless side slide.
Make sure to arch when you side slide to keep on the same level or plane that you initiated the motion on. Once you can go back and forth seamlessly both ways with out changing levels at all; then learning more advance side slide techniques would be warranted.
Turning is also a very important skill that can be learned in the wind tunnel. I start to teach turning usually right after the first 4 points of motion are learned. I progressively perfect my student's turn as side sliding is attained. The most important turning skill is to turn slowly in the wind tunnel. More often then not students like to "crank" turns out when they start. In the sky that might be all well and good, but most students are moving when they turn. If you turn with precision at first, then the progression will come easy.
Keep your head up and maintain a huge arch when you turn. Most students look down and de-arch when they turn. The sheer act of spinning creates lift. Coupled with de-arching spinning can send you up to the huge fans that power the wind tunnel. It is important to arch even harder when you turn to maintain your levels throughout.
Another popular mistake is to relax your legs on your butt when you turn. This makes for interesting times. Relaxing your legs will make you back slide while you are turning. Keep the shin pressure you have when you turn. Some students need to think of putting their feet out when they turn, just to keep the legs in the same place through out the completion of the turn.
The Mantis position is popular in more advanced relative work. We will cover it in the scope of this article because the vast majority of new fliers want to learn it. My opinion is that it should be learned after 6 points of motion, 90 degree turns and 360 degree turns. Early on in the progression, I believe that most students are too stiff to learn the Mantis properly.
Once a student can move their arms freely without causing instability or motion, then it is time to refine the basic relative work position into the Mantis. The student should try to bring their hands closer to their ears first to reduce drag on the arms. Remember the whole idea of the Mantis is to fly a more aero-dynamic position not to learn it because it looks cool. Most students press their elbows down at first. This usually causes tension. After a student can fly with hands closer to their ears instead of the basic relative work position, all the time, perfecting the Mantis position should be tackled. The hands should come closer together like you are hugging a small volley ball while laying your body on a flat surface. Dropping your elbows down into the standard Mantis position should be the last step to learning it.
It is very important to fly in the wind tunnel. The wind tunnel is the most revolutionary tool to be introduced to the sport of skydiving since the three ring system and tandem jumping. Now that wind tunnels are popping up all over the world, they will subject more and more people to our sport. Our numbers will grow in a prolific fashion and we will finally get the market penetration that our sport has long yearned for.
If you get frustrated in the tunnel keep trying. In all likelihood your frustration stems from only a few places. A bad instructor, people looking at you when you fly, the constant presence of glass or chicken wire and the inability to just go "buck wild" like you can in the air can lead to frustration. The wind tunnel is so much fun. With the right training regimen, repetition and a good instructor the sky is truly the limit to your skills.
Steven Blincoe is the founder and head coach of the New School Flight University in Orlando, Florida. He has 4,000 skydives and 500 hours of wind tunnel time. He specializes in wind tunnel camps and will scower the globe in the next few years to spread the art of tunnel coaching. Please feel free to contact him at www.blincoe.org or 530-412-2078.

By admin, in Safety,

Exit Separation Revisited

Exit separation has become a point of contention at many DZ's lately. Years ago, when belly flying was the rule and the Cessna 182 was the aircraft at most DZ's, exit separation wasn't too much of a big deal - you gave the other group (if there was another group) some time and then you went. With the aircraft in popular use 15-20 years ago, it was hard to exit very quickly to begin with, and so the issue never came up very often.


Bill von Novak started skydiving in 1991 at a small DZ in New York. Since then he has become an S+TA, an AFF, tandem and static line instructor, and has set two world records in large formation skydiving. He lives with his wife Amy in San Diego.


Since then, several factors have conspired to make exit separation more of an issue. First off, there are more people freeflying. Freeflyers, especially head down groups, drift differently than belly flyers, and thus need different considerations when planning for exit separation. Faster canopies mean that people who open facing each other need more distance to deal with a potential collision. Large aircraft with big doors can hold several larger groups, and those groups can get out those big doors more quickly. Finally, GPS spotting has removed some of the delay between groups. It's rare to see people even check the spot before beginning their jam-up.
I first became aware of this issue in 1994, when I started jumping at Brown Field in San Diego. We went through a series of aircraft as we grew, from Cessna 206's to King Airs to Beech-99's, none of which had GPS. In addition, we were less than a mile from the US-Mexico border, which meant our jump runs had to be east-west and our spots had to be dead on. Several instructors were "designated spotters" and we would argue over 100 yard differences in jump run offset and exit location. After a while we got pretty good at spotting.
As our aircraft became larger, exit separation became more of an issue. We had a few close calls, and so we agreed to start allowing more space between groups. At first it was essentially trial and error - we would leave some amount of time (10 seconds or so) between groups and increase that time whenever someone felt they were too close to someone else. After a while, we began to get a feel for how much time was required. We knew that if the upper winds were strong and the plane was just creeping along the ground, we had to leave more time. We also knew that if we let the freeflyers get out first, we had a problem almost every time. We ended up with a system that worked for us, and had essentially no problems with collisions or close calls after that.
During this time I was also traveling in the summers to different boogies and I noticed a wide variety of exit separation techniques. By far the most common technique was some amount of fixed time - the next group would pause, then climb out and go, without knowing what the upper winds were doing or what the spot was. The next most common technique was similar but they added a "leave more time if it's windy" clause to their delay. There was also a class of jumpers who looked out the door to tell how much separation to leave; these jumpers either looked at angle of the departing group or the ground to tell how much space to leave.
This got me thinking. What really works and what doesn't? I tried a few methods on my own, from the "45 degree" method to a purely ground-based method. After some experiments, a group of skydivers collaborated via email and internet and came up with the actual math behind separation, the physics that determines how far the center of group A will be from the center of group B after they open. But before diving into the math, there are a few basic concepts to cover.
What we care about. When we're talking about separation at opening time, we don't really care about where we are in relationship to the plane or even the ground - what we care about is how far we will be in the air horizontally from the next group that opens. So for our purposes, the airplane and the ground don't really matter, and someone watching from either of those places may not get the same "picture" of things that we get. (Of course, we do care about our relationship to the ground when it comes to spotting and landing on the DZ, but that's a separate issue.)

How we fall. In most freefall (tracking dives and wingsuits excepted) we fall essentially straight down with respect to the air. If there's wind, the wind blows us at whatever speed it's blowing. If the wind is doing 30kts at altitude, a group of skydivers will be doing 30kts as they drift with the wind. It's also important to realize how your trajectory changes after you open. At a freefall speed of 100kts, a 30kt wind will slightly deflect your trajectory, because it's a small fraction of your total speed. Once under canopy and descending at 10kts, it will deflect your trajectory a tremendous amount, since it is now a very large part of your speed. Of course, under canopy you have much more control over your own horizontal speed, and the winds may add or subtract from your canopy's groundspeed depending on the direction you are facing.

Speeds. When discussing speeds, it's important to define units. There is feet per second, which is very useful for people who are trying to figure out how far they want to be from another group. At 100 feet per second, 10 seconds gives you 1000 feet, which is about as easy as it gets. You may also hear the terms indicated airspeed, true airspeed, and groundspeed, in both knots and miles an hour. These can all be converted back and forth as needed . Now that all that's out of the way, the math is pretty simple. The distance you will get between group centers is the speed of the aircraft plus the speed of the winds at opening altitude, multiplied by the time you leave between groups. That's it. So if the aircraft is flying into the wind doing 80 knots per its GPS, and the winds at opening altitude are 10 knots from the same direction, and you are waiting 10 seconds between groups, you are going to get (80+10 = 90 kts, which is 153 feet per second) 1530 feet between groups.
It gets a little more complicated when the winds are not from the same directions. If the winds at opening altitude are opposite jump run, you have to subtract them rather than add them. If the winds at opening altitude are from the side, it's the same as zero winds at opening altitude when it comes to separation.
If you put these equations into a spreadsheet and play with the numbers, some basic patterns emerge. If the headwinds at altitude are strong you have to leave more time. If the plane is slow (i.e. it's indicated airspeed on jump run is low) you have to leave more time. If the winds at opening altitude are strong as well, and from the same direction, you can safely leave less time. (Or, preferably, just leave the same amount of time and you'll end up with even more separation.) If the winds at opening altitude are opposite from jump run, that's the worst case, and you have to leave even more time.
Some people have a problem visualizing how winds at opening altitude can possibly cause them trouble if they leave enough distance on exit. The question is usually phrased as "don't all jumpers follow the same path out of the plane?" And they definitely do. To visualize why this can still cause you problems, take a look at the separation diagram shown below.


Drawing showing exit separations
In the first drawing, there is no wind after exit, and the first group breaks off, tracks, opens, and flies their canopies away from the center for the first few seconds, which is what they should be doing on most formation skydives. (After that, it's a good idea to turn away from line of flight once you're sure you are clear of others in your group.) The second group arrives 10-15 seconds later, shortly after the first group has opened their parachutes, with some room to spare.
The second drawing shows what happens when there are winds are the same all the way down. Notice that the "cone" caused by the breakoff and the canopy flight has shifted strongly to the right. This is because (as mentioned before) once their parachutes are open, the wind affects their trajectory more strongly. As with the first example, it is assumed that everyone flies away from the center for the first few moments. That means the jumper flying into the wind makes no progress and comes straight down, while the jumper flying downwind gets a boost in groundspeed..
The third drawing shows where you can run in to problems. In this drawing, the winds after exit are from the opposite direction. You get the same skewing of the cone, but now the edge of the cone is getting dangerously close to the trajectory of the next group. This is a case where the same separation at exit led to trouble because of opposite winds at opening altitude.
This leads naturally to the question "how much separation do you really need?" That depends on the group. 1000 feet should probably be an absolute minimum for any belly formation skydiving. That means that two four-ways can exit, fall straight down the pipe, track 300 feet from center on breakoff, and then still have 300 feet to deal with avoiding a potential collision after opening. With the speeds of today's canopies, that's a bare minimum. If the group size grows to two 10-ways, 2000 feet might be a wiser separation. If a low-time RW group backslides a bit, again, 1500 feet might be needed to be clear of them at opening time.
So how does a jumper who doesn't want to carry around a calculator figure out how much time to leave between groups? One very simple way is to just look out of the plane and wait until it has covered 1000 feet, then go. This method, originally suggested by Skratch Garrison, takes much of the figuring out of exit separation. It can be hard to determine how far 1000 feet is on the ground, but fortunately most DZ's come with a handy ruler - a runway. A 3000 foot runway allows you to put 3 groups out along its length with a bit of margin thrown in. This method also has the tremendous advantage that it requires people to look out the door, and that means they are more likely to see traffic, high canopies or clouds that could pose a hazard to their skydive.
Another simple way is time-based. There are several tricks you can use to determine how long to wait. One common one is to always leave at least 7 seconds, then if the upper winds are strong divide them by 2 and wait that number of seconds. (Faster aircraft sometimes use divide by 3.) So if the winds are 30kts you wait 15 seconds between groups. This technique uses some math but isn't too bad.
A third technique that seems to be popular for some reason is the 45 degree method. In this method, jumpers wait until the previous group passes through an imaginary 45 degree line before they exit. The problem with this method is that the jumpers never pass through that 45 degree angle, or pass through it so quickly (under 1 second) that it's not useful for determining separation. The numbers confirm this. What you see out the door depends purely on speed of the aircraft, fallrate of the jumpers and type of exit. If the plane is going slower than freefall speed, the group may start out above the 45 degree line, but will drop below the line in less than a second and never rise above it again. If the plane is going faster than freefall speed (which is rare) the jumpers stay above the line and never cross it at all. A good head-down exit will tend to move jumpers lower in the picture. Winds will not affect the picture; an exit in 5kt uppers looks the same as an exit in 50kt uppers.
There has been some friction over this issue. The 45 degree method has a lot of supporters because it's so simple and makes a sort of intuitive sense. Beyond that, it actually seems to work for some people - although it's likely that the extra time it takes to locate and stare at the previous group has something to do with the reason the next group usually leaves enough time. To show that this doesn't work, two cameras were fixed at a 45 degree angle and mounted on a boom outside an Otter's door (see pictures below.) Pictures and video of several jump runs both into the wind and downwind were taken and magnified to determine how close each group was to the imaginary 45 degree line, which was essentially the center of the images. The pictures confirmed the basic problems of the 45 degree rule. RW groups, falling a little faster than the aircraft, never quite passed behind the 45 degree line. Freeflyers, going much faster than the aircraft, stayed well below the 45 degree line for as long as they were visible in the stills (about 30 seconds.)


Some version of the 45 degree method may work for some people. It may be that the simple act of looking out the door delays them enough, or their subconscious may see the group moving slowly along the ground (because the aircraft's groundspeed is low) and send a warning message to the rest of their brain - "hey, hold up a minute." But waiting for a true 45 degree angle simply does not work.
Another issue that has become more important lately is exit order. Some places still put freeflyers out first, and that doesn't make much sense. In 30kt uppers, a belly flyer who leaves 10 seconds and gets out after freeflyer will open 100 feet from him, but if the belly flyer goes first and the freeflyer leaves the same time he will open 2200 feet from the freeflyer. RW groups, since they are in freefall longer, drift farther downwind before opening. It seems like a no-brainer to choose an exit order that used this to your advantage and increased, rather than decreased, separation distances. You can certainly wait 20 seconds after the freefly groups before the belly groups exit if there is some other reason why the freeflyers have to exit first, but at most DZ's it's hard to ensure that 20 seconds, especially since waiting so long almost guarantees long spots or a goaround.
Below are two diagrams that show how exit order can affect separation.

Belly out first diagram

Freefly out first diagram
One reason given at DZ's to explain a backwards exit order is that freeflyers open sooner and therefore are beginning to descend before the next group gets there. Bryan Burke of Skydive Arizona has pointed out that you simply cannot trust vertical separation - one premature deployment or malfunction and all that vertical separation is gone. Even during a normal skydive, when you add up altimeter error, pull timing and snivel distance, you can easily get a jumper opening 1000 feet from where he expected to be open. In fact, Bryan points out that at Skydive Arizona, the primary reason high pullers get out last is not for separation but rather because they are the ones that can make it back from a bad spot.
Every drop zone is going to have a different set of rules and a different approach to exit order. Some work well, some don't work as well. Jumpers have to understand the factors that can reduce group separation so they can make informed decisions about when they want to exit and what kind of exit orders they are comfortable with.

By admin, in Safety,