National Skydiving Museum Weekend Honoring Joe Kittinger
A mid-summer skydiving celebration honoring the "first man in space" is the centerpiece for one of the biggest fundraising events yet planned for the National Skydiving Museum. Fifty years ago, Air Force Capt. Joe Kittinger exited at 102,800 feet from a helium balloon over New Mexico, reaching a speed of 614 mph during a four-and-a-half minute free fall. The record still stands today, although there have been several attempts to better it.
The "National Skydiving Museum Weekend Honoring Joe Kittinger" will be held in DeLand, Florida the weekend of August 13-15. Kittinger’s jump was on August 16, 1960. Kittinger, who retired as a colonel and is now 81, plans to attend, as well as other skydiving luminaries. There will also be several activities during the weekend benefiting the Boy Scouts of America, another cause Kittinger supports, to commemorate their 100th Anniversary.
Joe Kittinger outside the gondola from which he took his historical jump.The Saturday evening dinner will be devoted to honoring the initial class of inductees into the National Skydiving Museum Hall of Fame. A special committee carefully selected eleven honorees, culled from a list of skydivers who made major lifelong contributions in equipment design, free fall techniques, and those who excelled in national and international competitions.
This fundraiser is part of the National Skydiving Museum’s $5 million capital program that will raise the necessary funds to build the museum in Fredericksburg, VA. (story contributed by Doug Garr)
Show your support and join us!
Skydiving Activities and Exhibitions...
Here are just a few of the events that will honor Joe Kittinger and celebrate 50+ years of skydiving history including giving special recognition to other pioneers for their contributions to our sport. (schedule subject to change)
Jumping for Joe 50-Way Formation Skydiving Exhibition
This 50-way formation with some of the best skydivers in the country will celebrate and symbolize 50 years since Joe Kittinger’s record breaking jump. Canopies opening in an almost simultaneous rhythm will have the audience cheering until the last skydiver lands.
Swooping Exhibition
Swooping truly shows how far parachute equipment has come over the years. Swooping is gliding a high performance parachute across the ground or water for long distances, generally a slalom type course, to show the skill of the canopy pilot. The exhibition will have some of the top swooping demo jumpers in both individual and team exhibitions.
Accuracy Competition
Accuracy goes way back in our history but didn’t get the recognition it deserved until the Sixth World Parachuting Championships held for the first time in the U.S. at Orange, MA. Accuracy canopies in those days were modified military surplus equipment with very little steerability. Today, high performance accuracy canopies and the skill of jumpers make for exciting and competitive accuracy contests.
Skydiving Demonstrations
Precision skydiving demos the world famous Army Parachute Team (Golden Knights) and the Air Force Academy Parachute Team.
Wingsuit Flying Exhibition
Grand finale and tribute to Joe Kittinger wingsuit flying truly exhibits the dream of human flight. Ten to 15 of the premier wingsuit flyers in the world will fly formations across the sky with smoke to add to the effect of this spectacular jump.
Source - http://www.skydivingmuseum.org/
Skydiving and the Environment
It is no secret that skydiving is bad for the environment, it doesn't take rocket science to figure out each load is using fossil fuel which is essentially damaging to the environment. Many companies, people and organizations around the world continue to try become more 'green' in an attempt to slow down emissions, an initiative which has been strongly inspired by the global warming buzz which has been increasingly present over the past decade or so.
Skydiving has been put on the list of most environmentally damaging hobbies/sports activities a few times, this because of the fuel used in each load. Though it's certainly not that black and white, and one has to look at little bit deeper, down to that layer of thought called logic.
To quote a member of the dropzone forums in an environmental thread.
"While skydiving may consume more fuel per participant then, say, soccer. He (the writer of the article that the thread is discussing) ignores the fuel consumed by the millions of fans who drive to soccer stadiums around the world every week. Therefore, the impact of soccer as a whole, makes skydiving look like a drop in the bucket."
Let's quickly look at some numbers and see just how 'bad' skydiving is in comparison to other sporting events.
In soccer for example, the world’s largest spectator sport- stadiums can hold from 40 000 to in excess of 100 000 spectators, and often these stadiums are full. The FIFA World Cup this year is in South Africa, and the South African chief organizer of the World Cup is suggesting a possible 300 000 foreign visitors. Including flights to the country, local flights between games and transport that's a lot of fossil fuel! This is of course just one example of a sport where the transportation of the spectators seems to outweigh the emissions of skydiving.
The fact that skydiving is an activity which is based around aeroplanes often tends to trigger people into thinking that conventional sports are a lot less damaging to the environment. But it is important to take into account the details and nature of each activity and not just look at which one appears at first glance to be damaging.
Trying to become more environmentally aware does not mean that one must stop all activities that are harmful to the environment, because with that logic one would likely never leave their room. It's about trying to make a difference, looking for greener ways to continue what you're currently doing. There will be times when you will have to sacrifice comfort should you want to become more environmentally friendly, though this is a personal choice you should make on your own.
With that said; There are dropzones who are getting into the green swing of things and attempting to cut their emissions the best they can, while at times positively enhancing the dropzone as well.
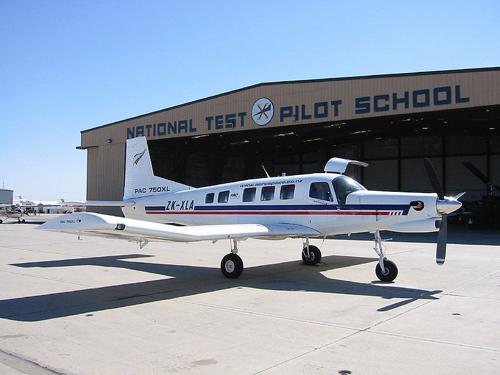
Skydive Lake Wanaka is just one dropzone who has recently purchased a P-750 X-Stol jumpship. They stated in a press release they have upgraded their current Cresco to the Cresco P-750 in an attempt to cut down on the amount of loads done per day by increasing the size of their aircraft and doubling the amount of possible passengers per load. This is just one case where a small investment allows for progressive environmental support while at the same time increasing the quality of the dropzone. The P-750 is not only larger than the current Cresco, but it is more comfortable, has larger windows and a quieter engine.
The current Cresco has an average fuel consumption of 180 litres/h while the P-750 X-Stol has an average fuel consumption of 192 litres/h, an increase of just 12 litres an hour while being able to hold twice the amount of passengers.
An Inconvenient Truth Regarding PLF's
When I started skydiving round parachutes were the only parachutes available. The landing under a round canopy had a high straight down component. Although Para Commanders had a noticeable forward speed under no wind conditions, landing in winds over 10 mph were again straight down. Due to straight down landings most injuries were to the ankles because one tended to sit down on the ankles during a less than perfect timing of the landing techniques required by round parachutes. Use of the Parachute Landing Fall (PLF) greatly reduced the extent and severity of landing injuries. Virtually all successful skydivers were experts at PLFs because not every landing was executed perfectly, no matter how many jumps one had, and sooner or later one had to land a round reserve. In the classroom it required a block of at least two hours to teach landing the parachute because so much of the time was devoted to teaching an actual PLF. The complete PLF technique is not a natural, readily apparent procedure. During the actual jump about half of the students would perform a PLF and the other half wouldn’t no matter how much time and practice was spent on PLFs. The injury rate was quite high. About 1 in 20 first jump students would suffer some type of ankle injury.
With the advent of square parachutes, and particularly with the advent of placing students under square parachutes, the landing injuries changed. Each experienced person reading this article will realize that the injuries from landings that we see today are not limited to ankles. This is because the parachute is moving the jumper across the ground in almost all circumstances. However, there are cases were a person would be descending straight down even today. A high or rapid or deep flare by a student would be one example. In this case the PLF position for landing would definitely influence the ability of the student to walk away from their mistake.
In my opinion there are instances when use of a PLF for a botched landing is NOT beneficial to the jumper. A downwind landing is such an instance. The PLF introduces a roll and a square parachute introduces a large amount of speed. For the sake of this example, assume the wind is blowing at ten mph. The jumper has made a mistake and is landing downwind. He/she has the presence of mind to have the toggles at his/her ribs (half flight) for an air speed of ten mph and a ground speed of 20 mph. Please bear with me for the easy math.
20 mph = 20 mph X 5280 ft/hr = 105,600 ft/hr
105,600 ft/hr = 105,600 ft/hr divided by 60 minutes/hour = 1,760 ft/min
1,760 ft/min = 1,760 ft/min divided by 60 sec/min = 29.33 ft/second
At 20 mph ground speed a person is moving 29.33 ft per second across the ground. At half flight the downward speed (3 to 5 mph) would be somewhere between 4.4 ft/sec and 7.33 ft/sec. I believe that in this example the best outcome for the jumper would be to try to absorb as much of the initial downward velocity as possible with their legs (knees bent and pressed tightly together) and then NOT ATTEMPT A PLF.
The danger inherent to a high speed roll/tumble is a direct result of the laws of physics. An example using a cylinder will illustrate the principle. I am 52 inches around the shoulders so let’s talk about a perfectly round cylinder, 52 inches in circumference, moving in the air just above the ground and oriented perpendicular to the line of flight.
At touchdown the cylinder is going to pick up a rotational (angular) velocity based upon the speed across the ground (linear velocity) divided by the circumference of the cylinder. Excluding friction, which will slow the cylinder by scraping, the cylinder will initially roll across the ground at 29.33 ft/sec divided by 52” (circumference) per rotation.
52 inches divided by 12 inches per foot = 4.33 feet (circumference)
29.33 ft/sec divided by 4.33 ft / rotation = 6.77 ROTATIONS PER SECOND!!!
If this seems quite a lot, it is. However, this is why occupants of a rolling vehicle are thrown so far from the vehicle in a rollover car accident (buckle up?). In the rollover case the rotational speed (angular velocity) of the vehicle rolling is translated to the linear velocity of the thrown body. The thrown objects, including unbuckled occupants, are thrown hundreds of feet.
Returning to the skydiver, I am not a perfect cylinder. I am more of an imperfect ellipse (oval) seen from above. This is not to my benefit in a rolling landing as the ground (not perfectly smooth) will have a tendency to turn me into a round object by attempting to break off my protrusions (shoulders, arms, knees, etc.) This is complicated by the fact that the PLF was developed using round parachutes which did not have flare capability. As such the arms in a round canopy PLF were above the head, elbows bent and cushioning the head from the sides. This positioning essentially extends the arms along the long axis of the cylinder. With a square parachute our hands are down at our sides (hopefully) controlling the flare. During the rotation of a PLF, and particularly a rotation of 6.77 rpm, the hands and arms are thus exposed to quite a bit of trauma due to impact with the ground, more than once, as the roll proceeds.
What one hopes for is the best case scenario where the jumper is rolling from shoulder to shoulder across the ground. The worst case scenario would be tumbling head to toe across the ground. Unless one is a trained gymnast this would expose the head and neck to several impacts with the ground. A real life roll/tumble would probably fall somewhere between these two extremes. At a rotational speed of 6.77 rpm a PLF would risk head and neck injury. At a rotational speed of 6.77 rpm, even a perfect PLF has great risk to shoulders, arms, hips and legs.
There is a solution to this downwind landing possibility. It is easy to train and easily understood by newcomers and experienced skydivers alike. The simplest way to prepare for as many landing scenarios as possible is to assume the PLF position, fly the parachute and slide on one hip in the event of a forward motion, high speed landing. I teach our students to envision holding a dollar bill between their knees and squeezing a quarter between their glutes (“feet and knees, dollar and a quarter”). Actually doing so puts one into the PLF position.
When the person discovers a downwind mistake has been made, he/she should assume this PLF position. At touch down the jumper should try to absorb as much as possible of the downward impact with their feet but lean back in the harness. Under no circumstances should the person allow themselves to be thrown head first. The jumper wants to stay on their feet as long as possible, tending to sitting down. As the person sits down he/she wants to transition (during the squat) onto a hip. One does not want to impact directly onto the butt. The spine will tolerate torsion (bending) but very little compression. Sitting down directly onto the butt could cause spinal problems on its own (disks and vertebrae). Absorbing the actual butt touchdown with the hip will allow the spine to flex. Hitting a rock with the tailbone while sliding across the ground could be quite painful as a likely result is a cracked tailbone. Hitting a rock with the hip while sliding across the ground might possibly bruise the hip, an easier recovery than any spinal injury. The jumper should perform a baseball slide into second base ensuring that they remain sliding feet first. The person will get dirty. Done properly, one may see damage to the leg strap cover on the hip, but a dirty/torn jumpsuit and/or a dirty/scraped hip cover will be all that one sees.
During a proper landing (into the wind) and under reasonable conditions, if a person is in a PLF position (feet and knees, dollar and a quarter) accompanied by a flare anywhere near half–flight, the parachute will lay the student down in the first half of a PLF. This is all that is necessary with a properly sized square canopy. The “lay down” is a result of the fact that most students are not true into the wind at touchdown and thus the square parachute almost always imparts some degree of forward AND sideward motion to the student.
The occurrence of downwind landings is relatively rare. However, bear in mind that most of these are done by a jumper off student status (off radio assistance). This person has received very little if any formal instruction since the first solo landing class. So the technique must be simple to learn, retain and execute months after the initial training.
Since I began teaching this concept, decades ago, I have not had a single jumper injury related to downwind landings when my advice was put into practice.
My motivation for writing this article comes from the words that I hear when traveling to other drop zones and the words that I read in articles such as “Incident Reports”, “…you should have done a PLF”. This is not always the case, particularly with today’s parachutes. A PLF is no longer a panacea for all conditions. I also want to point out that, in my opinion, the instructor showing a first jump student a PLF accomplishes nothing at all. Having each student perform a PLF on the ground is no better. For a person to learn a PLF requires repetitions by the student, MANY repetitions, from an elevated platform.
A person or publication telling anyone that he/she should have done a PLF, which the person has never actually learned, is not accomplishing what the student needed and the knowledge that the publication is trying to disseminate.
Climb Out, Freak Out, Chill Out
A beginners guide to filming competitive 4-way
This article is for jumpers that already have some experience flying camera and are trying to expand on their knowledge of how to film formation-teams in a competition setting. I will focus mainly on 4-way, because I believe it to be the most difficult FS discipline to film (aside from VFS), due to the many different exits and faster key speeds. However, once you have a firm grasp of shooting 4-way, the same principles can be applied to 8-way and larger formations.
During a competition, whether it be a local meet or the nationals, it is vital that you give yourself all the advantages you can to do the job right. It is advisable that you jump with two cameras with differing wide-angle lenses. Film the team with the tighter view in mind, so if a grip goes out of frame, you can always revert back to the other camera with the wider view. The difference between first and second place can come down to only one point. So our goal is to have an “NJ free” (Non Judgeable) competition for all 10 rounds. If at any time during a jump a grip goes out of frame, the videographer can cost the team a point or more. Jumping with two cameras is not necessary for training, however you want to do a few training jumps before a meet with the exact set up that you are planning on using. This may expose any flaws or issues with your equipment.
Training should be more difficult for you than competition. Push yourself to fly close to the formation. Train with your back up wide-angle lens, this will force you to be closer and more aggressive in getting the shots you need. This will make every competition feel much easier. Do not be afraid to try new things. Sometimes we have to leave our comfort zones to learn something that may benefit us in the long run.
Climb OutIn most cases the camera flyer is in charge of the spot. Not having to worry about this little detail allows the team to focus on their jump. As you climb out on the camera step, think of flying your body as soon as you expose yourself to the airflow. Even though you are on the airplane, miss-presenting yourself to the wind can make your job a lot more difficult.
You can practice climbing around on the airplane while it is parked. Get a feel for where everything is. Continue to practice until you can climb out of the plane in a smooth and controlled manner. Speed will come with time. Do not forget to practice climbing back into the plane. Sometimes you will find yourself climbing out right as the red light turns back on. If possible, one of your teammates can block some of the wind and help you get back inside. Remember to become familiar with different aircrafts when you travel to another drop-zone to train or compete.
Freak OutNever trust an exit count! It is easy to get impatient on the camera step, waiting for the team to get ready. Teams can sometimes take a while in the door to get ready, especially if they are trying something new. Do not interpret a “wiggle” as a count. Be patient and watch for other signs like a helmet releasing a head jam.
Every team’s exit count is different. Before every jump, most teams will take the time to dirt dive and practice their exit from a mock-up. You can learn a lot about the team by just simply watching them on the ground, so take as many opportunities as you can to learn the exit count and timing.
Leading or Peeling?The exits covered here are from an otter, a left-handed door.
Keep in mind that your relative position to the team is much closer on the aircraft than what it will be in freefall. You will need to create this gap quickly during the exit by falling slow. This is where camera wings and strong legs can be very helpful.
Teams and coaches prefer the leading exit over the peel exit, because it gives them a great view of their timing, presentation, and heading. This method is much more conducive for the video debrief.
For this exit I have my left foot on the camera step and my right hand on the handle. (When you have your right foot on the step, you expose more of your body to the exiting team.) After the team has given the count and is in the process of leaving the airplane, I find it helpful to try and run my right hand across the fuselage. I try to feel the rivets of the plane as I kick off the step. This helps ensure that I am in the correct position relative to the formation. As for your timing on this exit, you will know you have left too early when you can see the bottom of the airplane, and you will have left too late if you make contact with the team. For all exits, this is where your timing becomes crucial.
Peeling is usually considered the safer choice of the two exits, because you leave right after the team. This way, you will not leave too early because of a misinterpreted count and you do not have to worry about the teams burble.
For this exit, I have my right foot on the step with my right hand on the handle. I swing my body back so that my left foot is touching the fuselage. Now all I have to do is wait for them to come out the door. Leave with the last person and follow the team down the hill. Remember to present your hips correctly into the relative wind and keep the team in those cross hairs.
Chill OutAfter the exit, all you have to do is keep the team’s grips in frame for the next 35 seconds. Remember that the different formations rarely stay in one place. As the team transitions from one formation to the next, you may have to adjust your own relative position to the team to keep them all in frame. Improving your individual flight skills will allow you to make these necessary corrections quickly and without thought.
Although the “hard part” is over, you still have to be in the right position to get a judgeable video. Being close enough is the first part, but probably more importantly is being “steep” enough. Your angle in relationship to the formation is crucial. The steeper you can get, the better. It is very difficult to see all the grips when you are shallow. This is especially true on exit. If at any point, other than the exit, you can see sky, you are not steep enough. You should also only be able to see the top/back of the team’s helmets (no faces). The distance from the team will vary on the size lens you are using.
An additional detail to pay attention to is the background. As the videographer, you can make the judge’s job easier by turning to a heading with a solid background, such as a forest, lake, desert floor, etc. Multicolored backgrounds, such as buildings can make the image very distracting and the formations harder to judge.
Doh!Making contact with the formation can occur either on exit or in free fall. We want to avoid this scenario at all costs; however, accidents can and do happen. If you find yourself falling towards a formation, get as big and flat as you can! The last thing you should do is ball-up. Your natural reaction is to protect yourself, but by doing this you will only make things worse. Not only have you sacrificed all your lift and will now impact the team with greater speed, you have also given up on the chance that your airflow may be returned to you as the formation continues to move to the next point.
I think that it is a good idea for camera flyers to understand what the team is exiting and how the formation will fly. I believe that a deeper understanding is necessary than just to know whether a formation is long or round. Being able to anticipate a formation’s movements, direction, and timing will greatly improve your video quality. Be pro active! Ask your team what formations they are going to perform. It will take some time, but being able to “speak” a little 4-way will not hurt.
You can educate yourself on these formations by reviewing the IPC dive pool online. Memorize how each formation flies as it comes out the door; more importantly, think about how they might block your airflow. As the team debriefs their jumps, you should do the same. Take a look at your own timing, framing, and distance. Strive to make each video jump better than your last.
Competition vs. TrainingWhen it comes to competition camera flying, there is a big difference between a “Gun for Hire” and a Teammate. In order to make this transition, you need to change your approach and mind-state from just being there for the ride, to being part of the action. As a teammate, you are taking on much more responsibility than a “gun for hire”, such as: archiving and cataloging all media footage, taking pictures, submitting photos to magazines and sponsors (if applicable), checking in with manifest for calls, spotting, chasing down cutaways, etc. Your team needs to be able to depend on you to do all of these things. Creating a great training environment becomes key. The more the team can focus on their training, the better.
Helping a team to perform at their best can also aid you in achieving your best. Being able to perform at your peak during a high-stress competition can be very satisfying and rewarding. A positive attitude and an eagerness to learn is the start of becoming a good competitor. Hard work and embracing the training process is what will turn you into a great competitor.
Voyages of a Skydiver
Captain’s Log 2010, 0210, Manifest asks for proof of currency and jump numbers, along with the reserve data card from my rig…These are the voyages of Average Skydiver.
Many of us grew up hearing a similar introduction to Star Trek episodes, as required by Starfleet Command. A captain’s log is nothing more than a logbook chronicling the journeys and adventures of a spaceship, boat, airplane, or other craft that carries persons or cargo.
Logbooks are the basic standard of proving jump numbers in the world of skydiving. Jump numbers are a basic indicator of skydiving experience. A logbook may also be a means of keeping track of where you’ve been, what you’ve done, and who you did it with. Logbooks may be fun, or they can be boring.
Skydivers are required to keep a logbook of sorts at the least until an A or other beginning license is achieved that indicates the “student” status has passed. Many dropzones require a written logbook if a visiting jumper wishes to jump. The logbook not only demonstrates the number of jumps, but should indicate skydiver currency as well.
If the goal is to become an instructor of sorts, logbooks must be kept until 500 or even 1000 jumps, depending on where the skydiver lives. Riggers are required to keep logs of reserves packed, and it’s a good idea to keep a log for any major repairs done to any skydiving equipment for purposes of “present recall." The same can be said for keeping student logs, or at the least, logging information about students you've taught. Something may come up later in their jumping career. Remember your Coach course?
Logbooks might be as simple as a logging audible that keeps track of jumps and as complex as handwritten journals that contain every last detail about each jump, and everything in between.
A logbook is a journal of skydiving history. For some, bragging rights related to jump numbers may be enough. For others, recalling who was on a jump, the type of jump, the formations achieved, length of freefall, and much more become part of the bigger picture.
Every AFF instructor learns how to fill out a logbook with encouraging information and reinforcement of a student jump while providing “code” so that any subsequent instructor has some information about the strengths and weaknesses of the student. Students will generally improve faster if provided specifics in their logbook, and the logbook will serve as a historical record of their first jumps.
Logbooks also preserve records for those that come after someone has retired or deceased. A most special moment was at the memorial service for Gary Douris, where some of his logs were brought out for the attending public to view. Howls of laughter rang across the courtyard at S’nore as people read log entries saying that “So and so had been grounded” and “XXX couldn’t arch but he deployed OK, so he was ready for a longer delay."
Samplings of logbooks can be seen here, courtesy of Eike Hohnendahl and myself.
Some folks have expressed shock and awe at Eike’s logbooks, which are as meticulous as the man himself. Each jump is logged for place, date, exit point, landing point, participants in the jump, any exciting or interesting moments in the jump. Also included are copies of any payment for a jump, type of main used, and any special equipment used. In many cases, photos of the jump are also included. These logbooks take time, time that most are probably not willing to put into logging each jump. The skydiver making 15 jumps in a day likely isn’t able to log with such tremendous detail.
Some skydivers may wish to only keep jumps logged in an electronic logger as mentioned above, and never enter data into any computer or logbook. This is perfectly fine too.
CHEATING JUMPS
A famous logbook entry, referred to as the “P-51” entry, is named for the kind of pen used to fill in the logbook with false/padded jumps.
Although meant in fun, inflated jump numbers are no joke. Lying in a logbook is predominantly a game of lying to yourself, but may carry over into falsification of records, if the logbook is being used to affirm and prove jump numbers for the purposes of achieving ratings or participation in an event. Ultimately, falsified logbooks impress only yourself and no one else.
INSTRUCTOR AND SPECIAL JUMPS
My own method has been to keep a detailed record of every jump using the L&B; Jumptrack software, until I became an instructor. I keep a separate log of students and the type of instructional jump ie; Coach Jump, AFF jump, Wingsuit FFC, Wingsuit Coach, etc. The Instructional Logbook is kept in paper form, and in most instances I ask the student to sign the logbook, simply because I enjoy re-reading the logbooks at later points, and being able to show students “lookie here, remember when you did your AFF Cat D jump with me? That was a fun ride, yeah?”
CHOOSING A LOGBOOK
When choosing a logbook, consider how you’d like to log jumps. If you like to write, be sure the logbook has enough space and is comfortable to write in. Do you want to be able to put photos in the logbook? Be sure it’s large enough to hold those photos. If electronic logging is preferred, there are several applications available, including software as simple as Excel or other database software. Software tools like Paralog and Jumptrack interface directly with electronic loggers such as the Neptune, Altitrack, or ProTrack altimeters/audibles. Some logbooks allow for the import of GPS data for tracking jumps, wingsuit flights, or long distance canopy flight. The logging software may display a graph of exit point, speed, deployment, and offer fields to store indexed data such as total freefall time, type of skydive, aircraft used, etc.
No matter how jumps are logged and chronicled, it’s a good idea to keep a logbook for at least the first 500 or 1000 jumps, if ratings are to be achieved. If nothing else, logbooks can provide great entertainment during the off-season or after a day’s jumping has occurred. They’re a great place to store phone numbers, email addresses, photos of special jumps, and to remember all those “beer” experiences.
And when you're sitting around on a dark windy day with nothing to do but make up lies (No sh**, there I was) and drink beer with friends, a well-kept logbook will only add to the fun.
The "D" Point by Brian S. Germain
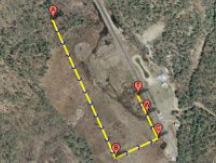
Although there are many ways to improve one’s accuracy in parachuting, I have found no better way than flying a consistent pattern. By connecting a series of invisible points in the sky, “Altitude-Location-Checkpoints” as I call them, we can create a consistent flight path that makes us more predictable in the air, as well as significantly increasing our chances of landing on target. The typical pattern, made up of three distinct turn points, I will now argue is not quite enough to get to the target with the consistency we are looking for.
The standard flight pattern for a ram air parachute involves a downwind leg, a cross wind leg, and an into-the wind leg, also know as the final approach. This pattern is defined by three distinct turn points, “A” (Base to Final), “B” (Downwind to Base), and “C” (pattern entry point). It is true that if we are prepared to modify our approach in light of new information along the way, we can hit the target. But wouldn’t it be nice to get there without needing to modify our flight path, to just sail along and turn when the altitude is right? That is exactly what the inclusion of a fourth turn point does.
The trouble with the standard pattern is that there is a good deal of guesswork when it comes to the length of the Base leg. Depending on the glide ratio of the parachute, the location of the turn to Base leg will vary widely. The better the relative glide ratio, the farther the turn to Base needs to be from the target. Our ability to adapt to this changing environment is spotty at best, and often requires substantial correction along the way. This creates traffic conflicts, as well as varying airspeed and decent rate, making life far more difficult for us, and for the canopies behind us. In most cases, the length of the Base Leg needs to be longer than we think.
This becomes an even more important issue for swoopers setting themselves up for a high speed approach. If the length of the Base Leg is incorrect, the pilot is forced to either float in the brakes or “S-Turn” prior to the initiation of the dive. This has consequences to the approach, even if they manage to reach the Initiation Point at the correct altitude. If they are flying significantly faster than usual when they arrive at the initiation point, they may lose much less altitude in the turn due to the increased front riser pressure upon initiation. If they are flying significantly slower than usual, they may lose a much greater amount of altitude in the turn, and find themselves hooking into the ground. It is my experience that, aside from the altitude of the Initiation, the selection of the “B” point is the most important aspect of a high speed approach.
If we simply add another checkpoint prior to the entry into the Downwind Leg, we can take the guessing out of the process. Assuming that the turn points are equidistant in altitude (300, 600 and 900 feet), we can simply add another unit above the original pattern entry to create a fourth, or “D” point, precisely on the wind-line, upwind of the target. What this does is, it creates a Pre-Base Leg, which shows us exactly how long the Base Leg needs to be. In other words, if the altitude between the points is 300 feet, the “D” point is at 1200 feet.
The beauty of the data that this “D” point brings us is, we discover the exact length of the base leg without choosing the precise location of the “B” point prior to exit. This means that we can fly this pattern at a new drop zone, or when we are landing off, and learn where the altitude-location-checkpoints are for that specific landing area. It doesn’t help us with the “depth” of the pattern points, but it puts us in the ballpark, assuming that we have a rough idea of our canopy’s glide ratio.
When the winds pick up, this method still works perfectly well. The crab angle on the Pre-Base Leg is equivalent to the angle of crab on the Base Leg. Note that the horizontal distance of the offset from the target on the downwind leg on a windy day is exactly the same as it would be on a no wind day (A to B = Anw to Bnw). This is only true if we do not compensate for the side-slip of our ground track due to the crosswind legs.
However, even when we do choose to compensate for diagonal crabbing on the base leg and create a “Holding Crab”, if we create the same crab angle on the Pre-Base Leg, we end up on the perfect final approach despite the complex situation. This is easily accomplished by simply making our goal to fly a box pattern on the ground, flying our Pre-Base and Base Legs perpendicular to the wind-line.
Also note that the length of the base leg is longer on the No Wind condition than it is on a windy day on which we perform a Holding Crab on the crosswind legs. This is due to the reduced groundspeed when in a Holding Crab, and the diminished glide ratio that comes as a result of it. If you aren’t pointed where you are going, you will not move there quite as quickly.
This method assumes something that many canopy pilots do not have: a trustworthy altimeter. A standard dial-type, analog altimeter is not sufficient to give us the kind of accuracy we are looking for. Even the digital dial-type is not usually graded in such a way that we can distinguish units of one hundred feet or less. These are freefall altimeters. For the precise data required by today’s canopy pilots, we need digital altimeters with digital read-outs. Even better, many of us have found, is the heads-up advantage of an audible altimeter designed for canopy flight such as the Optima and Neptune. If you have an audible alert telling you where you are, it is far easier to keep your eyes looking outside the cockpit and on the action that may require your instantaneous reactions. All that being said, your eyes have ultimate veto power. If things do not look right, your instruments must be ignored. Too many skydivers have hit the ground due to complete faith in their instruments that let them down due to mechanical problems, battery issues or some unconsidered technical malfunction.
Assuming that you use this accuracy technique the way it was intended, and you notice what is happening as it is happening, you can take a huge step forward in consistently hitting your target runway. It will take a while to dial-in your approach so that you actually hit the target, but the target is always a secondary goal to hitting the centerline of the runway and turning to final at a reasonable altitude. If you plan your pattern well, using four distinct points along the way, you can change what you are capable of handling as a canopy pilot. Not only will you feel better about yourself, you will increase the likelihood that you will live a long, healthy life. That, of course, is the mark of a great skydiver.
In addition to being a highly experienced skydiver with over 14,000 jumps, Brian Germain is the author of several books including The Parachute and Its Pilot, Transcending Fear, Vertical Journey, and Green Light. He is currently designing canopies for Aerodyne Research, and offers canopy flight courses worldwide. For more about Brian’s Books, Seminars and Parachutes, visit his websites: www.BigAirSportz.com and www.TranscendingFear.com
Landing Pattern – Landing Approach Simulation
Landing Pattern is an interactive computer simulation program for ram-air parachutes. It is similar to flight simulators, such as Microsoft Flight Simulator. One can fly a landing approach of a parachute in different wind conditions. Currently only Skydive New England is available in
the simulation as a virtual drop zone, but more will be added in the future.
Usually the landing pattern is shown to the students on top of an aerial picture or a satellite image. The pattern has an entry point around 1000ft, then the turn to the base leg around 500ft, and then the turn to the final around 300ft. The altitudes for these points are kept constant, while the position of the canopy
relative to the landing target changes depending on the wind conditions and canopy parameters. Static Line Interactive released a free online service Landing Pattern Estimator that shows you the landing pattern above the satellite image from google maps. Landing Pattern allows you to fly a landing approach. Landing Pattern comes with tutorials that explain each leg of the landing approach.
You can pick the wind direction, wind strength, starting altitude, position for the
jumper, and the type of the altimeter to use (digital or analog). You control the
left toggle by pressing the left mouse button and moving the mouse up and
down, and holding down the right mouse button allows you to control the right
toggle. If you hold both mouse buttons together you control both toggles at the
same time to flare the canopy. You can experiment with normal and flat turns. It is possible to switch between top view, side view, first person view, and free camera. You can show or hide the landing approach guides.
Top view allows you to see the the movement of the jumper from above, which is useful to see the
general shape of the pattern that you are flying. It is easy to see when to turn to
the base leg or to the final leg.
Side view allows to see the difference in altitude between the jumper position
and the proposed landing approach. It is also useful to see the changes in the
canopy pitch as the flare is performed.
After understanding how to fly the approach using the top and side camera views you can use the first person view. This is how you would fly a canopy in real life. You can look at the analog or digital altimeter mounted on your chest. You can also see the proposed landing approach to follow. Use the mouse to look around and locate the target. Free camera allows you to fly the camera around so you can find the perspective that helps you the best.
At the end of the jump you can flare the canopy for landing. After touchdown,
you will see the speed of your landing as well as other statistics about your jump.
You can review the trajectory of the jump and compare the current trajectory
with trajectories from previous jumps.
Author Information:
Alexander Shyrokov is the founder of Static Line Interactive, Inc.
Skydivers
Yes, I know who you're talking about.
It is these crazy guys, who jump out of perfectly good aircraft with the bunch of ropes and fabric in their backpack.
The only reason why they are allowed to do this is the fact that the pilot wants to get rid of them. Badly.
Having a cabin full of freaks which are laughing, kicking out the jokes only they can understand and giving each other high five from time to time... you know, I can understand the pilot.
Some of these guys are so untolerable so the pilot makes them to get out in the middle of the way up (sometimes at 3,500 ft). The crazy bastards call this "hop and pop".
Aha. Hop'n'pop. You know.
Hop! And pilot turns the red lights. I believe this is because skydivers almost never listen to the pilot so he has to give them a visual cue. Most of them are still allowed to drive a car so the red light still rings the bell. Surprisingly, this bell tells them "the fun is about to begin"! Green light follows.
Pop! The guy is popped from the plane. I suspect, sometimes, this happens not without a good kick to the ass from the humble bros and sisters. Why would they call it "pop" otherwise???
Then, there is always somebody who is curious if the pushed out guy got his lesson - you can always see a few heads out of the plane looking at the guy tumbling in the air.
No, they had not been such freaks from the very beginning.
In the beginning the innocent guys and girls were lured into the small room full of weird stuff: worn out harness containers hanging on the ceiling looking like just taken from a dead body, creepy plane cabin imitation, tables on the wheels with soft tops looking very... very... suspicious.
The whole place looks like a mideval torture chamber.
Then, during several hours they are asked to do a lot of strange things: hang in the harness and partially disconnect it from the hanging ropes, falling down like been hanged, assume strange poses on the soft table, fall and roll on the floor while other yelling "PLF, PLF!!!", memorize a lot of motions which doesn't make much sense for any decent person who got used mostly to the movement of glass with beer to the mouths.
I think, "PLF" must be an abbreviation for Practice Leaning to the Floor. But why jump from the small stair for that???
All this is sometimes interrupted with the videos showing multiple ways how the parachute doesn't work. And such videos for some strange reason are supposed to be encouraging. No way!
After a few hours, when the instructor ensured the guy is driven crazy enough already, they get with the student on the plane going up.
While it is the beginning, no normal person is going to jump out of plane, but these bastards got a trick for it: one of them holds the poor guy on one side, another - on the other side and then they suggest "just to look at the prop". Yeah, they are trained well so it is easy to push the relaxed guy into the air.
During the freefall their favorite joke is to tease the guy in the middle with quite inappropriate gestures.
The most popular is the gesture which the Rome Ceasers showed "death to him" to the gladiators at the arena: big thumb down.
Some other gesture is the way people in the Europe say "you're an ugly goat" - two fingers apart.
When the student screams and kicks legs, they just tip the big thinger to the palm showing "shut up".
And when they sick and tied of the guy, they point to him, which will mean "fuck off, pull now so we cannot see your ugly face any more around".
Do you know why they give the guy the radio on the first jumps?
They always say "it's a one way radio" but actually they enjoy listening to the screams of the student.
It is obvious that after such a treatment the guy goes nuts completely and gets an inevitable desire to repeat.
However, some of them reasonably try to get rid of instructors on the jump (who wants these freaks around, really???). The most popular ways are: don't give an exit count or exit in the middle of count, tumble like a bitch on the exit, hoping that the instructors will be lost, assuming the unusual positions in the freefall hoping the guys aside will not be able to hold on. Apparently, this almost never works – in the most successful cases the best achieved result could be the one instructor lost only.
With the time, guy's craziness goes deeply and it is only one instructor needed to make him out of plane. To check that the process of madness goes well, instructor requires the guy to do weird things on the jump: put the head completely out of plane and look for aircrafts, roll and rotate while falling, try to hit the small piece of land while landing.
The advancing on that way is almost completed when the guy decides to jump out of plane alone.
However, after a few jumps alone almost all of them got a bit better and prefer to get out with a coach, trying to hang on him during the freefall. Obviously, it is safer to hang on something firm while in the air! They call it "docking".
The progressing in that is recorded in the special (I believe, medical) sheet (white or yellow) and then submitted to the organization which tries to keep account of the sick bastards. The organization is named USPA which is apparently the abbreviation for US Psychiatric Advisory. In 25 jumps and when all the symptoms are listed, USPA classifies the guy and assign him a first "A" number in the sad history of sickness.
The progressing classifications are:
A - Almost Hopeless
B - Better Be Avoided
C - Completely Crazy
D - Dreadfully Mad
It took time for USPA to figure out exact symptoms of progressing from one category to another.
However the common anomalies were noted and listed (like jumping into the water, jumping in the middle of the night etc.)
It is noticed that many guys prefer to exit from aircraft not alone (some prefer to have as many jumpers as possible surrounding them). And this is a natural fear - and it is not a rare to see multiple jumpers hanging on each other in the sky. Sometimes, by chance, their formation looks even nice. However, within a minute they realize that hanging on the other guys don't help them from getting close to the earth and they break off and fly do the different directions, obviously scared. I personally saw 30 such guys at once, flying from each other as fast as they could.
Some of them try to pretend nothing unusual happens and flying sitting - like they were at home on a sofa. Some prefer to have some roof over the head and flying head down.
Anyway, all of them soon realize that something goes wrong. "Most probably", they think, "it is that heavy backpack drags me down to earth" and the obvious decision is to get rid of it. For some unknown reason all of them start with ripcord or BOC pilot chute...
In a few seconds the parachute opens and now they have the desire not to get down to earth somehow satisfied. Poor bastards! They could have simply stayed in the plane instead!
Any reasonable man can confirm that having as big umbrella as possible above you is safer under the open sky.Who know, what can fall from it on your head. Especially, when you are flying.
So, obviously, the most experienced skydivers land with two parachutes over them.
They call their parachute "canopy". "Canopy" must have came from Russian “konoplya” and in Russian it means "cannabis" - something that gets you high, which obviously is associated both with the parachute and the whole process itself. "Get high naturally!" - they say, - "Skydive!”
Hmm... I think skydiving should be declared as a controlled substance too.
Note, while under canopy these guys are very dangerous and do not hesitate to use their awful knives (designed in the best traditions of Jack the Ripper) if somebody else decided to join them. Even if another guy just wanted to chill out together!
The separate branch of the symptoms is the animalizing. Some of these guys (and their number is progressing with the years) decide that they are not humans but the... birds. Yes, birds!!! I suspect birds flu has something to deal with it.
They take on the bird-like costumes. Sure thing, somebody is making money on this heavy mania, selling the bird suites to them. Then they jump out of plane.
Another proof of the animal-like anomaly is then they get and fly together. They call this "flocking" - what else needs to be said!
Sure think, not all of them so unreasonable. There are some guys who recognize their “mental change” and do the best to make it safe. The best of them do not get on the plane to jump on awfully high altitude with heavy backpack stuffed with two parachutes.
They know that it is safe to jump from low, unmoving object. They know that two canopies introduce exhaustingly big number of options: which to pull?
So they jump from very reliable, unmoving, low bridges, buildings and cliffs. With one canopy only.
These ones are obviously less crazy and the other skydivers call them BASE jumpers - they are nuts too, but only basically nuts.
Yeah, and, of cause there are some guys who enjoys to see the normal people dropped from the plane. These are very smart and persuade the good citizens to do this, proving on the ground that there is nothing scary in that.
"You even don't have to wear this heavy ugly backpack. I can do it for you. But put this harness on so my boss would not suspect anything."
While in the plane, they sit behind the poor guy and, unexpectedly, grab his harness and tie up to his one.
He get close... very close... to the guy or the girl.
And I personally saw how they pushed the poor one to the aircraft exit in front of them, telling them: just cross your hands on your chest, there is nothing else you can do now... Yes, I was the one of the guys dropped out of plane that way.
But this... hmm... close relationship doesn't last long - in 6-7 minutes they are on the ground, and giggling, seeing as normal people runs from them, screaming on their way.
"They are excited!" they say. Yeah, right!
If the guy doesn't run away - here we go, he is another candidate for AFF (see what I wrote about it before). Oh, yeah, AFF is obviously for Awfully Freaked Fella - the student.
So, when you are going to marry a skydiver, don't even hope that he or she is going to be around you all the time. Sky and jumping will be the on the top of his/her list of priorities. And if you want to get to that list not far after sky, jumping, boogie, bonefire, beer, new container, try a wingsuit, new reserve, freeflying, freeflying jumpsuit, wind tunnel, night jump, audible alti, jump from balloon, big ways, CRW, hook turns, swooping, go to Florida to jump in winter, spend vacation on drop zone in New Zealand, high-altitude jumps, sleep sometimes, try weight, try that cool new canopy on boggie, jump from the cliff in grand canyon, dogs... then you have to become a skydiver too!
Wanna have him or her around more often? It is simple. Do RW with them!
Blue skies!
Managing Media on the Dropzone
Managing Media on the Dropzone
Whether for positive or negative reasons, every dropzone in the world should expect a visit from local news media at some point in time or another. This is a short guide to help you best understand how to manage modern media on the dropzone.
For starters, understand that the media generally considers skydiving as an "extreme sport" so they're often willing to portray it from a perspective using terms like "dare-devils," "Adrenaline junkies," "thrill-seekers," and so forth. It's not necessary to encourage these labels; they'll exist anyway.
Remember always, that any press is good press, but well-managed press is GREAT for the DZ and the sport.
INVITING THE MEDIA TO AN EVENT AT THE DROPZONE
If you've got an event at the dropzone, such as a celebrity jump, someone's Xthousandth, a war hero, multiple generations of a family, competitions, special guests, etc, you'll likely want to invite the media. It's not quite as easy as it may seem. Here are some rules and practices of etiquette that will enhance your chances of succeeding in bringing the media to the dropzone.
-Send a short press release no further than four weeks out. Follow up two weeks out. Follow up one week out, and send a final release the day before the event. Press releases should NEVER be longer than one page.
-Make sure the press release contains at least two contact phone numbers. At least one of those numbers should be an after-hours number. It should also CLEARLY state the date and time the event is taking place.
-Include some action statements and if you're creative, you might consider generating one or two subtle headlines. "The Family that Jumps Together, Lands Together," "World-Record Skydiver Visits XXXX Dropzone," "Human Birdmen Flock to XXX Dropzone," etc. These headlines will almost assuredly not be used, but will spark the creativity of the reporter or editing staff, and most importantly, the assignments desk.
-Have a place for the media at your dropzone. Assign a dropzone liason to stay with the media during the entire event. This person is not only there to answer any questions, but to also guide the media to safe areas during landings, help them to find the best angle with safety in mind (they'll almost always want the sun at the back of the camera operator), and more importantly, act as their friend during what is likely an unusual experience. It's a good idea to have cold bottled water on hand if it's a hot day. They're your guests, treat them as such. The person assigned to act as a media liason should be well-spoken and well-groomed.
Articulation is very important. Remember, this person is representing YOUR dropzone and our sport to the masses. He/she may not appear on camera, but if he/she will appear on camera, be sure they're wearing clean, non-wrinkled clothing with neatly groomed hair. They should be able to start and complete a sentence without "ummmmm," or showing a lack of confidence. They should be able to smile and speak with a slowed cadence. If it's an exciting event, great. But fast speech is slurred in most instances, unless they're a trained speaker. They should know the language of "sound bites." Like it or not, the MOST airtime your event will receive is 2.5 minutes and that length of time is fairly rare. Being able to speak in concise, clear sentences will assure that you'll get maximum airtime, and likely increase the chances of the media wanting to return for future events.
RULES OF ETIQUETTE
-Don't send photos or video via email before the event. Send links to downloadables, links to photos, or make it clear that photos and video will be made available on the day of the event.
-Don't ask a reporter if they received your email.
-Don't ask for a copy of the story. If you want it badly enough, go get a copy for yourself. The reporter has other things to do. Your event is a big deal to you; to them...it's just another story.
-Never provide gifts of any kind to reporters. It's bad form, and could be misconstrued.
-Don't expect reporters to do tandems. If they ask, great. If not, don't push. Some reporters have clauses in their contracts that prevent them from doing anything considered to be a "high risk." You don't want to be known as the dropzone that broke the reporters leg or tailbone.
-Don't call reporters during deadline hours. It's a good idea to ask a reporter when the best time to reach them might be. Don't repeatedly call; it may be seen as harassment. Don't be "that guy."
-Don't spam every reporter at the media source. If you don't have a cultivated contact, send email to the City Desk or assignments editor.
DEALING WITH THE MEDIA IN TIMES OF AN INCIDENT
"If it bleeds, it leads." Period. That's ALWAYS the axiom of the news media. Deal with it. Death, mayhem, corruption make for more interesting stories that up ratings. Depending on the story, it can quickly go huge. Cases in point, my own incident went nationwide due to my small celebrity stature. Another case in point, the guy that dropped his paraplane into a crowd and injured six people, including small children. Both generally small stories, but mine occurred on a slow news day, and the paraplane story had great footage from an amatuer camera. Understand you can't stop this from occurring, and trying to keep the media away from injuries or fatalities only piques the interest and will make your dropzone look as though you've something to hide. You cannot win against the Fourth Estate. Deal with it.
If you have a fatality or unusual incident, you should;
-have someone pre-designated to speak to the press. This is critical, and this person hopefully has already rehearsed or has spoken to the press before. As previously mentioned, this person should be capable of articulate, intelligent speech.
-NEVER speak off the record. Ever. There is no "Just between you and me" with reporters. Ever. Gossip is the fodder on which they eat. Shut your mouth.
-Do not provide details about an incident; it's usually too early to provide details anyway, depending on how quickly the press arrives at your dropzone. This is not the time for some arrogant, ego-driven jackass to be promoting his authority on the subject of skydiving. Merely by appearing on camera will give an air of authority, and a brief sound bite is all that is needed. Later, we'll look at some general methods of speaking.
-Do not allow the press to shoot images of any aftermath if possible. There are alternatives to managing this better, such as a Crisis Kit or EPK (Electronic Press Kit). Every dropzone should have one of these.
-If you have footage of the incident occurring, the DZO, DZM, or S&TA; should be given a copy, and its usually a good idea to have the videographer turn over the original work so it doesn't show up on YouTube or similar. Bear in mind that any video may be retained by the police or investigators as evidence. Fatalities are treated as a crime scene in most areas. Help, don't hinder.Skydivers are our own worst enemies. Case in point, at the USPA Board of Directors meeting, I was informed that the FAA has watched several wingsuits buzzing tandems. They're watching. They've also watched videos of DZ's busting clouds and I'm aware of at least one DZ that was visited and ramped, simply due to a video of skydivers busting clouds. Keep a tight lid on footage of incidents and have someone worthy of responsibility and sound judgement decide what to do with the footage. This is why one reason I've encouraged my home DZ to institute a "Work for Hire." Tandem footage or hired aerial camera footage belongs to the DZ, not the camera flyer.
-Keep statements short and as glib as possible. Here is an actual (shortened) transcript of a Dropzone Operator speaking to the press;
"The guy was doing a low turn, he turned low with his toggles, turning too close to the ground. When the parachute turns close to the ground, it loses altitude and his body slammed into the ground. He made a mistake and he's now badly hurt. We'd talked to him about low turns before but he just kept doing them...." The DZ rep was still talking as the press cut back to the news room. In other words, he desperately needed to show his superior intelligence about the sport of skydiving and was reveling in his 15 minutes of fame. And wouldn't shut up. Not good. For anyone involved. Additionally, the end result of this poor presentation is that the skydiver ended up having his insurance company challenge various aspects of their payments, citing that he willfully put himself in a bad situation by turning low, and that he was negligent. Do you really want to put one of your buddies in that situation regardless of what may have occurred?
Finally, if you're hot-headed, avoid being near the press. Incidents are emotional, and hot-heads and high emotions don't mix with the media.
A recent incident had a skydiver become aggressive with a news camera. The news station gathered unflattering footage that may be trotted out whenever there is a skydiving incident, and the station has a prejudiced view of skydiving in general, simply because of an immature, emotional person that felt they needed to keep the media off the DZ. In the future, do you think the media will present pleasant, happy stories about skydiving?
Keep these sorts of people away from the media.
A better example (and a paraphrased version of another incident report);
"We're not yet exactly certain what happened. All we know at this time is that unfortunately, one of our friends has been injured, and we won't know the cause until we talk to everyone who actually observed what occurred. We will be providing a full report of the incident to the USPA, and that report will be available to you as soon as we have it."
Simple, short, and sweet. It doesn't degrade the skydiver, doesn't give the news a "push" to assure it meets the "bleed." And it's all true. Be brief and stay on point. You'll also get more questions. Answer them confidently, briefly, articulately. Don't be afraid to say "It's too early to know that," or "That's a great question, and we hope to have an answer very soon." Additionally, don't be afraid to say that "Skydiving is a high-risk activity, and sometimes accidents occur." If you do want or feel a need to provide details, keep them as factual and simple as possible, and explain that we train for these scenarios, etc. Remember, your dialog with a visual media reporter is a 'performance' as much as it is a dialog. Stay confident, look in one direction, avoid moving your eyes around. Try to avoid "uuhhh,,,, mmmmm,... weeeeellll,...and other verbal distractions. Just because you're the DZO or DZM doesn't mean you're the right person to speak to the media. Find that nice-looking, articulate guy or gal on the dropzone and have them represent you and your DZ.
The media serves one purpose and one purpose only. They need to bring a story back to the station. DZO's, S&TA;'s, or media personnel at the DZ can shape the voice of the story, and help direct the flow of the story by being courteous, professional, and helpful. Or, they can create a bad image for the DZ and the sport by reacting badly. Just as you have a job on the DZ, the press has a job too. One way or another, they're going home with a story. Wouldn't you rather have a say in how that story is presented?
BUILDING A CRISIS KIT/EPK
A Crisis Kit or Electronic Press kit is a great tool for DZ's whether it's used for crisis management or event promotion. This kit is a DVD that contains:
-Contact information and a headshot of the DZO, DZM, or other authorities for the DZ that are permitted to speak to the media.
-A "fact" sheet of statistics related to skydiving. This is available from the USPA website.
-Random video clips, well labeled, that show happy times in skydiving. Hoop jumps, tandems, RW, VRW, wingsuiting, etc are all good to include. These clips should not be more than :30 in length. These provide the media with cutaway shots, and will quell their desire to create more than the "real" story in the event of an incident. It also will help promote your DZ in a positive manner, regardless of what has brought the media to the dropzone. I recommend delivering in a .mxf format, high definition is preferable today. Any news station can open a Material eXchange Format file. DV is next best, preferably widescreen.
-Contact information for the USPA, assuming you're a USPA dropzone. The USPA has a PR team there to support and help you. Provide them as a resource.
Most savvy DZO's know that any press, good or bad, is good for business. However, if you can work with the media, provide them tools and assistance, make them feel welcome and appreciated regardless of their role on the DZ, they can become a weighty ally for your dropzone whether you're promoting a competition or just sponsoring an Easter Egg hunt.
The media can be free advertising and provide a draw to your location. Used wisely, you can dramatically increase traffic around your dropzone.
Blue skies and puffies,
~douglas
Camera Considerations 101
Flying with a camera can be a lot of fun, and is a reasonably easy goal for new skydivers to achieve.
The USPA SIM Section 6.8E recommends that a skydiver have 200 skydives before putting on a camera. The first question often asked is “Why 200 jumps?” I believe the answer to that question is that in times past, the D license (which at one time required only 200 jumps) meant that a skydiver had experienced enough of the basics of skydiving that he/she could begin exploring additional responsibilities during a skydive. By no means is anyone with only 200 jumps generally prepared to be a good nor safe camera flyer, but everyone needs a benchmark from which to begin. This article isn’t about debating the merits of jump numbers; I’d recommend potential camera flyers stick with the SIM and the findings of the USPA.
Before beginning, you’ll need to make a couple of gear decisions straight off, and this article is to help you prepare for those decisions.
HEADGEARChoosing a helmet is the first and potentially most important decision in flying a camera. There are a lot of good helmets out there; each manufacturer has their own ideas about why their helmets may be better than another helmet. What your first decision will be isn’t as much about a brand, but rather a type.
P>There are two types of helmets; those that are primarily side mount, and those that are primarily top mount. Most side mount helmets do offer at least a small top area to which a second camera or other fixture may be mounted. Most of the top-mount helmets are designed to place everything on the top of the helmet. Each type of helmet has its own advantages and disadvantages.
Freeflyers and inside RW/FS skydivers tend to prefer side mount camera helmets not only because of the profile of the helmet, but due to the way the air moves around the helmet. Those that are shooting four/eight-way FS might prefer a top mount not only due to the greater stability of a flat-top profile, but that the larger top area allows for two cameras to be mounted (one acts as a backup in case a camera fails in competition). Commercial photographers tend to prefer flat top systems so that they can mount larger cameras, or have enough space to mount a DSLR and video camera from the same perspective point.
One point to consider aside from the primary flying format; top mount helmets with properly centered weight are less injurious to the neck over repetitive openings.
VIDEO CAMERAVideo camera models change pretty quickly, so it’s pointless to recommend models vs features.
While recommending a brand is tempting to avoid, Sony camcorders have a strong position in the skydiving market for several reasons.
-External control. This is very important, as you’ll want to know whether the camera is on, recording, battery failing, or nearly out of media. There are a couple brands of control devices that provide this information.
-Electronic Image Stabilization (EIS). This is fairly important for freeflying, and much less of an issue for tandem shooters. Avoid Optical Image Stabilization in most cases. The floating lenses of an OIS system makes it difficult to shoot a stable image under any but the most optimal shooting situations (very difficult to achieve).
Small is in; cameras don’t need to be large to produce large results. Keep weight on your head to a minimum and your neck will thank you over hundreds or thousands of openings.
If your intent is to wear a camera merely to document skydives with friends, low-cost camcorders such as the GoPro Hero and similar small cameras are wonderful. If your eventual goal is to work towards shooting tandems or teams, you’ll want to consider a higher quality camera. A current favorite is the Sony CX series of camcorders.
LENSESMost camcorders do not offer lens widths sufficient for most inside or tandem-oriented skydiving. Wide angle lens adapters are commonly found on camcorders used for skydiving. For most skydiving use, a .5 or double field of view lens is sufficient. If you’re flying inside video for FS or Freeflying, a .3 or more than double wide field of view is generally desired. Anything more wide than a .3 is typically going to be relegated to handcam or specialized use.
Depending on the size of the camera’s lens thread, a step-up or step-down ring might be necessary. Step-down rings almost always assure a vignetted shot (black circle around your video frame), whereas step-up rings rarely cause a vignette. Step-up and step-down rings are very inexpensive. Some are plastic, others are aluminum. Some professionals prefer plastic rings so that if a riser strike or line catches on a lens and tears it off, the plastic ring will give way before damaging the camera. While this is likely true, plastic rings also deteriorate in strength when exposed to sunlight. If you use a plastic step ring, be sure to periodically inspect it to be sure it’s not become brittle or cracked due to sun exposure.
RINGSIGHTSAlthough it’s tempting to want to outfit a helmet with everything right from the start, it’s a good idea to add parts one step at a time. A ringsight is a good tool for some disciplines; it helps the videographer know where the camera lens is looking, and some types of ringsights help with framing and distance.
Ringsights aren’t necessary for inside shooting of FS or Freeflying. No matter what, a ringsight is a snag hazard regardless of how much care is taken to prevent it from being so. The risk can be lessened, but not entirely removed. The ringsite should be one of the last accessories added to a camera helmet.
In lieu of a ringsight, consider a “paper asshole” or a punch hole reinforcement sticker, mounted on your goggles. This can serve the same purpose and yet completely remove the snag hazard of a ringsight. A circle or dot can be drawn on goggles as well.
To sight in a dot on a goggle; face a plain wall on which, you’ve taped a target. A paper plate works well for this exercise. Stand back from the wall at a distance of about ten feet. Put on the camera helmet, turn on the camera, and have a friend hold your head/helmet so the paper plate is dead center in the camera’s display. Keep your eye looking forward; don’t be tempted to roll the eyeball up/down/sideways. Keep it straightforward. It might take a moment to get comfortable holding your eye straightforward while a friend guides your head/helmet to the centerpoint/target.
Once you’ve relaxed, focused on the target, and the target is in the center of the camera, mark your goggles (one side only, usually the right side) with a DRY ERASE marker. Remove the helmet, remove the goggles/glasses, and then put them back on and check to see that a reasonably accurate target acquisition occurs. Otherwise, repeat the aiming/targeting process.
It’s worth mentioning once again however, a ringsite should be one of the last accessories added to a camera helmet when you’re a newcomer to camera flying. A ringsight adds an unnecessary snag hazard.
STILL CAMERAAgain, it’s very tempting to buy a camera helmet with everything in one shot, and as mentioned previously, is a poor decision for newcomers to camera flying. Learning to fly with a video camera will help develop the skills necessary for flying a still camera.
DSLR cameras are popular, as they record stills to a memory card, making for fast previewing of photos taken during a skydive, and for tandems, DSLR’s are necessary for fast delivery of photos to tandem students. Though Canon and Nikon are both popular brands of cameras for skydiving, most any kind of camera can be modified to accept a bite, tongue, blow, or hand switch for taking skydiving photographs.
MOUNTING DEVICESThe device used for mounting a still or video camera to the camera helmet is critical, particularly for video cameras. If the mounting device isn’t rock-solid, the camera will shake or shudder in freefall, resulting in an unstable image. Sometimes this shudder/shake will be blamed on the video camera when the blame lies squarely on the camera mount. Check whatever mounting device you’re considering to be sure it will not move either at the time of purchase, or after it’s been in use for a period of time. Personally, I’m a big fan of the Cookie Composites Padlock systems and the Really Right Stuff mounting systems. Neither are inexpensive, but if you want solid video and clean stills, a solid mounting system is critical.
CONTROLLING SYSTEMSCamcorders and still cameras need hands-free operation. Video cameras can be manually started/stopped in the aircraft, but for convenience and comfort, most camera flyers use a control system of some sort. Sony tapeless systems offer essentially one controller choice; the HyPeye products from GetHypoxic. All of the camera control systems also offer an indicator that indicates the status of the camcorder such as Power On/Off, Standby, and Record modes. In lieu of these indicator devices, you can always wear a small mirror on the wrist next to the altimeter, and view the Record light on the camcorder. I’d recommend a plastic mirror vs a glass mirror in case your wrist strikes the side of the aircraft.
Still cameras/DSLRs require some sort of trigger device to cause the camera to snap a shot. Conceptus manufactures tongue and bite switches for Canon cameras. Custom Nikon switches are available from The Ranch Pro Shop and other resellers. Some Pentax cameras use the Canon connection (2.5mm plug).
It’s difficult to recommend a bite switch, hand switch, tongue switch, or blow switch; everyone has a preference. I personally prefer a tongue switch, but many friends like bite switches. Some like hand switches. You can also “roll your own” from inexpensive parts available at Radio Shack.
JUMP SUIT/CLOTHINGSome camera flyers opt for jumping with or without a camera suit, or a suit with “wings.” Although it’s a personal preference, camera wings provide the camera flyer a more stable flying platform (when used correctly) provide the for a great deal of range and control that isn’t quite so easy to achieve when wearing a standard jumpsuit or freefly suit. If you’re looking at flying with tandems, wings are often an important part of the jump. If you’re shooting freefly work, you probably won’t want to wear wings.
There is a lot to learn about flying a camera. Getting good at RW is perhaps the best thing you can do to prep for flying a camera with tandems and four/eight way teams. Understanding burbles, trapdoors, safe zones, and having good belly skills that include side sliding, the ability to orbit, and a very broad fallrate are all important aspects of camera flying.
This article does not discuss the challenges of camera flying and make no mistake; there are many dangers. One such danger, is that the camera flyer is always focused on the action in front, and never able to turn to see what’s happening behind him/her. Another danger is that in order to “get the shot” some camera flyers lose altitude awareness and may find themselves well below appropriate deployment altitudes.
Spend time talking to the camera flyers on your dropzone, reading the forums, and pay attention to some of the videos you’ll find on Skydivingmovies.com, YouTube, and Vimeo. All have examples of good and bad camera flying. You can learn a lot just from watching the techniques of others.