Submit Article

Skydiving News and Articles

Select A Category

Pick a Category

The 5 Most Inspiring Skydiving Videos of 2012

Each year the boundaries of skydiving are expanded, giving way to new avenues of progress and to endless possibilities. The year 2012 was a big year for the sport, with a number of records being set. But aside from the records, there are also groups or individuals who slowly push the standards up with a display of skill. Other times we're inspired more by the surroundings and the cinematography of the video. We take a look at some of the most inspiring skydiving related videos from 2012.
1. Felix Baumgartner jumps from the edge of space


One doesn't really have to say anything about this video, I'm sure everyone reading this knows all about it already, but for those that don't; on the 14th October 2012, millions of people around the world were fixed to live streaming of a world record attempt by Felix Baumgartner to set the highest ever skydive. The final confirmed exit height was 128 100 feet, allowing Felix to reach speeds of 833 mph during his freefall. Whether you love him or hate, one cannot deny the magnitude of this jump.


2. Gary Connery lands a wingsuit without a parachute


This jump had a lot of media hype, not as much as the previous video - but the idea of skydiving without a parachute was obviously a subject that brought a lot of attention. The idea has been something that Jeb Corlois had been talking about for years prior, though his idea for landing was and still is quite different. Some argue that Gary Connery's jump was less landing without a parachute, and more just crashing into a pile of boxes. Though the technicalities of the jump aside, there is something liberating about the idea of being able to exit a plane without a rig on. Over the coming years, we will not doubt see further attempts to perform the act of landing without a parachute, and this first step - was definitely a jump worth the attention.


3. Vertical Skydiving World Record


While this video was technically uploaded in early 2013, the footage is from 2012 and comprises of a record setting 138 person vertical skydiving record. The video was created as a marketing strategy by GoPro for the Hero action camera - and regardless of your POV camera preference, it's hard to argue that they didn't put together an absolutely amazing video. While only lasting just over a minute, it's a pretty awesome minute of viewing.


4. Skydive Dubai - Part 2


This video was a follow up to an extremely popular video that Skydive Dubai released originally in 2011, the original video has over 11 million views on youtube, and if you're looking to attract potential clients, what better way to do it than using viral networking to show just what an amazing place to jump Dubai is. While the footage may not show all too much groundbreaking skydiving, you can't help but want to head there immediately and get on a plane when you look at the view. If the point of a video is to get you up in the air, this video accomplishes that flawlessly. The best way to describe it, is fun!


5. Soul Flyers tear up wind tunnel


Something for all the tunnel rats out there. Soul Flyers always manage to get one amped with any video they're in and this wind tunnel video is no different. There's some absolutely amazing flying in this video and for anyone who hasn't stepped inside a tunnel yet, it may well get them wanting to. The cinematography is also extremely good for a discipline that's notoriously difficult to get good footage of.
Which of these videos inspired you the most. Let us know, or share your favorite skydiving videos of 2012 in the comments section below.

By admin, in News,

Rigging Innovations - CPX Accuracy Rig

Douglas Spotted Eagle caught up with Bill from Rigging Innovations during the 2013 PIA symposium and chatted a little bit about the new CPX accuracy rig.

DSE: We're going to talk a little about one of the new accuracy rigs that Rigging Innovations has just come out with. So we're going to talk a bit with Bill. You are a world champion in style and accuracy and some 4-way and a few other things?
Bill: A little 8-way when I was on the Knights and some accuracy. It was a long time ago, but I can still claim it I guess.
DSE: A world champion is always a champion. Tell me a little about the new CPX rig?
Bill: Yeah, the CPX is a new accuracy rig and unfortunately all the years of accuracy containers, you know they're a lot bigger - we've got bigger canopies. So normally you just sort of accepted that you would have a big, uncomfortable rig on your back. So what Sandy did, what Rigging Innovations did, was design something with the newest technology and the newest bells and whistles on an accuracy rig. I went to the world cup in Dubai a year ago and I said that just because you're jumping accuracy doesn't mean you need to wear an uncomfortable rig. It's hard, I don't know if you've ever gone to a world meeting and gone tent to tent, it's kind of hard. You go in there and you try to show your product, and at first I tried to talk to people - they don't want to listen to me. They're on a break, these accuracy jumpers want to take their naps; they're older like me.
So Firefly said to shut my mouth and put the rig on them, so I put the rig on them and they'd call everybody over in the tent and they'd feel it, and it's a comfortable rig. And the things we've got on the rig, the bio-yoke is more effective than on the Curv because the size of the rig. When you put the big rig on it has even more feel than the smaller rig. It takes the rig and distributes the weight with the bio-yoke, so you have that heavier rig more comfortable, and it fits you. If you put it on, usually the bigger rig sloshes around but not this, we've even got people doing style with them because it stays so tight on the body.
You've got the bio-yoke, the curve that fits the lower part of your back and then the rest of the things that we have on the newer rigs. There are grips on the handles so you get a good grip, even when wet. We've got non-slip on the stainless, as you know a lot of the rigs now days have a slippage problem. With the way Sandy has designed this, it doesn't slip at all, and accuracy jumpers usually want their rigs tight and not to slip, because everything we do in accuracy is related to your canopy and how it feels. If you get any bit of movement, it'll affect your competition.
On the back we have some new things, the pilot chute has a little protector flap. When you're in smaller aeroplanes, you'll often find that it gets bumped around and slides out. All it is, is a small little flap that goes over the pilot chute and holds it in place and keeps it from coming out, so it's always in the same place and ready for you to pull. It's just a little thing, but it makes it awful nice.
Next, on the backflap - again sometimes you get caught in a small plane, and I know that one time in the 70s I exited the aeroplane and went into a dive and my main opened, because I had bumped my flap and it had came up. Now this rig's backflap has magnets in so even if you knock it out, it'll go right back. Riggers will also appreciate that a lot of the time plastic breaks, but you can see that there is no plastic in here, which also helps aesthetically, as the rig is then flatter.
Then there are some standard features, the tab if you want to have your collapsing pilot chute you can using the magnet.
The suspension points for accuracy rigs are a little different to most other disciplines in that we don't want to be suspended back, but rather facing straight down. The designer has been doing these rigs for more than 20 years, so he has all the old technology but has also added the new technology to the CPX.
DSE: I'm going to interrupt you for just a second there... One of the things we've noticed during these interviews over the years is that a lot of the audience are brand new skydivers who are trying to do that sponge thing, you know - soak it all up. Explain what accuracy is for the newer people.
Bill: Good question. When I did started skydiving you did accuracy which still wasn't as popular as a style event, and then you had the long haired guys who were doing RW, we don't even call it RW anymore! So when we started accuracy, you're trying to land on a target. Now days we land on a tuffet, which was designed from the stuntment and stuntwomen who would need something soft and safe to land on. When I started jumping, the dead center measured 10cm and they measured out to 10 meters, now they measure electronically with the dead center being 2cm which is measured outwards to 16cm. You have shoes that are shaved down to a point so when you come down, you try and put your heel on that dead center and it's then electronically scored. You do 10 rounds of accuracy and then your total after those 10 rounds is how the winner is decided.
DSE: And you're basically just doing those as hop and pops don't you?
Bill: Yes sir, we get out at 2500 feet, open our parachute immediately and then setup your pattern. Most accuracy events now days are done as a team accuracy event which is usually done with 4 or 5 man teams. You get out at 3600 to 4000 feet and then set your stack out and land as a team, they will then take the score of the team and add them together for your score.
DSE: I ask about the altitude because someone said earlier, "How do you get 10 jumps in when you go up to 13 000 feet".
DSE: I interrupted you earlier, is there anything else on the rig you wanted to show us?
Bill: Bill That's all the details about the new rig really. I guess you could say that we've taken an old uncomfortable rig and made a modern comfortable one instead.

By admin, in News,

GoPro Hero 3 - Firmware Update and Stability Issues

After a hyped release and what looked on paper to be an outstanding action camera, the GoPro Hero 3 has come under all kinds of scrutiny since its release late last year. While there appears to be a large number of users who are happy with their purchase, there is also a fair sized pool of users who are not happy with their product.
A page on the Gethypoxic website dedicated to listing each of the GoPro Hero 3's issues, as well as potential workarounds has seen comments from a vast amount of users who feel as though their purchase of the Hero 3 was a mistake, many of whom recommend that those with GoPro Hero 2s avoid the upgrade to the Hero 3, citing that the GoPro Hero 2 offers a more stable and in turn, better user experience. One user who claims to have more than 20 years of software experience, suggests that the Hero 3 was rushed out too quickly in order to meet seasonal demands. He goes on to cite the need for an 'out of the box' update requirement.
The Issues
One of the more noted problems with the GoPro Hero 3, is the lack of continuous exposure adjustment when using the 'Photo Every Second' mode, which takes a still photo every second. The Hero 3 Black will set the exposure when it is turned on and fail to then adjust to allow for still images to be properly exposed, should one move from a dark to a light environment. Instead the exposure is locked to the automatic exposure setting based on the lighting when the camera is first turned on. Of course this means that skydivers, who will be exiting into much lighter conditions, will almost always end up with washed out images. This renders the 'Photo Every Second' mode virtually useless to skydivers. One would have to start the camera once one had already exited, a less than desirable action to have to do.
The GoPro Hero 3 has also been known to turn off at unexpected times, often during connection to a television display or when using the USB cable to download. The cause for these shutdowns are not known, but there is the assumption that it may be related to an overheating problem.
There have been many accounts of cameras freezing or locking up during filming.
Several other small and more isolated issues also exist with the GoPro Hero 3 range.
A number of other issues were present at the time of the camera's release, though updates released by GoPro since then have managed to fix many of them. Is it all a bit late though?
With the current action camera market seemingly exploding, steps such as releasing a camera before sufficient testing can prove dangerous. One thing that has to go to GoPro is that they are generally quite quick to release updates to fix certain issues. We are however surprised that the exposure issue, which proves to render an entire feature useless for a certain market - has not yet been fixed.
Good News
The good news for GoPro fans or those with the Hero 3 that are still encountering the exposure lock issue, is that GoPro have responded to the bug, which as it turns out - isn't a bug at all.
A forum user posted the following response from GoPro regarding this issue:
"Sorry about the problems with exposure locking in the two shortest time lapse intervals. Would you believe that was intended as a feature and it's not a bug? My understanding is that some folks in the skydiving community asked for it, but since then we've heard lots of complaints from other skydivers, so we've asked the engineering folks to make it an option you can turn on or off.
For now be aware that in the two shortest time lapse modes, 0.5 and 1.0 seconds, the exposure will latch on to the values encountered at the first frame. For time lapse intervals of 2.0 seconds and longer each frame will be imaged using auto exposure.

Remember that if auto-exposure results in flickering you can improve and smooth out the assembled video by invoking the De-flicker filter from the Advanced Settings menu of our free Cineform Studio software.
Keep an eye on the forums and check in to the firmware update page every few weeks for when the update hits.

Thank you so much for your feedback."
GOPRO HERO 3 Black Firmware revision 02.37
While the above quote seemed to suggest that there would be a fix for the exposure lock in the latest firmware upgrade, it seems that the new GoPro Hero 3 Black upgrade did not contain a fix to the problem. Rumours are now that the adjustment of the exposure lock issue will happen with the next update. The fact that GoPro are aware of this issue and seemingly aiming to solve it, it is a fair assumption that it won't be long before they release a new upgrade that will take care of this. As for now though, there's a lot of frustrated skydivers who were hoping that this new update would solve some of their problems.
While GoPro do not have the changelog available on their site yet for the new firmware update, the following changelog has been published elsewhere.
HERO3: Black Edition
Current firmware version: HD3.03.02.37

Wi-Fi version: 3.4.2.9

Release date: 04/03/2012
Feature Enhancements:

FW version # is now visible on upon startup.

Narrow FOV 1080p30/1080p60 (Protune)

Narrow FOV 720p60 (Protune)

Medium FOV 720p60 (Protune)

Default start-up mode is now 960p48
At this point it seems to be a wait and see scenario with regards to the fixing of many of the Hero 3's bugs, but we have no doubts that GoPro are working hard to solve these issues and that sooner rather than later, we'll see these issues being addressed in coming updates.
Do you own a GoPro Hero 3? Comment below and share your experience with using this camera.

By admin, in Gear,

Replay XD: Is it the New Generation of Skydiving Camera

In the earliest days of skydiving, photographers were excited about the advent of the “lipstick camera” for its small form factor and ease of use. The camera(s) could be mounted on a wing, helmet, or other foundation, cabled to a recorder, and used for new angles in aerial production. They were also horribly expensive.
In modern times, we’ve seen the camera shrink in size, and dramatically improve in image quality. In many cases, this size-shrink inspires kludgy form factors, and this is where the Replay XD camera shines.

With a nod to the stylings of the unobtrusive lipstick camera, the Replay XD is very slim in size (same diameter as a quarter), and easy to use. All electronics are packed into this small cylinder, where several features are found that no other camera offers.

Replay XD shoots in one of three user-determined resolutions; 1080, 960, or 720. Framerates of p30 or p60 are user-selectable.
The camera is powered up via a button mounted at the front. Users know it’s recording by the red indicator light and the haptic (vibration) feedback that occurs when the camera is put into record mode. The camera may be set up as a one-button record, or other modes may be defined by the user.
MicroSD cards are used for storage, and the camera supports up to a 32GB card, allowing for ridiculously long record times (up to 10 hours, and Replay offers a battery pack to support long recording times).
These small cylinder cameras may be mounted at any angle, any pitch, on any surface with great ease. The Replay XD is much smaller in overall profile than any of the other cameras, which is why it’s long been a choice in the motorsports and aircraft industry.
Mounting the Replay XD is no different than mounting any of the other popular POV cameras; peel n’ stick the 3M tape, and put it where you want it to go. The camera can be rotated in its mount until it has been clicked in place. Once clicked, it’s locked and cannot be rotated.
The Replay XD uses a 135 degree FOV (Field Of View) so it’s a bit more narrow than some of the other popular brands. However, this also provides for a more natural view, something many sports enthusiasts prefer, as the narrower FOV does not have a distorted image.
I like that Replay XD offers lens replacement kits for 5.00; this means I’m not spending a lot of cash for scratched lenses, and lenses can be replaced in the field. Replay takes lenses fairly seriously; they’re the only POV manufacturer that offers lens adapters so that external lenses or more importantly, filters, might be added to the camera setup. This is a tremendous advantage for pro’s wanting the best image possible.
With a mini HDMI connector on the back of the camera, it is the only live output to be found on any POV camera offering. This means that not only can the camera be connected to a broadcast device for live streaming (without the degradation of using low bitrate video via wi-fi), but that the camera may be connected to the battery-operated ReView monitor for checking camera placement, angle, level, exposure on a production-grade monitor. Lastly, the live HDMI output also allows users to plug straight into any television monitor while setting the camera on a helmet and checking the aimpoint.
Another pro feature, is the ability to access the core functions of the camera and modify camera settings for specific purposes.
Opening the .txt file at the root of the camera, allows users to modify bitrate (very important), white balance, exposure/compensation, saturation, contrast, audio gain, and more. The menu selections also allow the camera to be set to a one-button record, or one-button power up, second button-record mode. The file settings may be saved off, making it ridiculously easy for a camera monkey to set up multiple cameras.
Replay XD is also the only POV camera that offers timecode in the stream, providing significant benefit for multicam operations or legal use.
The camera is capable of shooting interval stills, at full resolution from a 5Mp sensor.
Files may be custom-named in the .text file, or simply auto-named by the camera. The camera records mp4/AVC files and wraps them in a .mov package, readable by any NLE software or media player on any platform.
A micro usb connector is used to charge the camera, and to transfer data from the camera to a storage device. Memory cards may also be removed for external read/transfer.
The Replay XD isn’t waterproof, but I was able to dunk it to around 10’ of ocean, and in any sink or tub. It’s not designed for underwater use (they have a housing good to 100meters), but the camera is quite capable of going through rain, incidental water, and other “wet” situations with ease. The all-billet aluminum camera is ridiculously tough, as seen in this YouTube video where I drove a Dodge Challenger back and forth over a running camera, and even popped the clutch, spinning the camera out from under the car.
Image quality is what I’d expect out of a POV camera. It’s subjective to say it’s better or worse than other POV competitors. The image sits quite nicely alongside media from high end cameras, and in fact, this camera is used for many broadcast television shows, including live feeds from NHRA and other race competitions. It’s been used in major-motion picture production, and sits nicely in the mix with other high-end POV cameras. The things that set the Replay XD aside are its form factor, the durability, and the features usually found only on broadcast equipment.
The factory package comes ready to roll; battery is partially charged, memory card included, 2 mount systems, pads, charger, 12V charger, carry bag, USB cable, storage bag for camera, Cordura system storage bag./

Things I really like about this camera:
External audio/pro audio capability
Live external monitor (to any monitor, but the ReView is very cool)
Lens/filter adapters
One button operation
Super low profile/inobtrusive in a wide shot.
Aluminum billet mounts
Body durability/toughness
Image quality with user-defined tweaks
Timecode for multicam use
Field-changeable lens covers
The awesomely wide variety of mounts ranging from lightweight plastic for general use, to billet aluminum for more permanent or high-risk mount locations. What I don’t like:
USB port. This is a Micro USB port, and the cables are nearly impossible to find in a crunch. If you’ve got the cable with you, great! But if you don’t, and your battery dies, you’ll wish you had a RePower charge kit with you.
Rubber buttons. At first glance, these are great. But, it is possible to skin them off if they’re struck with great force at the inappropriate angle.
Rubber water seal O-rings. These keep the camera watertight, but they also can fall off if the back is frequently removed.
In a tight spot, it’s difficult to get to the release tabs on the low-boy mount. I did find that using a flat screwdriver or popsicle stick got me in there, yet one would think there is an easier way. The camera kit sells for 299.00 with all accessories, and is available from most skydiving supply stores.

By admin, in Gear,

The Return of BIRDMAN

The Birdman is flying again! This past week, BIRDMAN® International ltd jumped back to life with the addition of some new content, along with a new website design. The company, which halted sales on gear in 2010 due to a change in ownership structure - now has blood pumping through its veins again. The press release that was posted to the website highlights a number of details regarding the company; it's structure, ambitions and new direction are all addressed. This news has caught the attention of wingsuiters everywhere, many eagerly anticipating the new products that are set to emerge from the restructured Birdman company.
Birdman's Return
The question on many lips surrounds what exactly went on during the past 30 months with regards to Birdman as a company. What structual changes were made, and where Birdman are headed from here. These are all questions that have addressed in the BIRDMAN® International ltd press release that they have posted on their site. One question that only time will be able to answer, is whether or not Birdman have what it takes to return to the market with the dominance they once held.
Firstly, Risk Control Corp. will be the manufacturer and seller of BIRDMAN® International ltd suits under license worldwide from Japan. Risk Control Corp is run by Shin Ito, who is now seen as the strategic partner to BIRDMAN® International ltd. Shin Ito is a world renowned and record holding skydiver and specifically wingsuit flyer. Jari Kuosma, from BIRDMAN® International ltd states that Shin Ito has been the driving force behind the new birdman line as co-creator. Jari goes on further to say that while in the past BIRDMAN® International ltd had trouble in regards to the sewing of the suits, he now feels more comfortable in the manufacturing process - having professionals to work with, ensuring the best possible quality for the new Birdman suits.
There is clearly a new focus on the Birdman products, and that focus seems to be quality. The company seems to have shifted away from the more economic suits and instead are focusing on supreme quality as opposed to an economic wingsuit option. The claims are that no corners were cut with the new line and that the aim was to create cutting edge suits that provide top quality. The paragraph closes with the wording "However, I dare to claim that the value of the new suits will be higher than the price tag. You'll see."
The website indicates that the new line will come out with 3 new wingsuits. The Birdman Blade III has already been put live on the site, with detailed information publicly available, while the other two suits, the Samurai and the Ninja - are both yet 'to be announced soon'

The Blade III
A new wingsuit has also been made available by BIRDMAN® International ltd. The Blade III is said to be targeted towards experienced skydivers and will be the first product to be released having been created with the help of Shin Ito.
An extract from the Birdman website says the following about the suit:
"BLADE III is very powerful all-around wingsuit made for experienced wingsuit pilots who want to enjoy their flight from exit to landing. It is balanced perfectly giving pilot 100% control of pitch and speed. It’s drag-reducing quattro–wing platform has large, carved and specially shaped wings for best lift, agility and speed. This gentleman’s race craft comes all included; four wings, semi-rigid ribs & mini-ribs, pockets, inner lining, extra sturdy booties & 10 mm YKK zipper and over the shoulder zip for easy dossing. It will be offered in 5 color scenes."

Birdman Watches
It seems that wingsuits aren't the only products that BIRDMAN® International ltd are returning to the industry with. The company has also released information on a line of skydiving watches that they will be selling. The watches are supposedly designed with skydivers in mind and consists of a carbon fibre face, a case of aerospace grade 316-L stainless steel and 'virtually scratch-proof' sapphire crystal. The watches are said to be water resistant to 100 meters and the straps made from parachute nylon, so that you can be sure that they aren't going to snap under pull.
The History of Birdman
Birdman started out making wingsuits in 1999, at a time when the wingsuit manufacturer market was extremely small - in fact, Birdman is generally recognized as one of the first wingsuit manufacturing companies. They released the BirdMan s.u.i.t in '99, as their first commercial wingsuit. The year after that they released both the BirdMan GTi and the Classic. In 2001 they continued the new lines with the BM SkyFlyer and the Classic II being released. A year later they expanded into tracking pants, releasing the Birdman Tracking Pantz. In 2003 the SkyFlyer and S.3 were released, followed up in 2004 by the Phi. 2005 saw the release of the quite popular Firebird and Firebird-R wingsuits. Between 2006 and 2009, Birdman released several more suits including both the Blade and the Blade II in 2007 and 2009 respectively.

By admin, in Gear,

Canopies for Kids

Put simply, skydiving is the act of jumping out of a perfectly good airplane and performing aerial maneuvers in free fall before landing by parachute. However in the eyes of Canopies for Kids founders Matt Kuikman and Taryn McKay it was so much more than that. It was an opportunity to combine the sport they love with a cause that they were both passionate about. All they had to do was incorporate a few teddy bears.
Matt and Taryn launched Canopies for Kids in the Spring of 2012 with the mission of providing skydivers with the opportunity to take stuffed teddy bears along for their skydive. Their organization uses this experience to position those bears as "The Bravest Stuffed Teddy Bears in the World" which are then given to sick children in hospitals. Their hope is that these special bears will help provide kids with the hope, support, and courage they need in their fight ahead and in their journey towards living a happy and healthy life.
Participating in a Canopies for Kids jump is rather easy. You simply show up to one of their partnered drop zones and purchase a Canopies for Kids kit on top of your jump fee. Their kits are just $20 and include a Canopies for Kids teddy bear in a plastic bag flight suit and an envelope containing a card with a heartfelt message to the child in the hospital which each skydiver can sign and personalize. The costs of shipping and handling are also included, as well as a built in $5 donation to the Children’s Hospital. Recently they also added a Sponsor a Bear program in which individuals who don’t want to jump themselves can purchase a kit and donate the bear to go skydiving with another skydiver who is selected by the drop zone.
After the bears have jumped they then make their journey to the local Children’s Hospital that the DZ is partnered with. Throughout the entire process the bears need to remain in their plastic bag flight suits. The reason for this is because some of the children these bears are intended for may have compromised immune systems; therefore it’s important that they remain as sanitary as possible. The hospital will then deliver the bears and their cards to the kids in a manner that they see fit.
Canopies for Kids is presently located in Chicago, Illinois. In their first year of operation they partnered up with Skydive Midwest and the Ann & Robert H. Lurie Children’s Hospital. They had over 70 bears jump with minimal marketing and exposure. As the 2012 season rounded out, Canopies for Kids began to gain increased publicity thanks to a documentary being done about them by an organization called Bus 52. That documentary can be found below on Youtube.
Since the release of the documentary, the Canopies for Kids story has started to spread even further. Their founder Matt was recently interviewed on Skydive Radio and they are presently hoping to expand their operation to drop zones all over the United States. The organization is in the process of finalizing a partnership with a drop zone on the East Coast and will also have a presence at the upcoming 10th Annual St. Patrick’s Day Boogie in Fitzgerald, GA. They are even working with a few individuals to build affiliate operations in other countries.
If you or your drop zone would like to learn more or get involved with Canopies for Kids you can visit them on the web at www.canopiesforkids.com. You can also find them on Facebook at www.facebook.com/canopiesforkids or follow them Twitter at www.twitter.com/canopiesforkids.

By admin, in News,

A Guide to Buying Your First Skydiving Gear

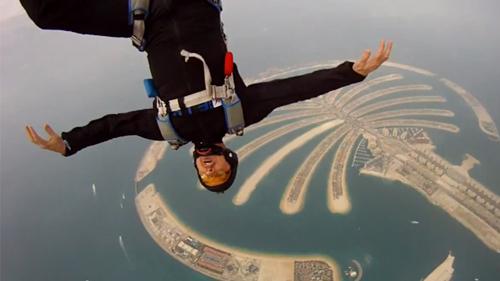
This article by Alain Bard is meant as a general guide. We highly recommend contacting your local rigger and instructor before using any of the information provided in this article.
In the years I’ve been a rigger, I’ve often seen the results of skydivers’ gear buying experiences. Most experiences go well, but some do not, and result in the buyer having to re-sell an inappropriate piece of gear they bought.
In this article, I am going to try to lay down some advice on how to go about choosing gear. I’m going to try to not go into brand specifics, but rather which components you should get and in what order, buying new or used, and sizing.
New vs. Used?
Let’s tackle this one first. Should you buy new or used? Traditional advice is that if this is your first set of gear: you should buy used. You’ll probably only use your first set of gear for the first 100 jumps or so. If you buy used skydiving gear, you can save some money (over new) while jumping your first set of gear, and take your time figuring out what you really want before you commit to buying new equipment.
Let’s break it down though.
So to put together a rig, you have to get 4 components: a harness/container, a reserve parachute, an Automatic Activation Device (AAD) and a main parachute. Whether to buy each of these pieces new or used depends on the piece.
AAD
Let’s start with the easy one: the AAD. Used or new does not matter, as you’re paying a fixed cost per year for these units. This fixed cost per year varies between $80-160 per year depending on which unit you choose. If budget is an issue, and you can find one used, grab it. Used AADs are rare as they expire faster than the skydiving gear they are in. If your budget allows, you can buy new. AADs are super easy to re-sell if you ever need to.
Reserve Parachute
Next up: the reserve parachute. For newbies, I always recommend buying a used reserve parachute, as you can save a significant amount of money here, and the benefit of a new reserve isn’t really justified over the cost of a new one. Reserve parachutes don’t get used very often, and even after 10 years, are usually in next to perfect condition. A 10-year old reserve of the same design is the same as a brand new one, it’s just cheaper to buy. Ensure the reserve has less than 5 or so “rides” and is no older than 15-18 years old.
Also, ensure it has no holes, patches or repairs, or if it does, make sure the cost is much less, and consider sending it back to the factory to have it checked out first.
Main Parachute
For the main parachute, my advice is the opposite to a reserve. I recommend buying a main with as few jumps as possible (under 200 if possible). Buying a new main parachute is preferable, if budget allows. You will use this parachute to save your life 99.9% of the time. Its condition matters. Age isn’t really that much of a concern as much as the number of jumps. I like to make sure a main parachute still has its original lines, because you can tell the number of jumps by the condition of the lines. Trying to estimate the number of jumps on a canopy after a reline is sometimes difficult if the parachute fabric has been kept clean, dry and out of the sun. Another consideration is where the jumps were made. A parachute that was jumped in the summer in Canada or the US Northeast on green grass for only 6 months of each year will be in much better condition than one jumped all year round in desert-like or beach locations. Sand really eats away at the fabric coating and gets into the seams.
If budget is really an issue, then a modern-design (last 10-15 years) used main parachute with more jumps is OK too, but make sure to have your rigger take a look and don’t pay too much for it, as it’s not going to be worth as much.
Again, ensure it has no holes, patches or repairs, or if it does, make sure pay much less, and consider sending it back to the factory to have it checked out first.
Harness/Container
Last is the harness/container, for 80% of newbies, a used harness/container is probably the right way to go. Newbies tend not to land on their feet 100% of the time, and if you get a used harness/container a little dirty or scuffed up, it won’t matter as much. The problem is getting the right size for both the canopies *and* for your body (ie. harness size). Sizing for canopies is easy enough, but then sometimes it’s difficult to find the perfect sized harness. Having a harness that is a little too big or too small isn’t the end of the world, but it’s not as comfortable as a made-to-measure harness. If the harness is more than a little too big or too small, then resizing a harness is always an option, but it may cost more to have a harness resized than the harness/container is worth.
For 20% of newbies, their body type makes it almost impossible to find a used harness/container. I’m talking about the 6’ guy who weighs 120lbs, or the 4’8” girl who weighs 95lbs, or on the other end of the spectrum, what you’ll find advertised as “big-boy rigs” for really large and/or heavy people. For these people that fall outside the average body types, while resizing a harness is sometimes an option, getting a new harness/container is sometimes a better option. Some manufacturers make basic rigs with no bells or whistles that end up costing less than a used, fully featured harness/container. I’m talking about rigs like the Shadow Racer and the Rigging Innovations Genera. These are great rigs at an even better price.
Also, if you are a serving military member, some manufacturers offer incentives (up to 30% off) on new gear. This is a great deal, and a no-brainer. If you are eligible for such discounts, get new stuff!
Before I move on, I want to mention that when you buy used, you will have to keep an open mind when it comes to colors. It’s the price you pay to save some money.
So now WHAT should I buy, but more importantly – in what order?
So you’ve been jumping a certain size main for a while and think you’re ready to downsize and get a different set of gear. Great! Let’s go through it.
One of the biggest gear-buying mistakes is choosing (or buying) a harness/container first, and then trying to fit the canopies into a container that was not sized for those canopies, so….
Here’s the order in which you should think about it:
Select the Reserve canopy first.
Select an appropriately sized reserve. Your reserve should be big enough to not seriously hurt or kill you in the event of an unconscious reserve landing (no flare). This means that your reserve should be sized according to your wing loading on that reserve.
For most people, that means I recommend getting a reserve at least one size bigger than the main you intend to jump. So if you think you want to jump a 150-size main parachute, get a 160 or 170-size reserve, and if you're a big guy that jumps a tiny cross-braced canopy, you'll maybe still want a 170-sized reserve (4-8 times larger than your main). You’ll thank me when you actually need to use the reserve.
Then, pick a main, any main. Well, not really, but decide on the size of main you want to jump. You can pick the type of main later, but decide on size now.
Now you can think about a harness/container!
Then and only then start doing the research on what brand of harness/container you want based on the features you think are important to you. Look at harness/container manufacturers’ published volume charts to see which size container you would need to fit the reserve. You want to pick a size of container that fits the reserve and is described as “soft” or “normal” fit (if those descriptors are available). Stay away from a “tight” reserve fit at all costs.
You’ll quickly notice that not all the manufacturers offer combinations that will fit a reserve that’s larger than a main. That’s really a shame. You should really ask those manufacturers why they don’t offer this.
An expensive solution to this problem is a low-bulk reserve, which is marketed a being able to pack one size smaller than a regular reserve. So, if you want a container combination that fits a regular 150-sized main, and only fits a 150-size reserve, a low-bulk 160 reserve may be an option. Careful though, it doesn’t scale down. For instance, a low-bulk 126 reserve may not fit in a 113-sized container, or it may fit but be so tight that it interferes with the normal deployment of the reserve. This is bad, and should be avoided.
So you’ve picked a reserve, and you know what size of harness/container you need, only then should you start looking at the classifieds to see if you can find something that has the right size harness attached to it.
If you find something that you think fits, or described by the seller as fitting someone your size, ask the seller for the serial number of the harness/container. Then contact the manufacturer of the rig (even if it was made 10 or 20 years ago), and ask them what size the harness was made to fit. Most manufacturers keep data on all the rigs they have ever built, and will be happy to disclose this information to you, and discuss whether it would fit you based on your measurements. There is no need for guessing games. You can know before you even buy whether or not the harness/container will fit you. The only exception to this rule is if the harness has previously been re-sized, which is uncommon.
Main Parachute
7-cell, 9-cell, F111, ZP, Hybrid, low bulk, square, semi-elliptical, elliptical, air locked, cross-braced, etc., etc… There are many mains on the market today. There is no right or wrong answer here. It depends on what you want to do. I’ll have to save this topic for another article. Refer to my comments above on age and condition.
Don’t forget the AAD!
The last part is to get an AAD. As long as the AAD in question is within its service life, has been maintained at the proper interval (if required), operates normally, and is approved for the harness/container you want to put it in, then you’re good to go.
So there you have it. It’s not always obvious at first, so I hope this guide will help some of you out.
 
Alain Bard has been an active skydiver since 2003.
 
Alain holds the following CPSA ratings: D CoP, Skydiving Coach Level 2, Jumpmaster (JM), Ground Control Instructor (GCI), Skydive School Instructor (SSI), Skydive School Examiner (SSE), Exhibition Jump Rating (EJR), Parachute Rigger (RA).
He is also a Tandem Instructor.
Alain is a certified Hot Air Balloon Pilot (Transport Canada)

Alain is a certified Paramotor Pilot (Transport Canada)

Alain is a certified Paraglider Pilot (HPAC)
 
You can find out more about Alain at his website: http://bard.ca
 

By admin, in Gear,

Top Skydiving Mobile Apps

Skydiving Logbook (Android / iOS)
Skydiving Logbook is an extremely popular application for both Android and iOS devices. The application allows users to log jumps with information such as jump #, aircraft, gear used, type of jump, delay, cutaways, notes and more. A unique feature is the ability to have licensed jumpers sign your logbook entries using the touchscreen. The application also caters for gear related information, allowing you to tie your gear item to their serial number and to set up service reminders on gear items. One is able to sort easily through the display of specific information that is recorded during your jumps, such as total jump counts, cutaways etc. You're able to manage your dropzones and aircraft, as well as setting a home dropzone. Another feature that's offered with this application is the ability to calculate and manage wing load information. The ability to import and export data from the application also means that you can perform frequent backups onto external devices.


Overall, this application is packed full of features and it's clear that the developer has done something amazing with it, offering a great application to the skydiving community for free, in fact to quote their download page: "This application is free and always will be."
Price: Free
Ratings:

4.5/5 based off 123 votes on Android.

4.5/5 based off 6 votes on iOS.
Download: Android: Skydiving Logbook
iOS: Skydiving Logbook
Skydiving Draw (Android)
There are a few apps out there at the moment that cater to formation skydiving, Skydiving Draw is the more popular of the apps available. It allows you to manually create or to randomly generate formation sequences which are then presented in visual form though graphic images.

The application provides you with the ability to copy and share your formation sequences, as well as the ability to export them as a PDF file, allowing for the easy print of such documentation onto paper, for training purposes. You are also able to save and load your sequences, this is something that while being worked on by other applications for future releases, wasn't yet available.
Price: $3
Ratings: 5/5 based off 17 votes.
Download: Skydiving Draw
Canopy Calculator (Android)
This app for Android devices is a small and basic application which calculates canopy size and wing load based off body and gear weight.
Naturally with such a lightweight application there isn't really too much to say about it, but the app seems very stable on most Android devices and can come in as a useful tool, also at only 80kb in size and as a free download, there is really no reason not to have it.
Price: Free
Ratings: 5/5 based off 8 votes.
Download: Canopy Calculator
BASEline Flight Computer (Android)
This application is more of an honorable mention, as the truth is, we really don't know just how well it works. On paper though, this looks to be a great application, if one has the correct mobile device that can support all of the functionality. BASEline Flight Computer is an application which is designed to improve flight performance, offering real-time feedback by both visual and audible means. The application claims that it uses the phone's sensors to determine things like altitude, glide ratio, tilt, speed etc.
BASEline Flight Computer offers the user the ability to program your mobile device into an audible altimeter. Though naturally one should never rely on your mobile device to act as your altimeter.
There is also a built in log book which has altimeter and gps recordings.
IMPORTANT
It is vitally important to note that this application should not at any stage be used as a primary means for altitude awareness, and to exercise extreme caution when using it in a skydiving or base jumping environment. The maker also strongly recommends that this device only be used with barometric altimeter sensors, which are only available on select few mobile devices. GPS data is not reliable for altitude readings, and even with barometric altimeter sensors, the readings may not be reliable.
The developer ends the description with the line: "Software is provided "as is," with no warranty of any kind. Skydiving is dangerous, don't be stupid."
This application has a lot to offer, as mentioned above. The real question is- How well does it work?
Price: $6
Ratings: 4/5 Stars based off 1 vote.
Download: Baseline Flight Computer

Which skydiving apps have you got loaded onto your smart phone?

By Meso, in News,

Cypres 2 Service Bulletin - Jan 2013

The following is a copy of the latest Cypres 2 service bulletin, which can be found at: Cypres-USA.
Issue date: 31 January 2013
Bulletin number: C2 0113
Identification: CYPRES 2 units manufactured February 2009 through December 2012 (02/2009 - 12/2012).
Compliance: MANDATORY before each jump
Background: Airtec GmbH & Co. KG has become aware of a small number of CYPRES 2 units becoming “non-responsive." Although the subject units indicated a “0” (or the selected DZ setting) on the display, they were no longer operating.
Extensive research indicates that this situation is extremely rare and tends to occur during packing, especially on non-static-proof surfaces such as plastic, nylon or carpeted areas. Low humidity, build-up of static electricity and
changing environmental conditions are all contributing factors. In addition, a recent activation, after the rig had been placed on the packing mat, has been linked to this phenomenon.
Action to be taken: Prior to each jump, during your pre-boarding equipment check (after the CYPRES has been switched on), perform
the following system test:
Click the control unit push button one time, and watch for the red LED light to flash. A flash indicates that the unit is working properly. If the red LED does not flash, repeat this procedure to confirm. IF THE UNIT IS NOT RESPONDING, IT IS NOT IN A SAFE WORKING CONDITION, AND THE UNIT WILL NOT FUNCTION AS INTENDED ON A JUMP. If this is the case, contact Airtec GmbH & Co. KG or SSK Industries, Inc. for further instructions either to arrange for repair, or for a loaner or replacement CYPRES 2.
If the unit is not in working condition, failure to perform this procedure prior to each jump will result in an increased risk to the user.
Resolution: CYPRES 2 units manufactured after 1 January 2013 (01/01/2013) contain an update to prevent this situation from occurring.
All existing CYPRES 2 units in the field manufactured during the affected date range (identified above) will receive the update as they cycle through their periodic maintenance requirement, or during other repairs. After a CYPRES 2 unit receives the update, the procedure described above (clicking the control unit push button during each preboarding equipment check) is no longer required.
Additional Technical Details:
The reason that only units manufactured during the above date range are affected is because the manufacturer of a component made a change on an internal ASIC microcircuit (which is something like a processor) to a higher level of
integration. Prior to accepting the revised component, Airtec went through a 13-month evaluation period. This included laboratory testing as well as field-testing of 151 CYPRES units with no events or anomalies experienced.
The revised component entered CYPRES production in February 2009.
Authority:

Helmut Cloth

Airtec GmbH & Co. KG Safety Systems

Mittelstrasse 69

33181 Bad Wünnenberg, Germany

Tel: +49 2953-9899-0

Fax: +49 2953-1293

info@cypres.cc
Distribution:

North America Market & Dealers

North America Parachuting Publications

Parachute Industry Association
An FAQ relating to this service bulletin can be found on the Cypres Website.

By admin, in News,

Apache Wingsuit Modifications

8 February 2013 - Editors Note:

After this article was published, TonySuit released a Service Bulletin regarding the Rebel and Apache Wingsuit that addresses the concerns raised below. If you use the Apache or Rebel for skydiving, TonySuits offers a free modification that will relocate your harness and emergency handles to the outside of the suit. See the image below. Download the full Service Bulletin.
Wingsuiting is a new discipline that is ever-changing in terms of equipment, general DZ knowledge, and practices within the discipline. This can lead to a great deal of confusion about what is what, and how the equipment operates.
One such example is the Apache series wingsuit, manufactured by Tonysuits Inc. This series of wingsuit is advertised as "for BASE jumping"and as the "biggest wingsuit in the world", the manufacturer "observed that placing the parachute harness inside the suit improved performance by reducing drag." This wingsuit places all components of the main lift web (MLW) inside the wingsuit, making the chest strap invisible, and leaving handles inaccessible unless modifications are made to the suit, parachute system/rig, or both.
The manufacturer’s website also indicates:
NOTE: This suit is for BASE jumping only. Having the harness inside the suit excludes it from being used for skydiving. Expert wingsuit skydivers could choose to modify the Apache to mount the emergency handles on to the suit itself under the guidance of a qualified rigger but TonySuits does NOT recommend any modifications!
The process of jumping this system in the skydiving environment requires one of three actions;
Rig Hidden In The Wingsuit
The first option is to do nothing and jump the suit as it is with the rig entirely hidden within the wingsuit system as seen in this image below. Handles are entirely covered, and inaccessible without first unzipping the wingsuit. This is a legal means of jumping the wingsuit/rig system. Whether it is an ideal or safe method is determined by a pilot or S&TA.;
The above method is not addressed in the FARs nor PIA Technical Documents. Various DPRE’s (Designated Parachute Rigger/Examiners) commented "No one at the PIA or FAA level ever anticipated we’d have jumpers covering handles with a jumpsuit; we now need to address this topic."
Emergency procedures in this system:

Unzip wingsuit.
Crossdraw handles (Left hand to cutaway release, right hand to reserve ripcord). The "fully covered handles" method may be the only method not addressed in a FAR or PIA Technical Document, yet this method fails to take into account situations such as:
Aircraft emergency requiring instant access to a reserve handle
Missing hackey/handle, requiring a straight-to-reserve deployment
Pilot Chute in Tow
Hard pull
Canopy collision requiring a cutaway
High ground winds, where a cutaway is necessary
Adding "Chicken Handles"
Another method has been to put "chicken handles" on the wingsuit, essentially Rapide links attached to the cutaway release and reserve ripcord system. This changes the angle of cable travel (inducing a double 90 degree bend in the relevant cable) significantly increasing pull force.
TSO (Technical Standards Order, administered by the FAA) requires that pull force be not greater than 22lbs of pull. In testing, the cutaway release required approx 45lbs of pull force, and the reserve system would not release with 60lbs of pull force applied (this was the limit of the scale used for the pull test.
The "Chicken Handle" system was discussed with several rig manufacturers, Technical Chairs, former Technical Chairs, Rigging Chairs, and former Rigging Chairs of PIA. All agree this system is a violation of manufacturer TSO as expressed in FAR 65.111, and PIA TS 135 4.3.3 Table 2.

In order to legally use this deployment system, the system must be tested and certified according to FAA TSO specification as set forth by the PIA. The definition of testing for certification requires:
"4.3.3 HUMAN FACTORS AND ACTUATION FORCE TESTS:

An anthropometrically diverse group of individuals (consisting of a representative group of no less than 3 males and 3 females) from the intended user group shall be employed for all human factors tests in 4.3.3. All individuals shall be able to operate the subject device without any undue difficulty. Table 2 lists the required test conditions and number of tests for each particular component. Additional information for the component tests is listed below.
TESTS: Under normal design operating conditions, all devices tested under this paragraph shall result in a positive and quick operation of the device within the following load range applied to the handle:
(a) a load applied at the handle of not less than 5 lbf (22.2 N), applied in the direction giving the lowest pull force,
(b) a load applied at the handle of not more than 22 lbf (97.9 N), applied in the direction of
normal design operation,
(c) for chest type parachute assemblies, the maximum pull force shall be 15 lbf (66.7 N),
(d) the primary actuation device shall be tested in accordance with Table 2,
(e) the emergency/reserve drogue release (if used) shall be tested in accordance with Table 2."
Table 2 includes standing, hanging in harness etc.
The above system was never tested prior to being put into the marketplace. The challenges with this system were discovered in the field, as seen in the video link below.
Pull tests were performed at various angles and configurations, with a Master Rigger in attendance.
As of March 2012, the manufacturer has recommended that skydivers immediately discontinue use of this system.
Moving Handles from the Rig to the Wingsuit
A third modification requires moving handles from the parachute rig system and relocating them to the wingsuit body via the use of Velcro. The rig is then connected to the wingsuit via ties/cords that are tied above and below the cheststrap/handles of the rig.
Due to pull forces and the random/chaotic nature of a deployment, this system has suffered multiple two-out scenarios across the country. Multiple dropzones have banned this wingsuit system from being jumped from their aircraft.

Tony Uragallo of TonySuits has responded to concerns, saying: "I am changing the Apache system to be similar to the Squirrel suit system." Squirrel suits have found a novel way of dealing with these risks by adding zippers that allows the rig to worn inside the suit (for BASE jumping) as well as outside the suit, with handles fully exposed. (for skydiving)
The vast majority of skydivers often don't give much thought to TSO's or FARs, and most have likely have never heard of PIA TS 135. These are the "rules of the road" for parachute gear in the skydiving world. These rules regulations and laws are there to protect skydivers from unsafe practices equipment, to provide standards of performance, and the safe operation of a dropzone and to prevent problems within the skydiving and non-skydiving community through standardized rules, laws and industry practices.
The FARs put aircraft pilots directly in the crosshairs when a problem occurs; this is why skydivers must demonstrate repacks when visiting a dropzone, for example. Should any incident occur, it falls on the pilot-in-command. Yet most aircraft pilots are unaware of what is or isn’t legal, as the dropzone assumes responsibility for equipment being legal and reserves in-date.
In this instance, a wingsuit designed specifically for BASE being used in the skydiving environment and requiring modifications to a rig or the rig operation is a violation of TSO and by extension, the FARs. This creates a legal headache for dropzone operators, S&TA;’s, rig manufacturers, and other skydivers on the lookout for standard equipment.
Wingsuits designed for BASE jumping are exciting, fun, and provide an added edge of adrenaline. Some skydivers may take the approach of "So what? It's an individual choice." Any reasonable jumper, base or skydiver, will conclude that skydiving is a different environment than BASE (which has no rules). In the skydiving environment, the manufacturers assure the FAA and the DZO that gear meets safety standards via the TSO certification. DZO's in turn, assure the pilot that equipment being used in the skydiving environment is legal, in-date, and approved. As skydivers, we assure each other's safety by using equipment that is legal, safe, and approved for the activity.
If you are considering jumping any product that may involve relocating handles or other modifications, first contact the manufacturer of the harness to verify the legality of doing so - and check with your DZO or S&TA; for any local policy.

By admin, in Gear,